一种效果调色效果..
一种效果..
附件
附件
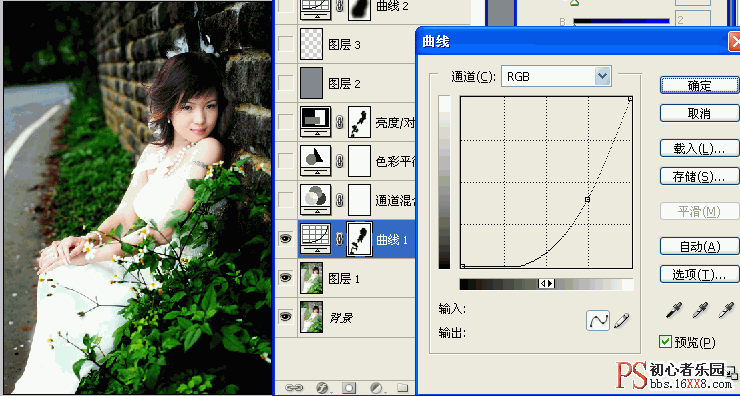
- 第一步:复制一层,然后添加曲线调整层,数值如图,并且用画笔在把人物擦出来
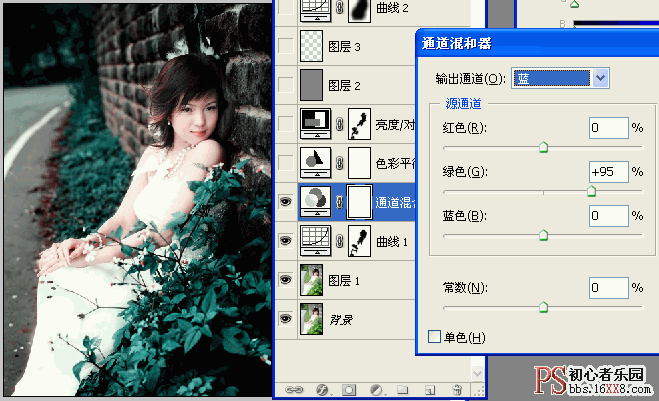
- 第二步:图像--调整--通道混合器,调蓝色通道,数值如图
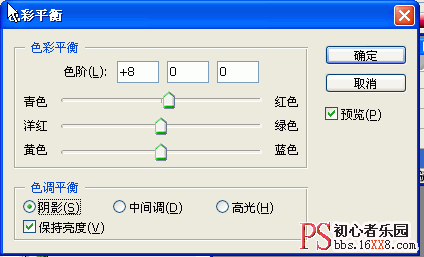
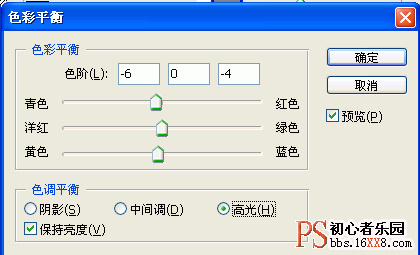
- 第三步图像--调整--调色彩平衡,如图

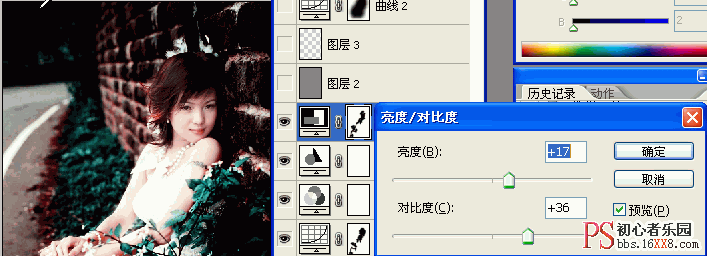
- 第四步:添加亮度对比度调整层,数值如图,并把人擦出来
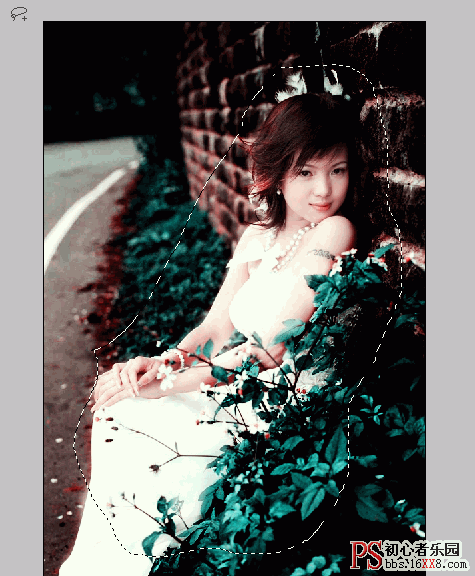
- 第五步:作选区,如图,并且羽化,数值自定
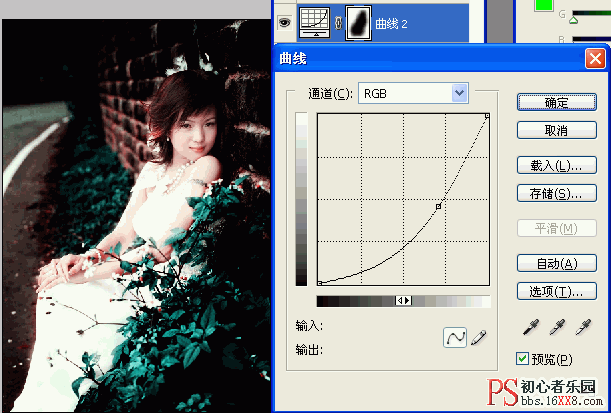
- 第六步:添加曲线调整层,如图调完曲线后自己用笔刷修饰一下就完成
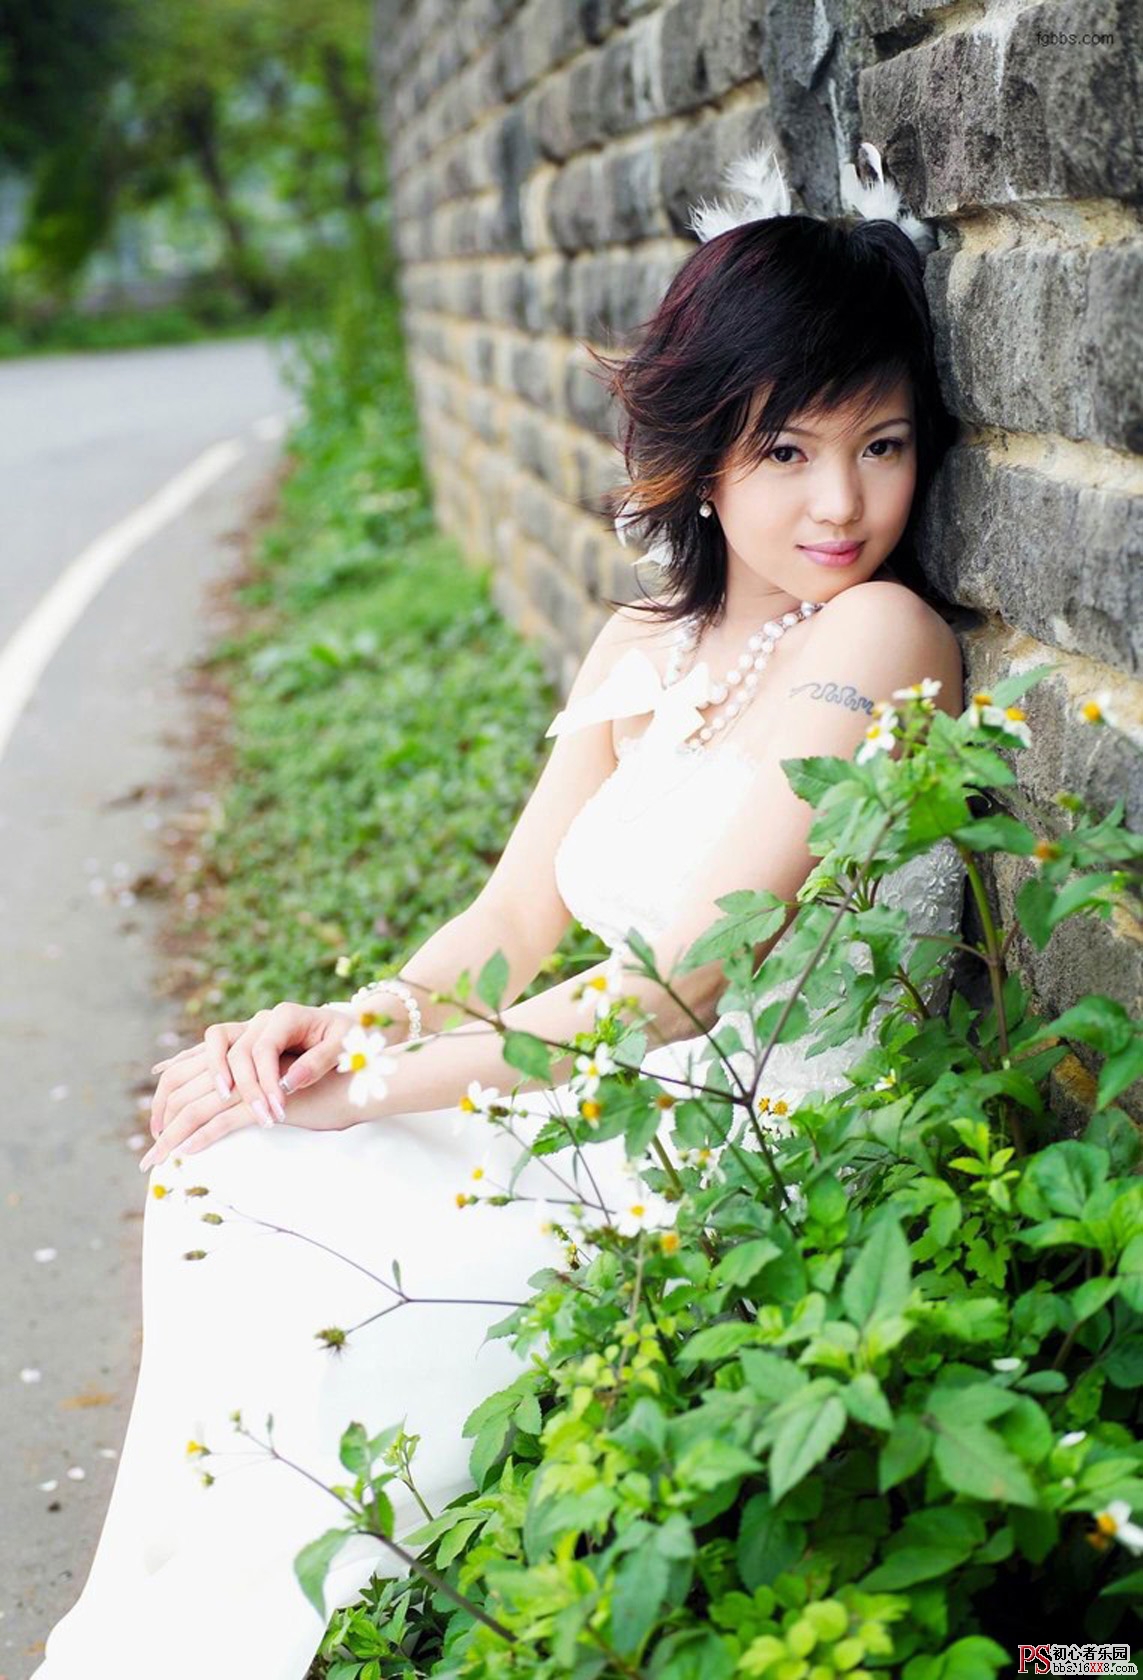
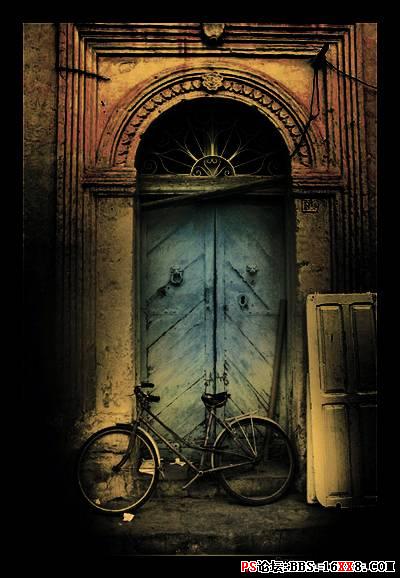
- 这是原图
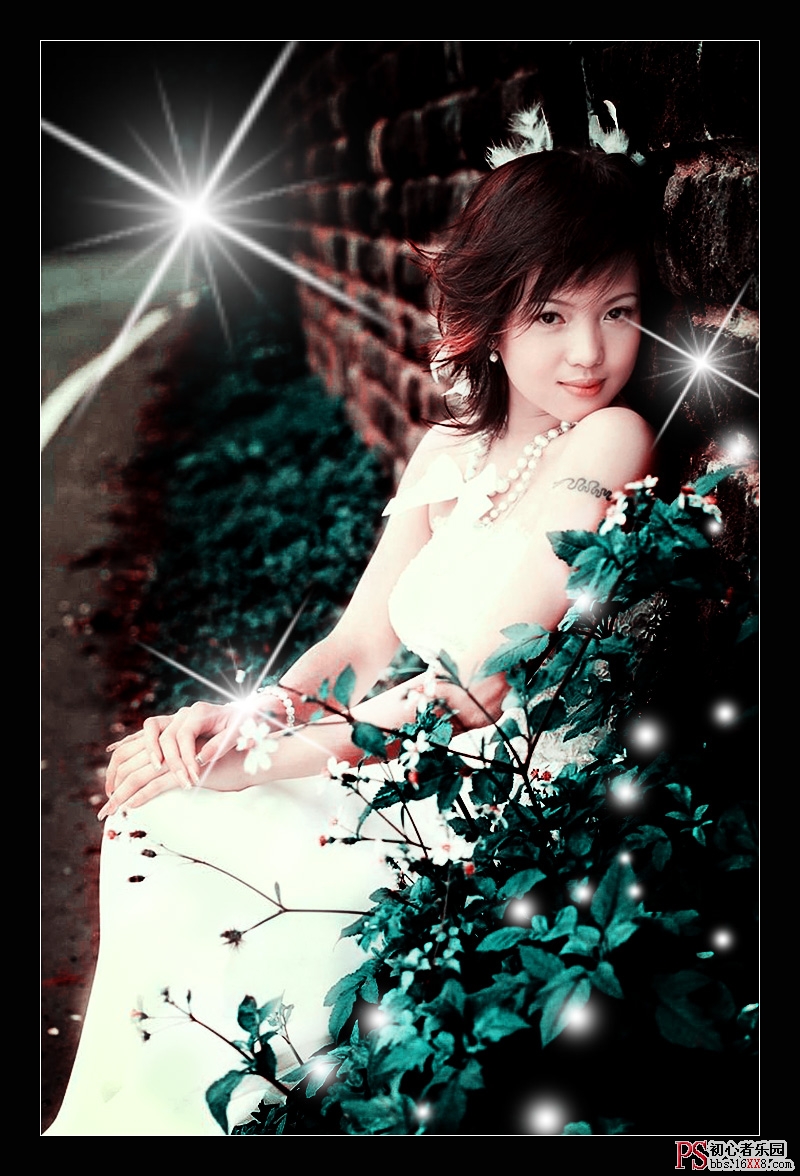
- 这是效果图
全教程完,学完记得交作业。教程对您有所帮助,请推荐给你的朋友。如果学会了,可以尝试投稿给我们,跟大家分享你的学习经验:http://i.16xx8.com
学习 · 提示

- 打开ps,跟着教程做一遍,做完的图要到这里交作业:提交作业
- 教程有看不懂的地方,可以到论坛发帖提问:ps新手求助
- 加官方微信,随时随地,想学就能学:ps_bbs,或扫右侧二维码!
- 关注我们微博:@photoshop教程论坛
- 想学更多的同学,可以订阅我们邮件,每天都有新教程发给你:http://t.cn/Rzm5o8Y
1221人学习过
黑夜玩梦幻 说: 给力
文涛009 说: 适用,谢谢~
菲新手 说: 作者的教程都好棒
胖胖的老婆 说: 这个教程很有问题步骤不够清晰
鸳鸯在避暑 说: 老师好利害
好先森 说: 谢楼主,教程写的很详细,希望楼主能做出更多更好的教程
相关教程

![[乔乔教程]:废照片大变时尚个性的非主流](http://pic.16xx8.com/article/UploadPic/2007/10/26/200710267119332.jpg)
![~~~乔乔~~~原创[面具]教程~~~~](http://pic.16xx8.com/article/UploadPic/2007/11/28/2007112874220854.jpg)
![[非主流PS教程] WAN风格之嫩白效果](http://pic.16xx8.com/article/UploadPic/2008/2/11/200821110517667.jpg)

![[非主流PS教程] WAN风格之红色印象](http://pic.16xx8.com/article/UploadPic/2008/2/12/20082129712394.jpg)