PS红色质感Logo教程
来源:网络
作者:腾龙视觉
学习:5161人次

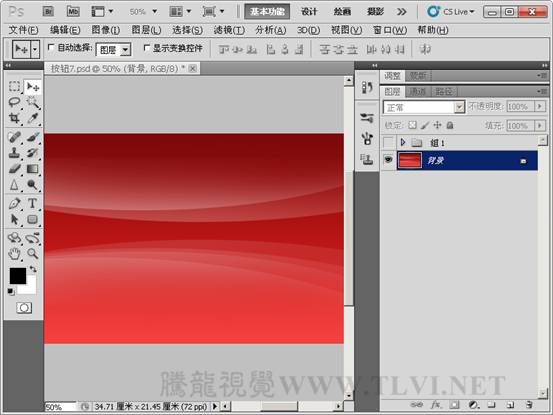
(1)photoshop教程运行Photoshop CS5,打开一个背景。
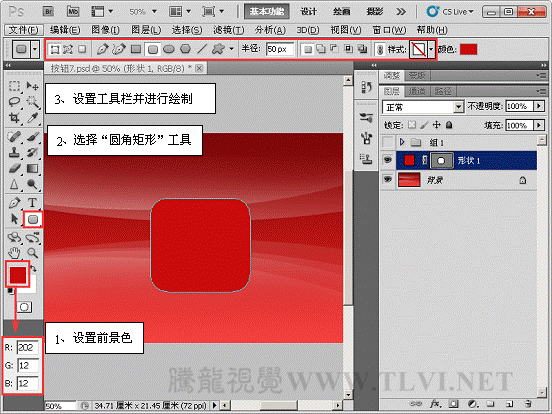
(2)设置前景色,选择“圆角矩形”工具,设置并绘制。
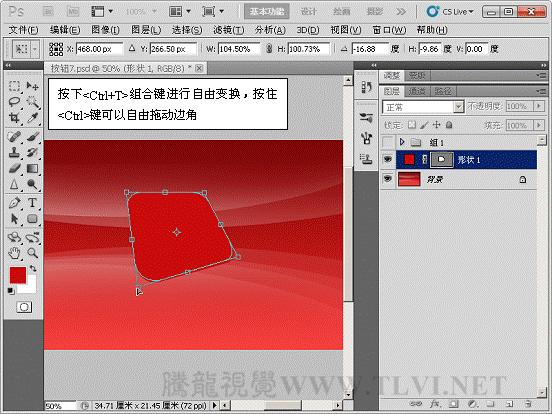
(3)对“形状 1”进行自由变换操作。
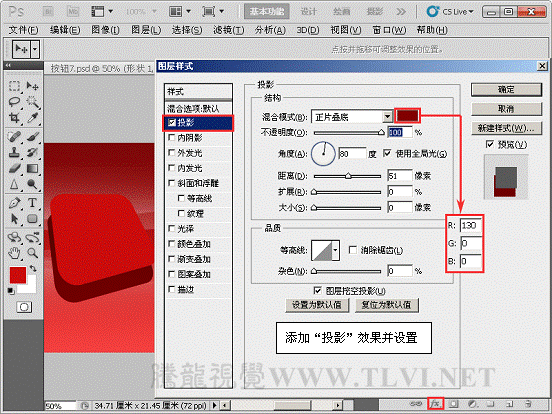
(4)为“形状 1”添加图层样式“投影”效果。
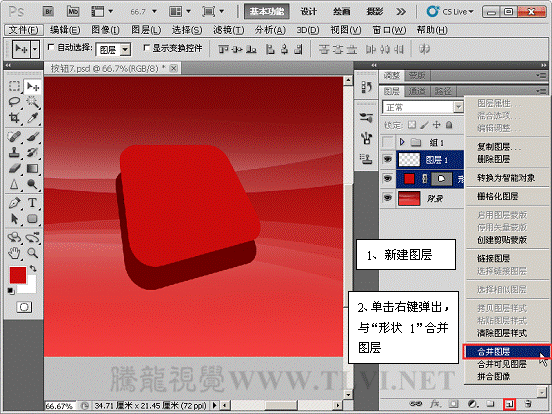
(5)新建“图层 1”,并与“形状 1”合并图层。
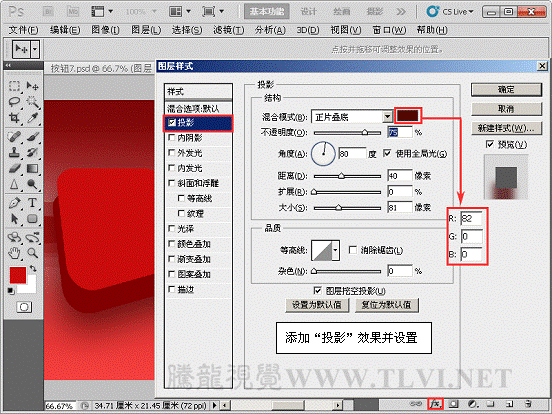
(6)为合并后的“图层 1”添加图层样式。
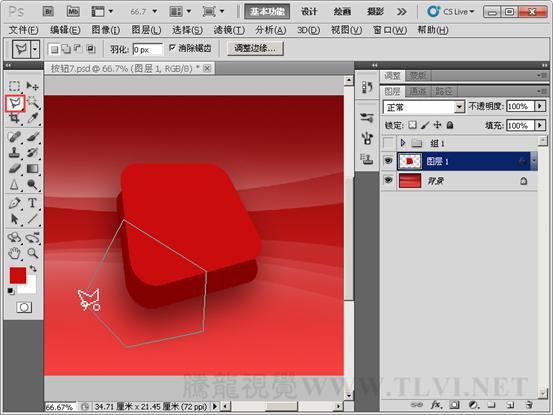
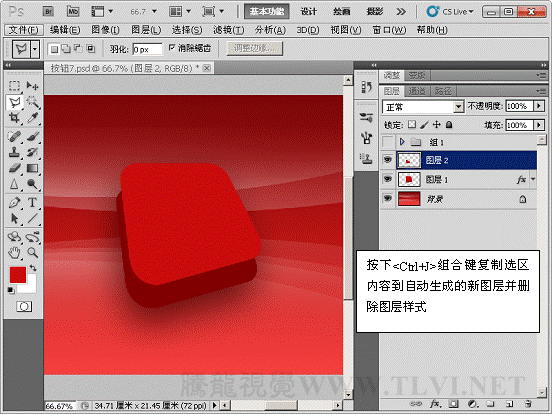
(7)选择“多边形套索”工具绘制选区。复制选区内容到“图层 2”并删除图层样式。
学习 · 提示
相关教程
关注大神微博加入>>


网友求助,请回答!