PS制作图像圆角网格效果教程
来源:网络
作者:admin
学习:5549人次

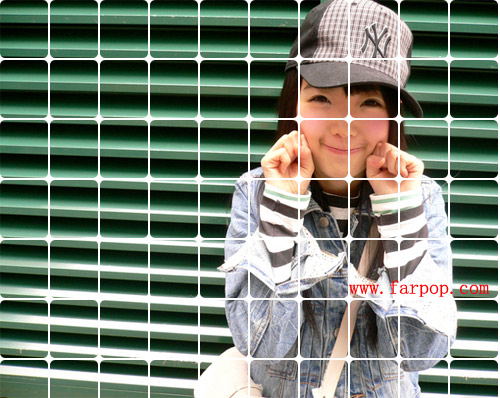
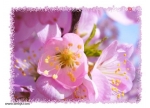
( photoshop教程原图)
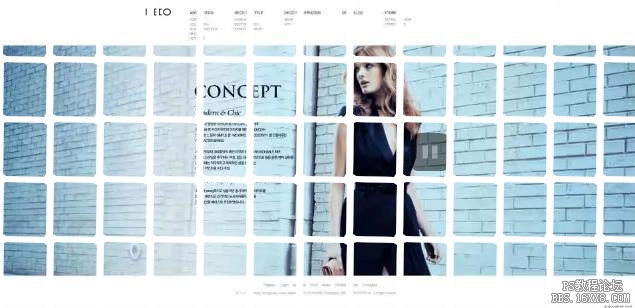
(效果)
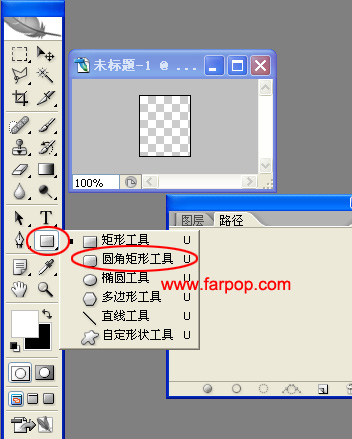
1.新建,尺寸是每个小格的大小(我的是50*60),打开路径面板 方法是 窗口-->路径 ,在工具箱中选择圆角矩形工具。
2.使用圆角矩形工具绘制圆角路径,可在工具栏半径处设置圆角的大小。
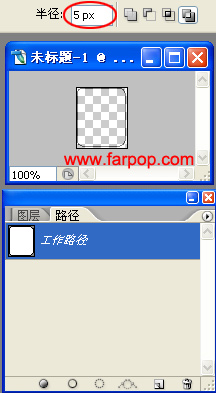
3.在路径面板 点击 将路径作为选取载入 按钮。
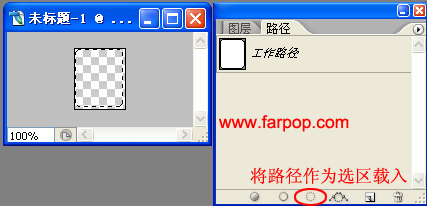
4.填充白色,(填充的快捷键 Alt+Delete) 。然后反选选区 填充黑色 ,(反选选区快捷键 shift+Ctrl+i)。效果如图:

学习 · 提示
相关教程
关注大神微博加入>>


网友求助,请回答!