PS处理动物图片
来源:未知
作者:bbs.16xx8.com
学习:6652人次
作者:佚名 出处:网络收集
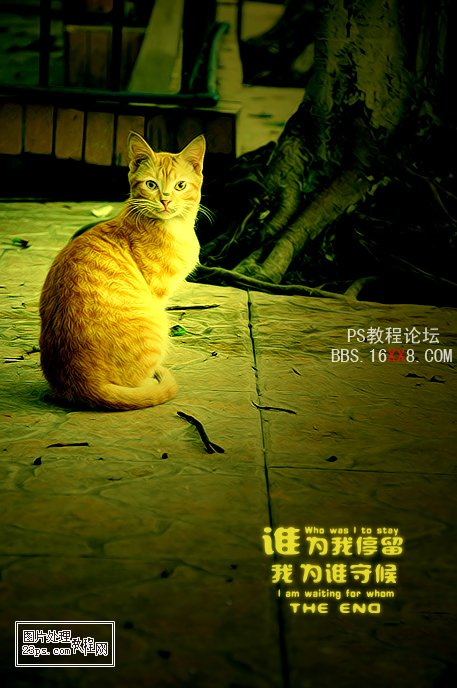
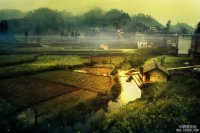
效果图:
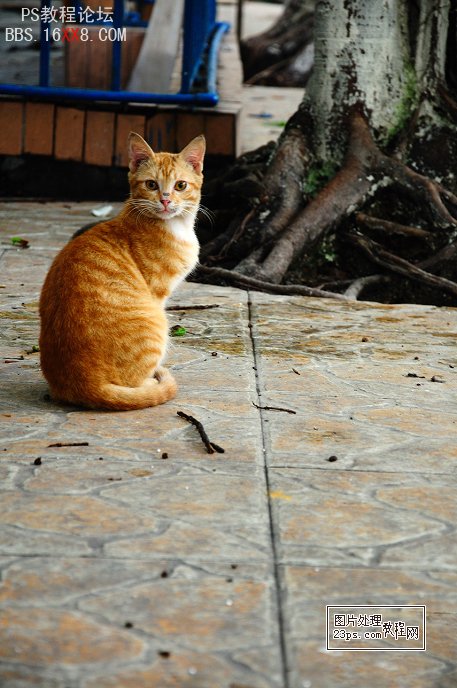
原图:
调色步骤:
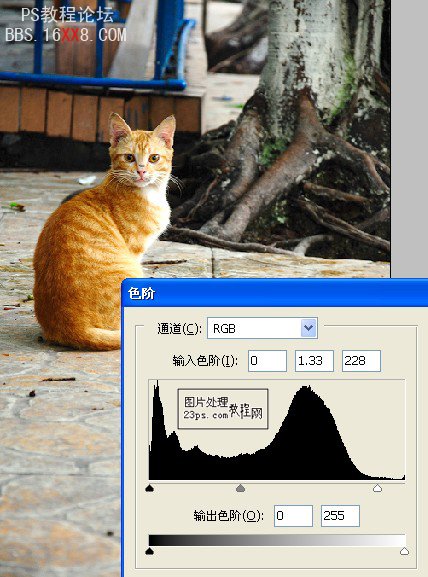
1.打开这只偶然街拍到的猫原片,发现原片较暗,调节色阶
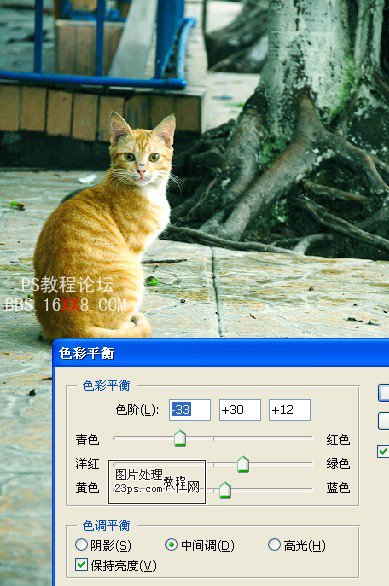
2.确定照片的主色调为黄绿调,先调节色彩平衡
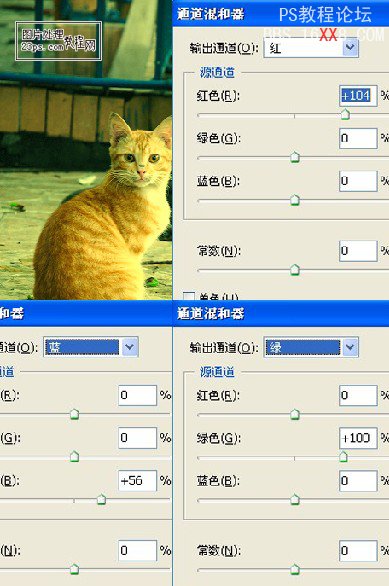
3.继续向黄色调调节,这里笔者调的是通道混和器
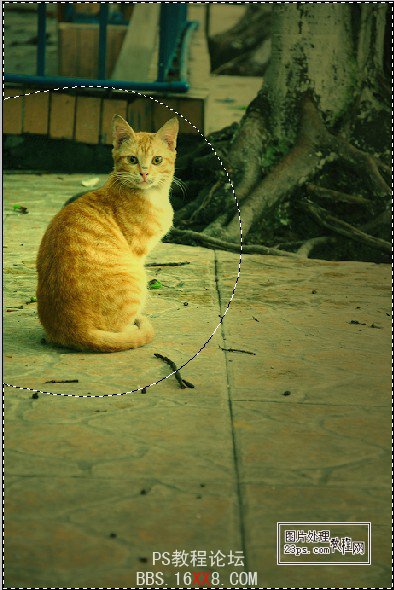
4.新建一层,用椭圆选框工具画一个比猫大一点的选区,羽化80px,反选,填充黑色
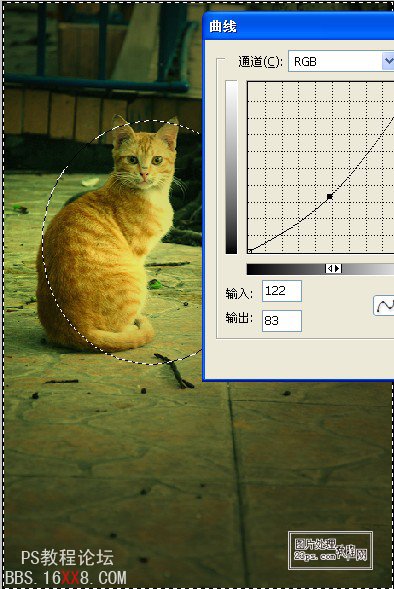
5.盖印图层,感觉主体不够鲜明,再次框选,羽化,反选,执行曲线操作
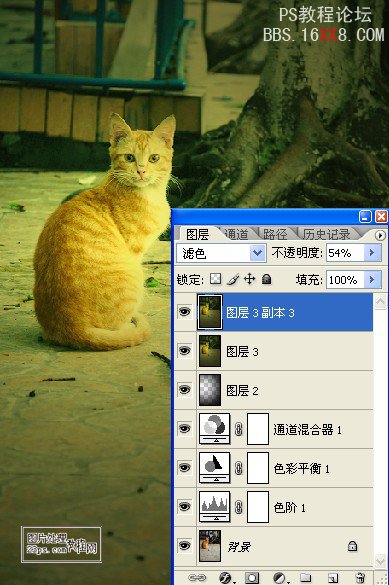
6.复制一层,图层模式改为“滤色”,不透明度为54%
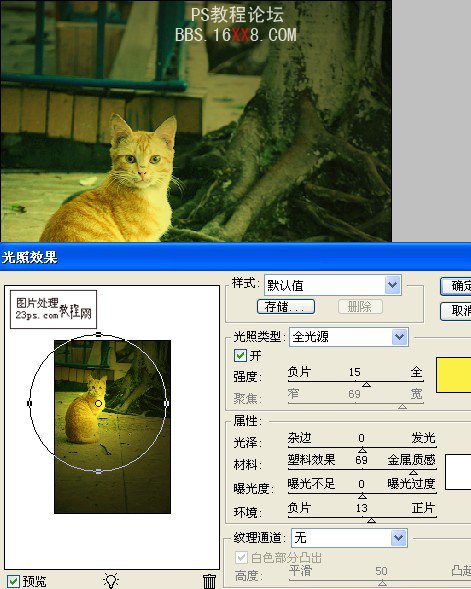
7.新建一层,盖印图层,执行滤镜—渲染—光照效果,数据如图
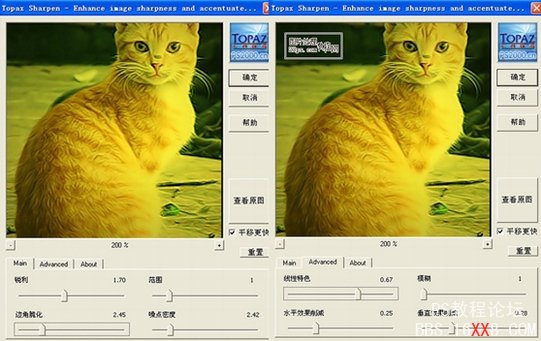
8.锐化图片,这里笔者采取执行Topaz滤镜的方法,数据如图
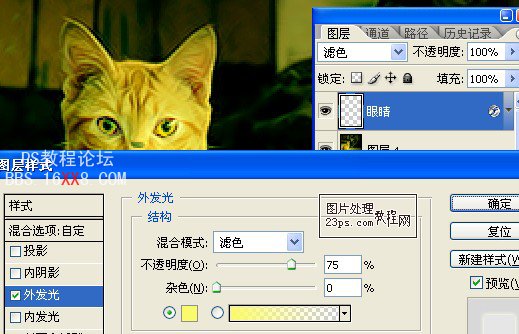
9.这时猫的眼睛比较暗淡,用钢笔工具将其勾出,Ctrl+Enter键载入选区,Ctrl+J复制一层眼睛,并图层模式改为滤色,并为其设置外发光效果,这样,猫眼立刻炯炯有神起来
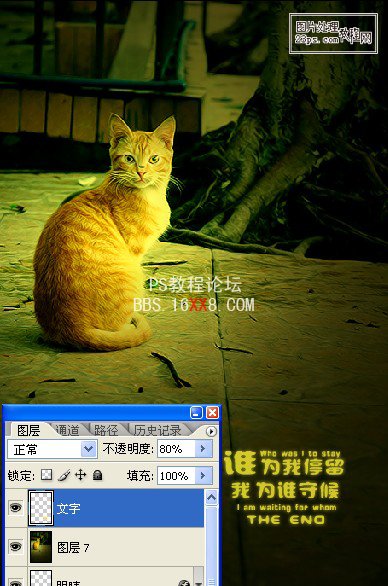
10.盖印图层,将四周压暗,加字调整好其大小和位置
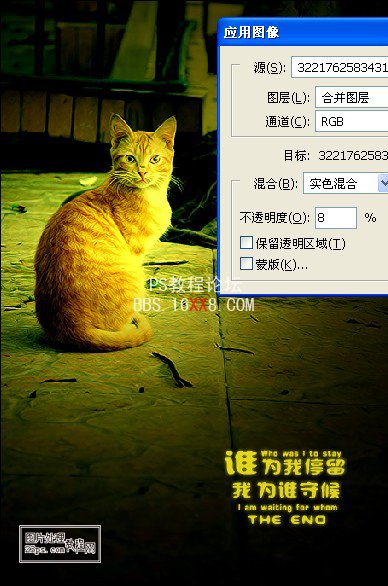
11.再次盖印图层,执行应用图像操作,数据如图
学习 · 提示
相关教程
关注大神微博加入>>
网友求助,请回答!