Photoshop教程:调出照片的层次与鲜明色彩
来源:不详
作者:佚名
学习:828人次
Photoshop教程:调出照片的层次与鲜明色彩Photoshopjiao cheng :diao chu zhao pian de ceng ci yu xian ming se cai
作者:鸿雁南飞 教程来源:中国教程网论坛
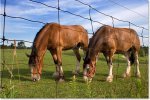
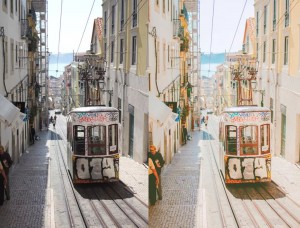
原图和效果图
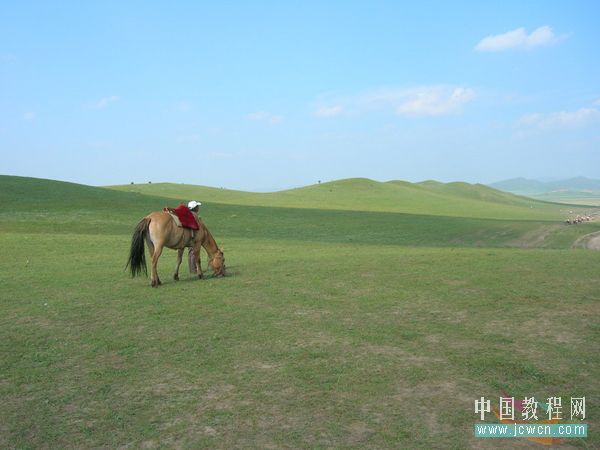
本新闻共7
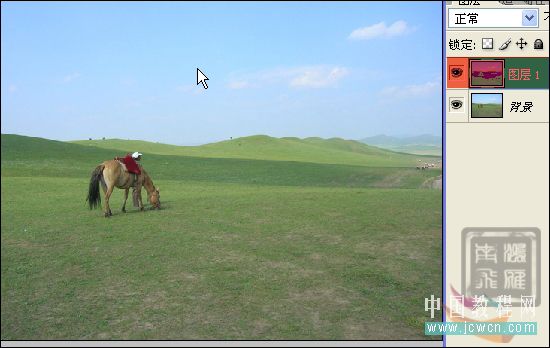
打开图像,Ctrl j复制一层.
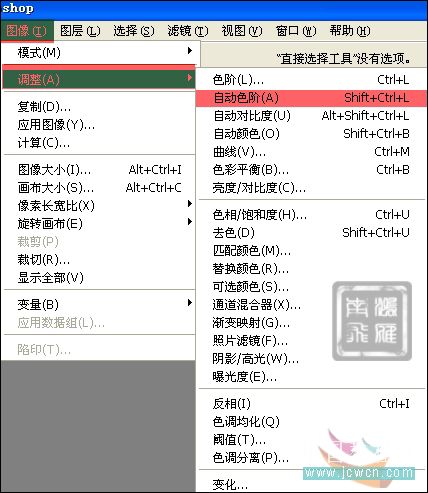
图像,调整,自动色阶.或者直接快捷键Ctrl Shift L.
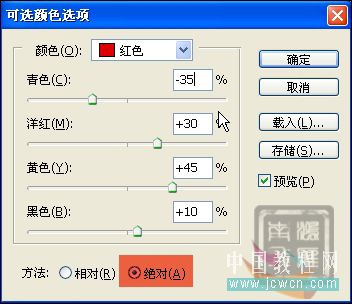
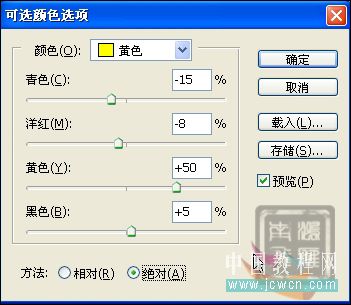
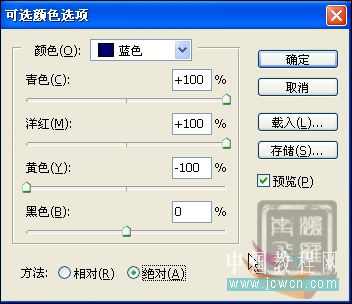
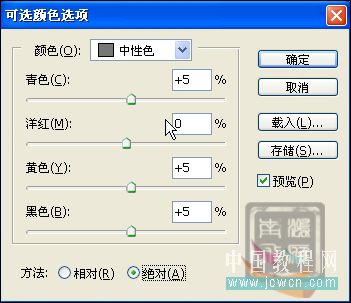
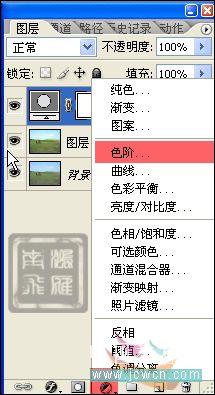
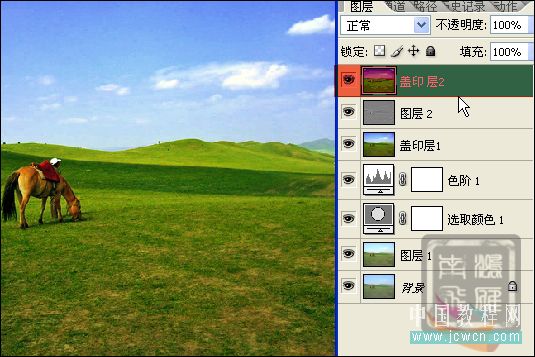
图层面板,点击创建新的调整层图标.可选颜色.
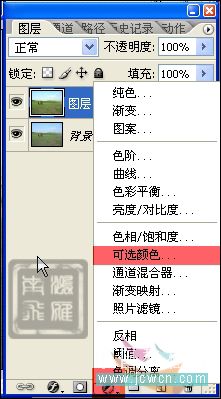
参考数据.-- 勾选绝对.
本新闻共7

本新闻共7
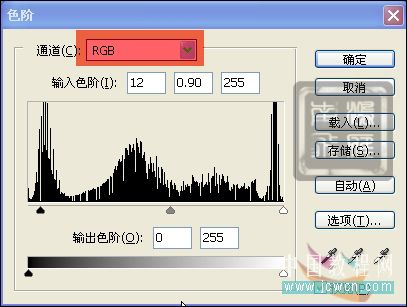
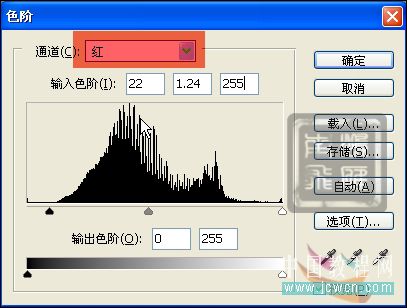
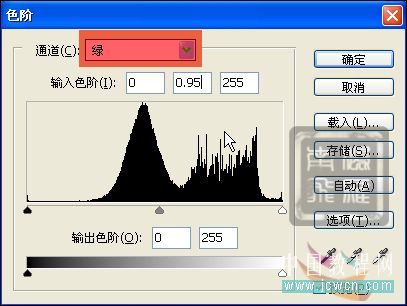
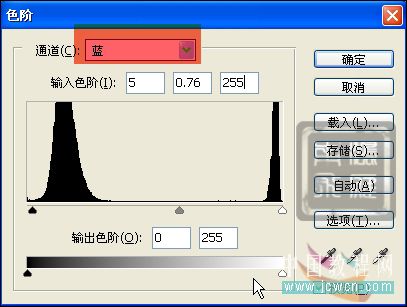
创建新的调整层.色阶.
先调一下RGB通道的数值,再红.绿.蓝色分开调整一下.
本新闻共7
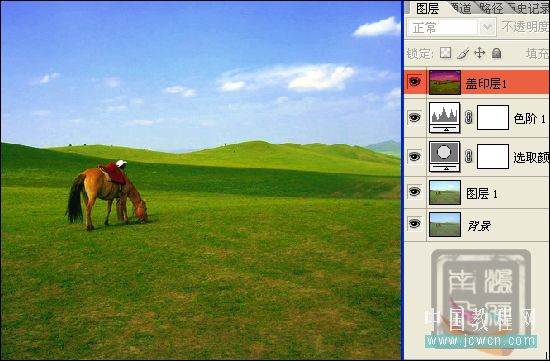
按快捷键Ctrl Shift Alt E创建盖印图层.
展开通道面板,观察各个通道.红色通道层次很好.就利用这个通道.
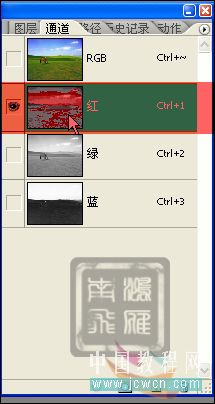
Ctrl A全选Ctrl C复制.
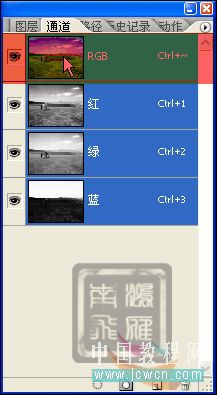
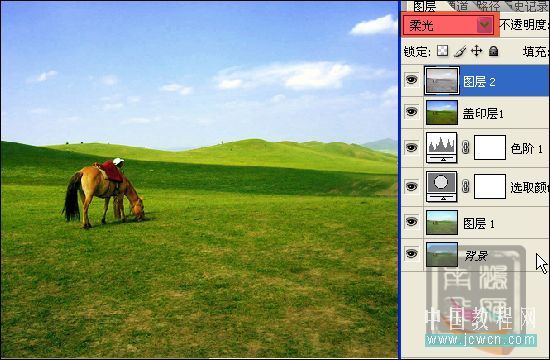
按快捷键Ctrl ~返回到RGB通道.直接Ctrl V粘贴.
本新闻共7
回到图层面板,此时多了一个图层2.设置图层混合模式为柔光.
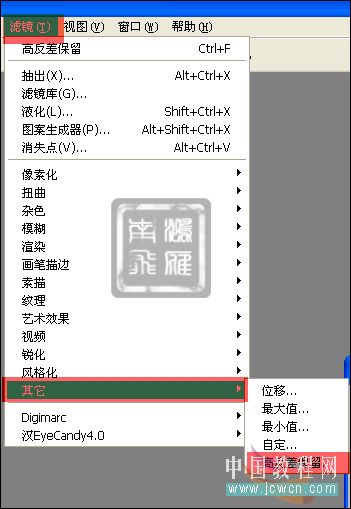
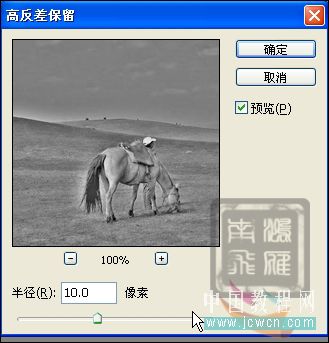
滤镜,其它.高反差保留.
数值8~10
再次按Ctrl Shift Alt E创建盖印图层2.
本新闻共7
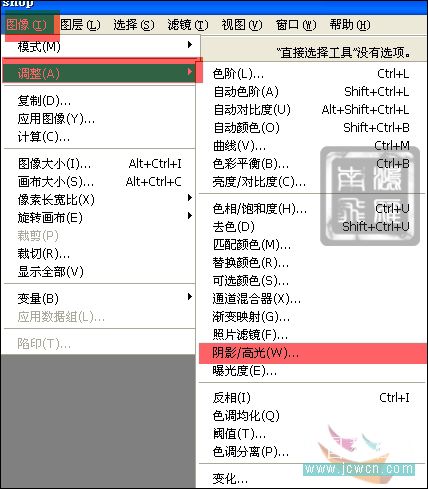
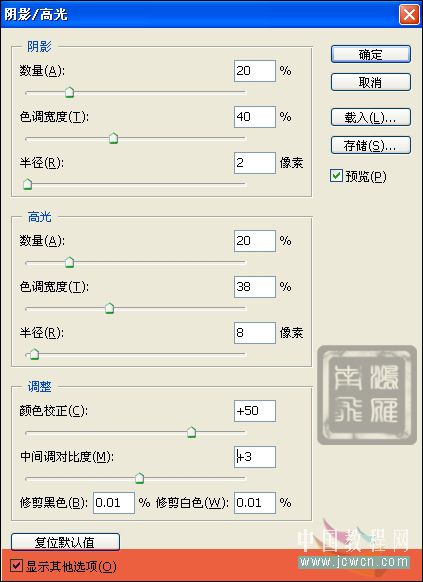
此时发现阴影部分细节有此损失了.可以利用阴影/高光来调整一下. 图像,调整.阴影/高光.
勾选显示其它选项.分别调整一下.
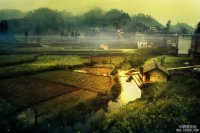
最后效果如图.
 简单的,我们教你,深奥的,你来分享,非主流照片|qqkongjian|feizhuliu|tupian|luntan|psjiaocheng|bishua|ruanjian|chajian|xiazai|psxiazai|qqkongjiandaima
作者:鸿雁南飞 教程来源:中国教程网论坛
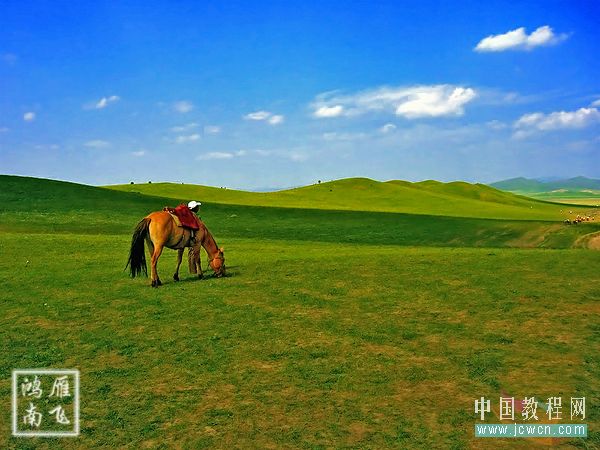
原图和效果图
本新闻共7
打开图像,Ctrl j复制一层.
图像,调整,自动色阶.或者直接快捷键Ctrl Shift L.
图层面板,点击创建新的调整层图标.可选颜色.
参考数据.-- 勾选绝对.
本新闻共7
本新闻共7
创建新的调整层.色阶.
先调一下RGB通道的数值,再红.绿.蓝色分开调整一下.
本新闻共7
按快捷键Ctrl Shift Alt E创建盖印图层.
展开通道面板,观察各个通道.红色通道层次很好.就利用这个通道.
Ctrl A全选Ctrl C复制.
按快捷键Ctrl ~返回到RGB通道.直接Ctrl V粘贴.
本新闻共7
回到图层面板,此时多了一个图层2.设置图层混合模式为柔光.
滤镜,其它.高反差保留.
数值8~10
再次按Ctrl Shift Alt E创建盖印图层2.
本新闻共7
此时发现阴影部分细节有此损失了.可以利用阴影/高光来调整一下. 图像,调整.阴影/高光.
勾选显示其它选项.分别调整一下.
最后效果如图.
简单的,我们教你,深奥的,你来分享,非主流照片|qqkongjian|feizhuliu|tupian|luntan|psjiaocheng|bishua|ruanjian|chajian|xiazai|psxiazai|qqkongjiandaima
学习 · 提示
- 发评论 | 交作业 -
最新评论
caibo392009-02-20 03:08
<阴险>8 太感谢你了
回复
阿丢2007-11-20 08:42
是不是太麻烦咯!~~~ 新手千万别人误倒呀`~! 其实跟本就不用这么做`~哦``!~ 别以为``步骤多烦琐就是大师之作了`` 阿丢提醒---新手千万别闭着眼睛跟着上面的做!~要有自己的想法. 个人认为上面的做得不好!你可别说阿丢,你能做出上面的效果吗? 如果你这么问,阿丢我可是白说了哦!(你能明白吗?)
相关教程
关注大神微博加入>>
网友求助,请回答!