ps处理春季外景人物图片甜美的桃花色(9)
来源:PS联盟
作者:Sener
学习:544人次
素材图片是较为常见的春季花景人物图片。处理的时候不仅要美化背景,更重要的是美化人物部分,尤其是女孩子的照片,应该把人物部分处理得比花朵更艳丽,这样才能突出主体。
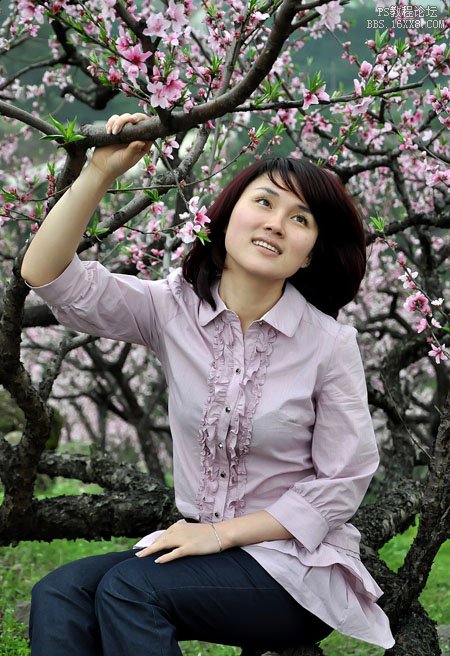
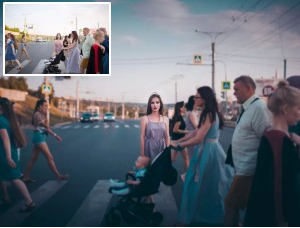
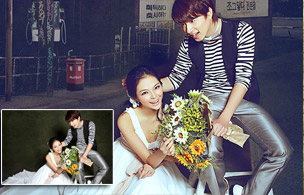
原图
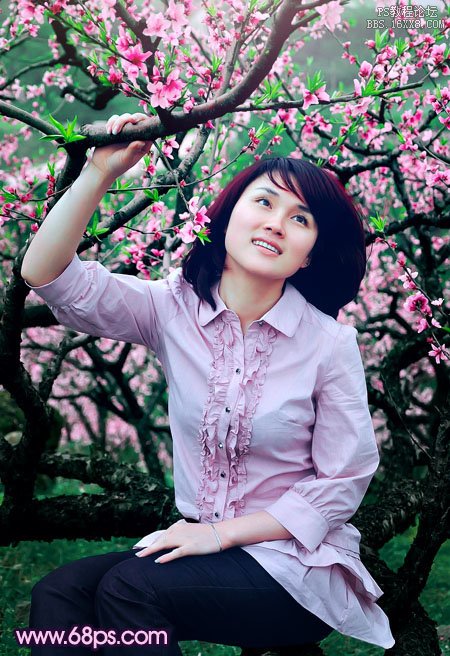
最终效果
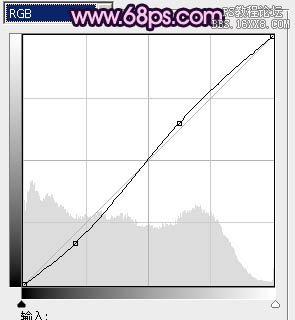
1、打开原图素材,创建曲线调整图层,对RGB进行调整,参数设置如图1,效果如图2。这一步是简单加强图片的对比度。
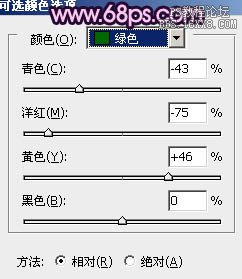
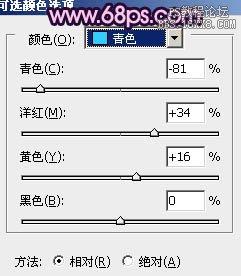
2、创建可选颜色调整图层,对绿,青进行调整,参数设置如图3,4,效果如图5。这一步是把树叶调绿一点。
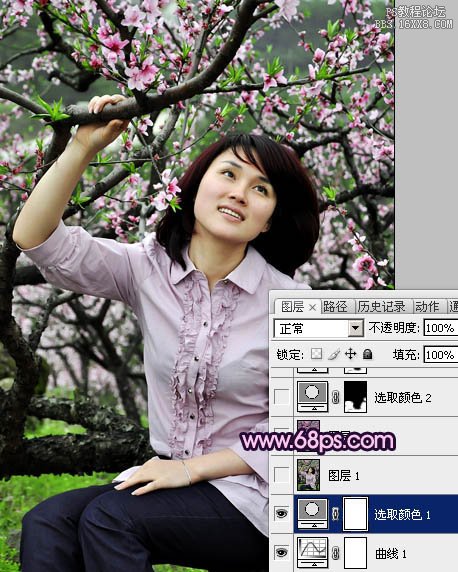
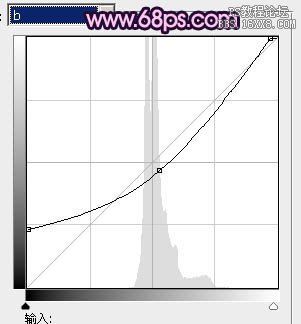
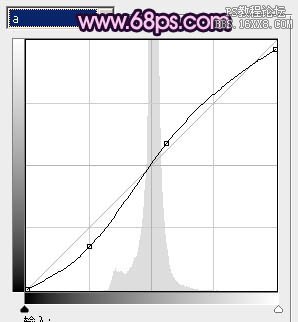
3、新建一个图层,按Ctrl + Alt + Shift + E 盖印图层。选择菜单:图像 > 模糊 > Lab颜色,选择不合拼。然后创建曲线调整图层,对a,b通道进行调整,参数设置如图6,7,效果如图8。
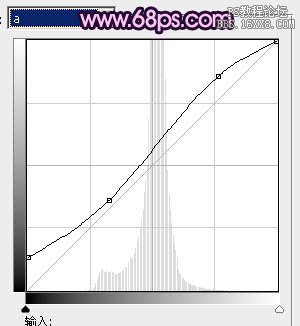
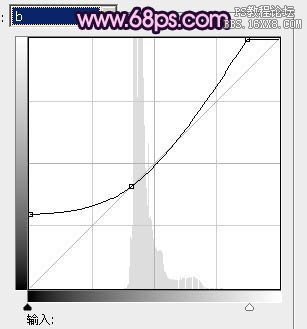
4、再创建曲线调整图层,对a,b通道进行调整,参数设置如图9,10,效果如图11。这一步是把图片调红。
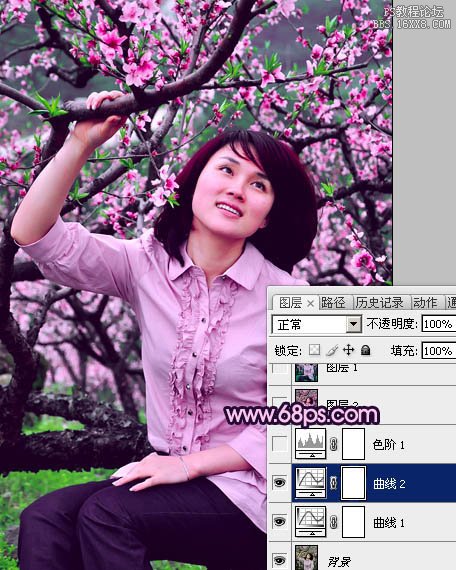
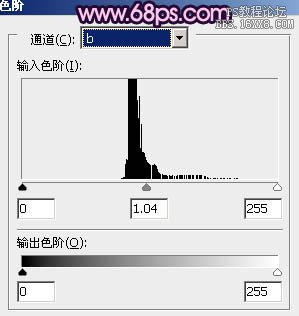
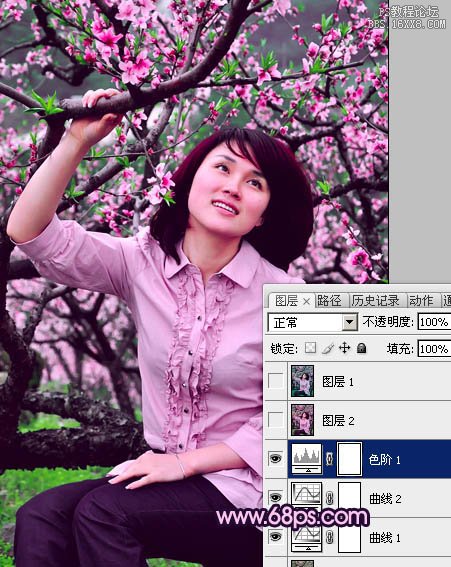
5、创建色阶调整图层,对b通道进行调整,参数设置如图12,效果如图13。确定后新建一个图层,盖印图层。选择菜单:图像 > 模式 > RGB颜色,选择不合拼。
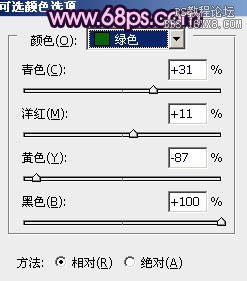
6、创建可选颜色调整图层,对黄,绿进行调整,参数设置如图14,15,确定后把蒙版填充黑色,用白色画笔把草地部分擦出来,效果如图16。
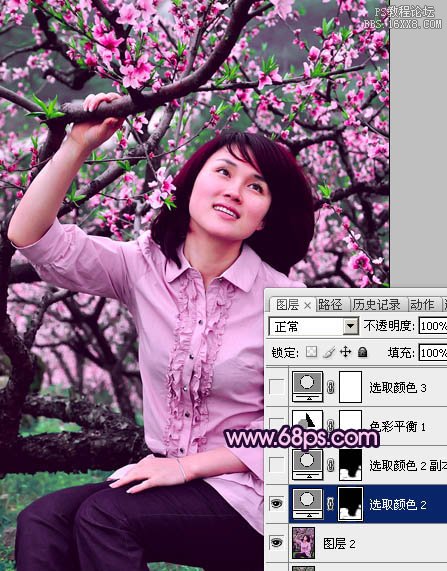
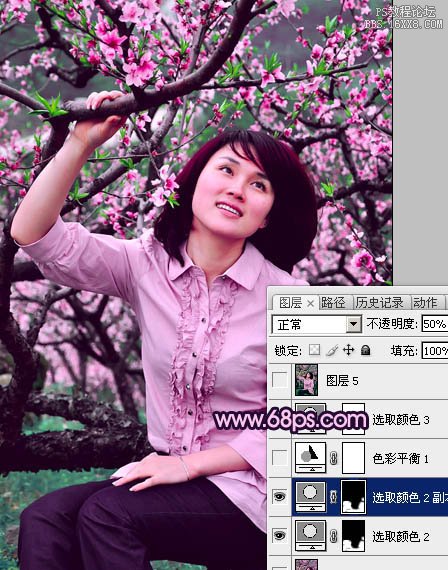
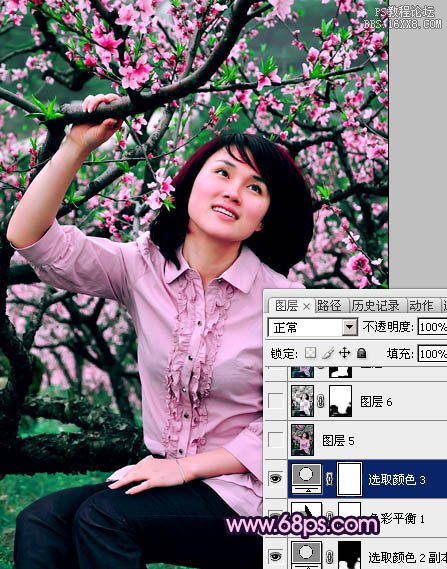
7、按Ctrl + J 把当前可选颜色调整图层复制一层,不透明度改为:50%,效果如下图。
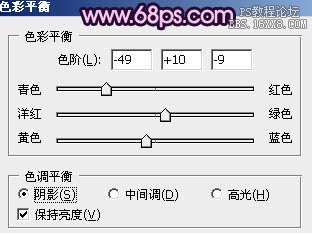
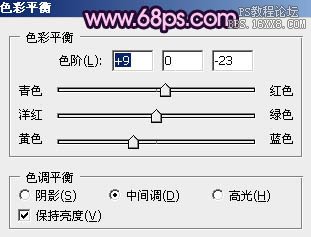
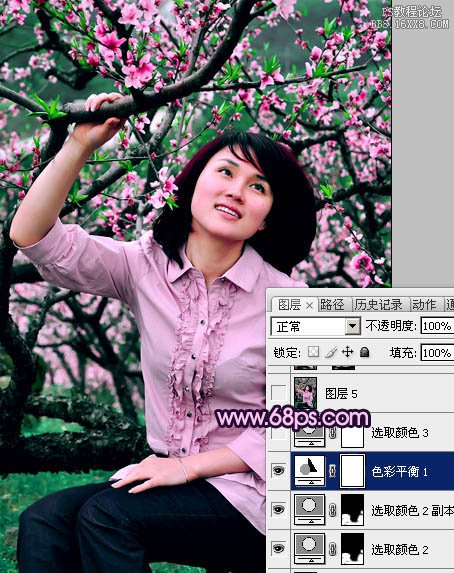
8、创建色彩平衡调整图层,对阴影,中间调进行调整,参数设置如图18,19,效果如图20。这一步简单调整图片的层次感。
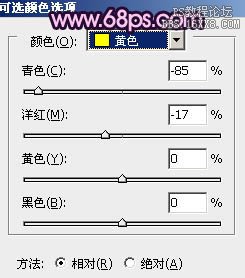
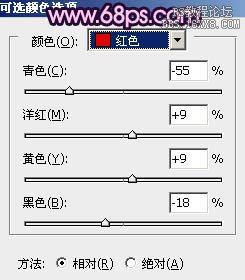
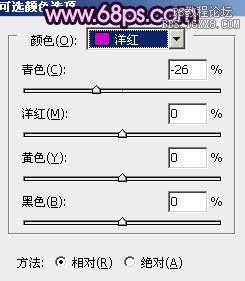
9、创建可选颜色调整图层,对红,洋红进行调整,参数设置如图21,22,效果如图23。这一步把红色调鲜艳一点。
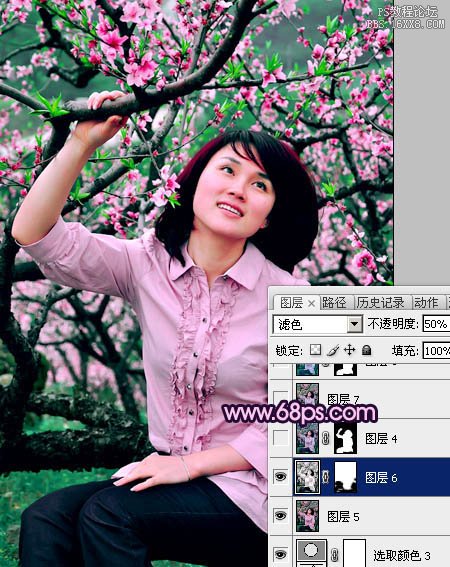
10、新建一个图层,盖印图层。按Ctrl + Alt + ~ 调出高光选区,按Ctrl + Shift + I 反选得到暗部选区,按Ctrl + J 把选区部分的图像复制到新的图层,混合模式改为“滤色”,不透明度改为:50%,效果如下图。这一步是简单提亮暗部。
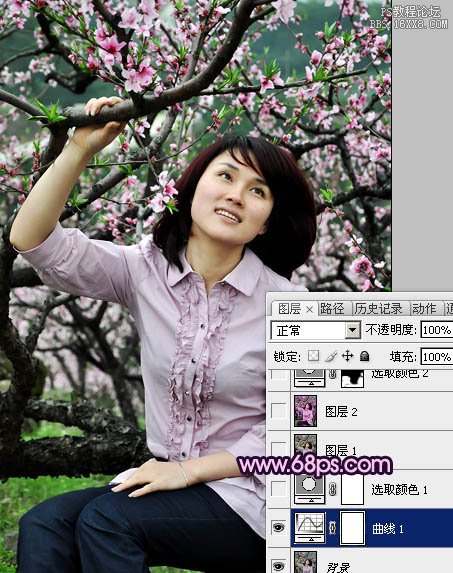
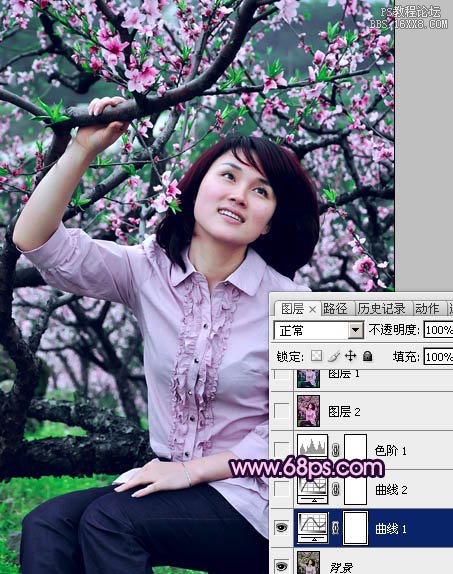
11、把背景图层复制一层,按Ctrl + Shift + ] 置顶,用钢笔工具把人物部分抠出来,复制到新的图层,适当给人物调整一下颜色,然后把背景副本图层隐藏,效果如下图。
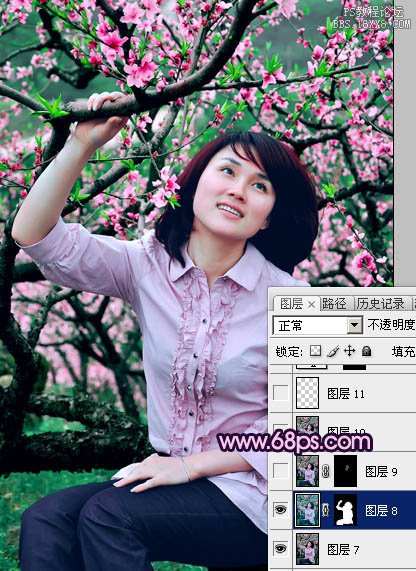
12、新建一个图层,盖印图层。简单给人物磨一下,再给画面增加一些高光和暗角,大致效果如下图。
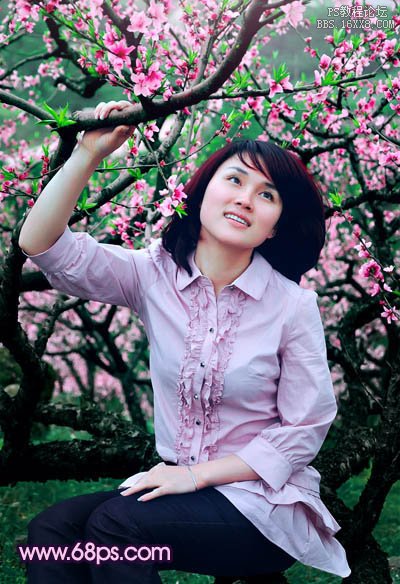
最后修饰一些细节,调整一下整体颜色,完成最终效果。
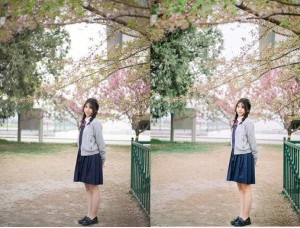
原图
最终效果
1、打开原图素材,创建曲线调整图层,对RGB进行调整,参数设置如图1,效果如图2。这一步是简单加强图片的对比度。
2、创建可选颜色调整图层,对绿,青进行调整,参数设置如图3,4,效果如图5。这一步是把树叶调绿一点。
3、新建一个图层,按Ctrl + Alt + Shift + E 盖印图层。选择菜单:图像 > 模糊 > Lab颜色,选择不合拼。然后创建曲线调整图层,对a,b通道进行调整,参数设置如图6,7,效果如图8。
4、再创建曲线调整图层,对a,b通道进行调整,参数设置如图9,10,效果如图11。这一步是把图片调红。
5、创建色阶调整图层,对b通道进行调整,参数设置如图12,效果如图13。确定后新建一个图层,盖印图层。选择菜单:图像 > 模式 > RGB颜色,选择不合拼。
6、创建可选颜色调整图层,对黄,绿进行调整,参数设置如图14,15,确定后把蒙版填充黑色,用白色画笔把草地部分擦出来,效果如图16。
7、按Ctrl + J 把当前可选颜色调整图层复制一层,不透明度改为:50%,效果如下图。
8、创建色彩平衡调整图层,对阴影,中间调进行调整,参数设置如图18,19,效果如图20。这一步简单调整图片的层次感。
9、创建可选颜色调整图层,对红,洋红进行调整,参数设置如图21,22,效果如图23。这一步把红色调鲜艳一点。
10、新建一个图层,盖印图层。按Ctrl + Alt + ~ 调出高光选区,按Ctrl + Shift + I 反选得到暗部选区,按Ctrl + J 把选区部分的图像复制到新的图层,混合模式改为“滤色”,不透明度改为:50%,效果如下图。这一步是简单提亮暗部。
11、把背景图层复制一层,按Ctrl + Shift + ] 置顶,用钢笔工具把人物部分抠出来,复制到新的图层,适当给人物调整一下颜色,然后把背景副本图层隐藏,效果如下图。
12、新建一个图层,盖印图层。简单给人物磨一下,再给画面增加一些高光和暗角,大致效果如下图。
最后修饰一些细节,调整一下整体颜色,完成最终效果。
学习 · 提示
相关教程
关注大神微博加入>>


网友求助,请回答!