Photoshop教程:水晶花纹字
来源:不详
作者:佚名
学习:5958人次
Photoshop教程:水晶花纹字来源:68PS
本教程是利用图层样式来制作水晶质感花纹文字,其中多次用到图案,本教程中用到的图案请点这里下载。制作过程中不同的文字大小样式设置略有不同。
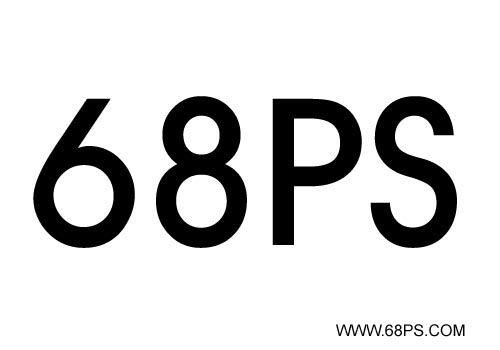
1.新建一个500px * 300px的文件,选用文字工具打上文字,文字填充为黑色,效果如图1
<图1>
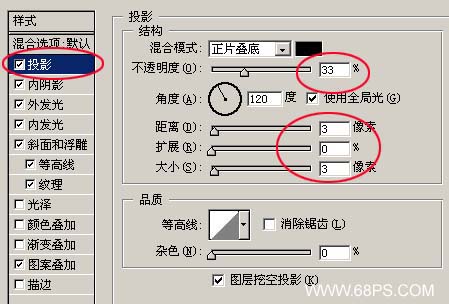
2.双击图层调出图层样式首先设置投影参数设置如图2
<图2>
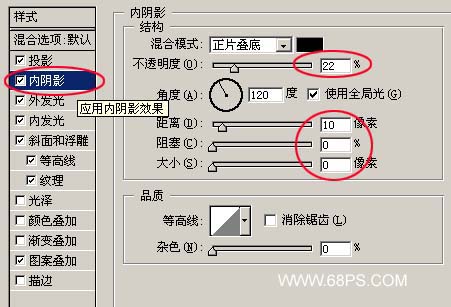
3.内阴影参数设置如图3
<图3>
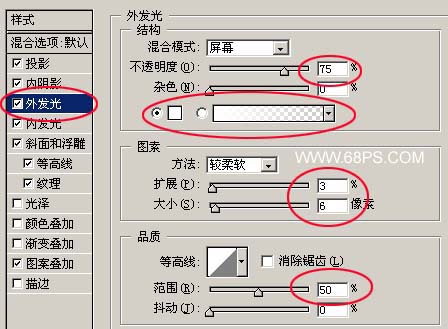
4.外发光参数设置如图4
<图4>
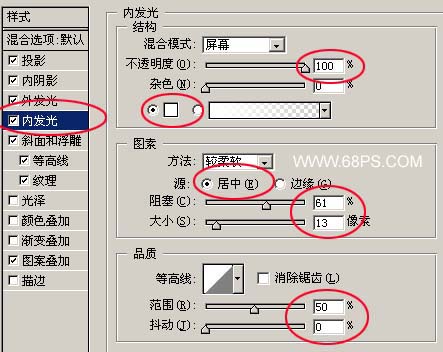
5.内发光参数设置如图5
<图5>
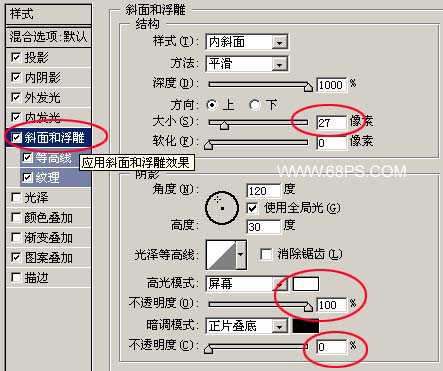
6.斜面和浮雕参数设置如图6
<图6>
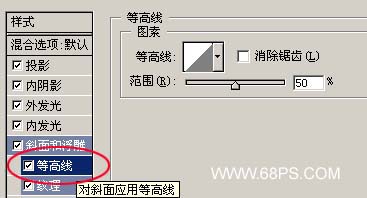
7.等高线的参数设置如图7
<图7>
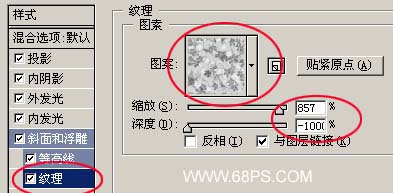
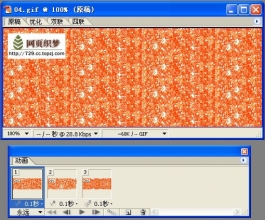
8.纹理的参数设置如图8(里面的图案请点这里下载下同)
<图8>
9.图案叠加的参数设置如图9
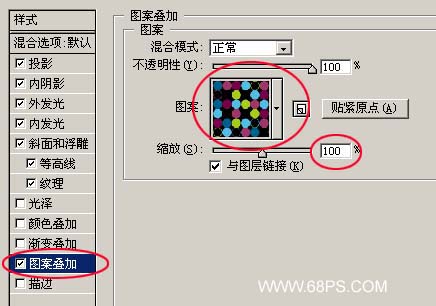
<图9>
10.确定后完成最终效果
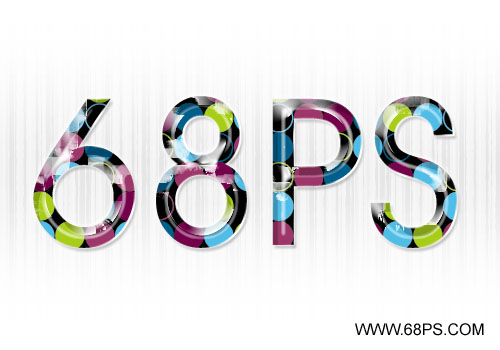
<图10>
提示:你完成后请保留PSD格式,下面这个花纹3D文字效果的教程在近期推出,将会用到PSD文件。
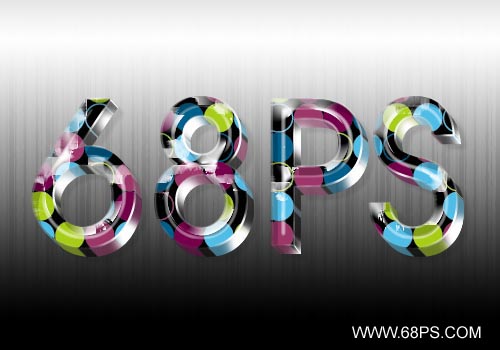
<图11>
本教程是利用图层样式来制作水晶质感花纹文字,其中多次用到图案,本教程中用到的图案请点这里下载。制作过程中不同的文字大小样式设置略有不同。
最终效果
1.新建一个500px * 300px的文件,选用文字工具打上文字,文字填充为黑色,效果如图1
<图1>
2.双击图层调出图层样式首先设置投影参数设置如图2
<图2>
3.内阴影参数设置如图3
<图3>
4.外发光参数设置如图4
<图4>
5.内发光参数设置如图5
<图5>
6.斜面和浮雕参数设置如图6
<图6>
7.等高线的参数设置如图7
<图7>
8.纹理的参数设置如图8(里面的图案请点这里下载下同)
<图8>
9.图案叠加的参数设置如图9
<图9>
10.确定后完成最终效果
<图10>
提示:你完成后请保留PSD格式,下面这个花纹3D文字效果的教程在近期推出,将会用到PSD文件。
<图11>
学习 · 提示
相关教程
关注大神微博加入>>


网友求助,请回答!