photoshop琥珀文字效果制作教程(5)
来源:
作者:
学习:1320人次
12、执行菜单栏中的“编辑”“定义图案”命令,在弹出的对话框中保持默认设置,将两个图像定义为图案。
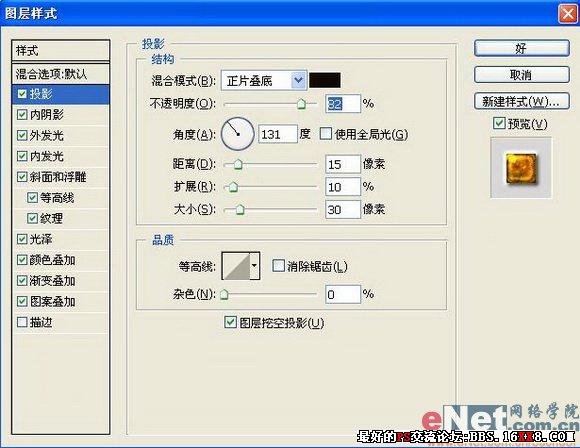
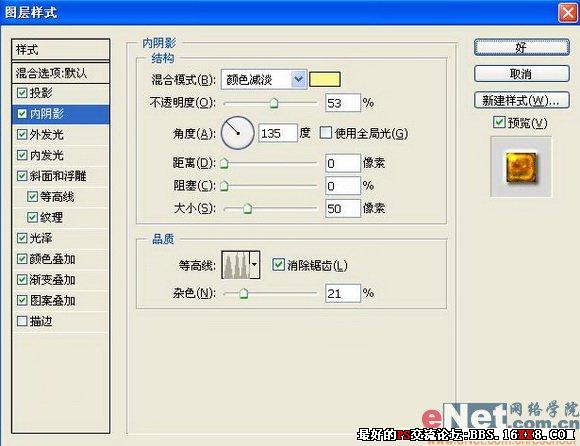
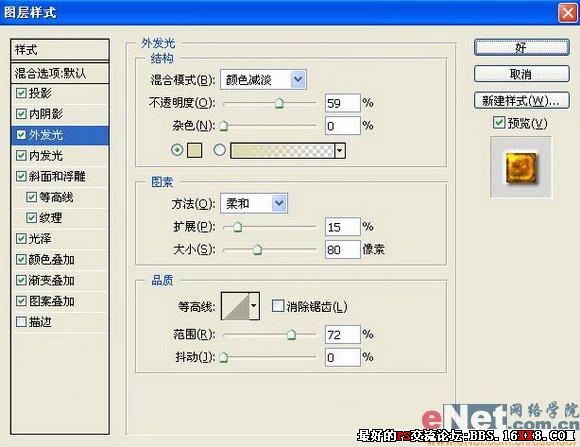
13、双击文字图层,在弹出的对话框中选择“投影”“内阴影”“外发光”样式,设置各项参数如图14-16所示。
13、双击文字图层,在弹出的对话框中选择“投影”“内阴影”“外发光”样式,设置各项参数如图14-16所示。
学习 · 提示
相关教程
关注大神微博加入>>


网友求助,请回答!