利用渐变制作超酷的抽象图案(8)
来源:IT世界
作者:河马
学习:6682人次
怎么也想不到,效果图竟是用简单的渐变工具来完成。过程也非常简单:选择黑白渐变后,在属性栏把混合模式改为“差值”。然后就可以随意拉渐变,即可得到一些抽象图案。后期再通过复制及叠加等做出更为复杂的图案。
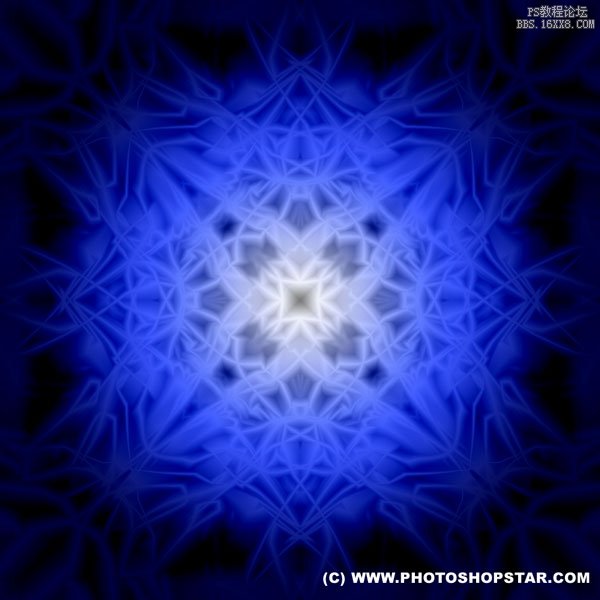
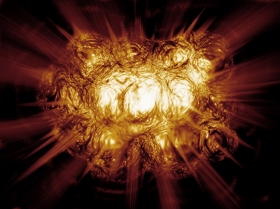
最终效果
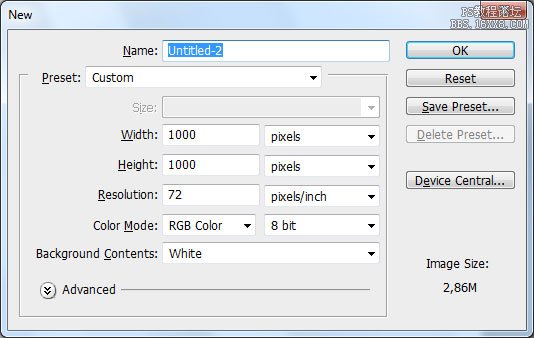
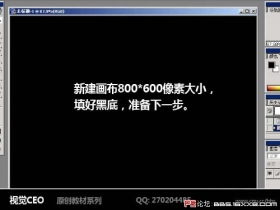
 1、在photoshop中创建一个大小为1000*1000的新图片,图片的尺寸十分重要,因为本教程的特效需要使用高度和宽度相同的图片。
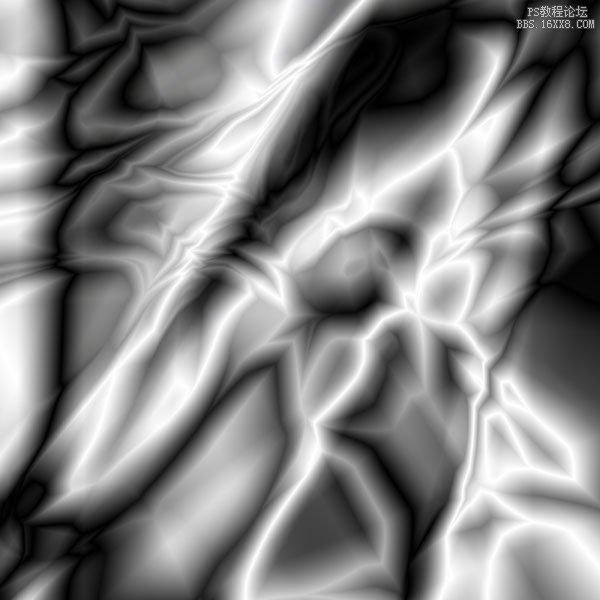
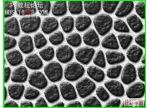
2、选择渐变工具在属性栏中设置模式为“差值”,按下D恢复前景色和背景色的默认设置(黑白),然后在图片中填充多次线性渐变效果,如图所示。

 3、接下来我们开始制作抽象的图案效果。按下Ctrl+J复制一层执行“编辑—变换—水平翻转”,然后设置混合模式为“变亮”,如图所示。
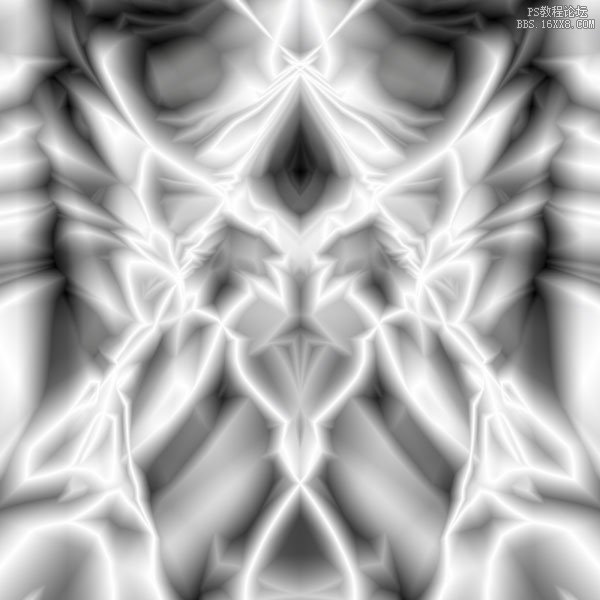
4、执行“图层—合并图层”把两个图层合并起来。再按下Ctrl+J复制一层,执行“编辑—变换—垂直翻转”,设置图层混合模式为“变亮”,如图所示。
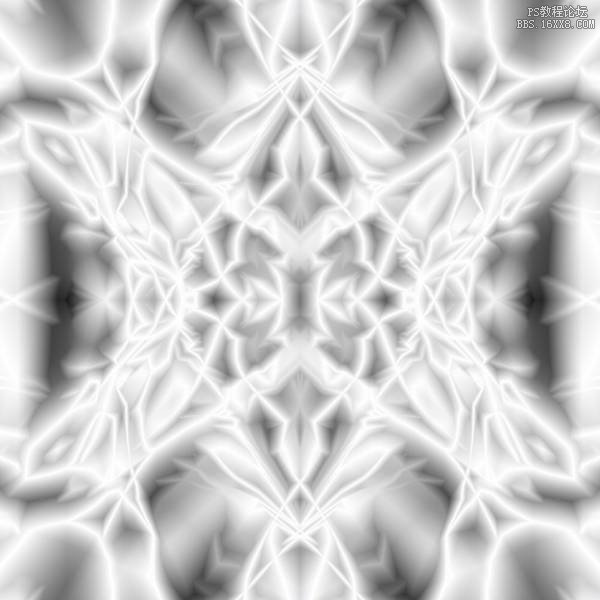
5、按下Ctrl+E合并图层,然后再按下Ctrl+J复制一层,执行“编辑—变换—顺时针旋转90度”,设置图层混合模式为变亮,如图所示。
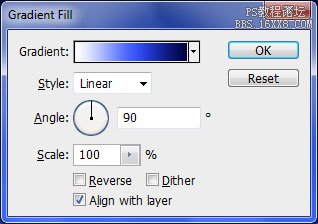
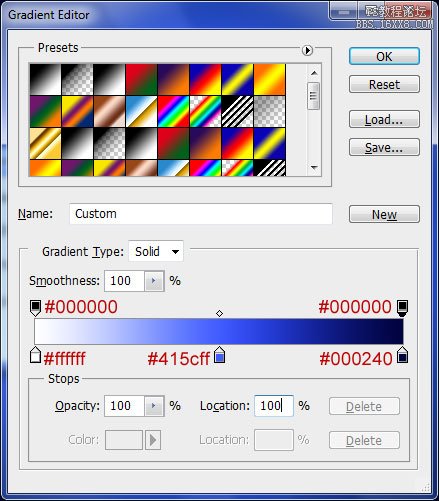
 6、下面添加一些色彩,选择“图层—新建填充图层—渐变”,设置样式为“径向”,如图所示。
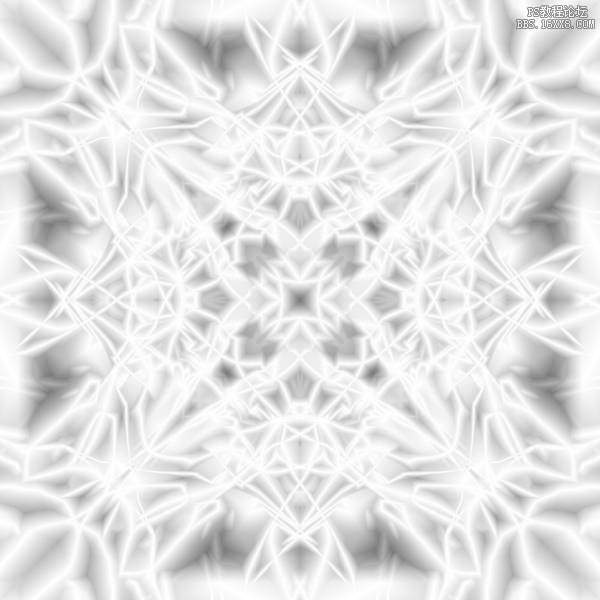
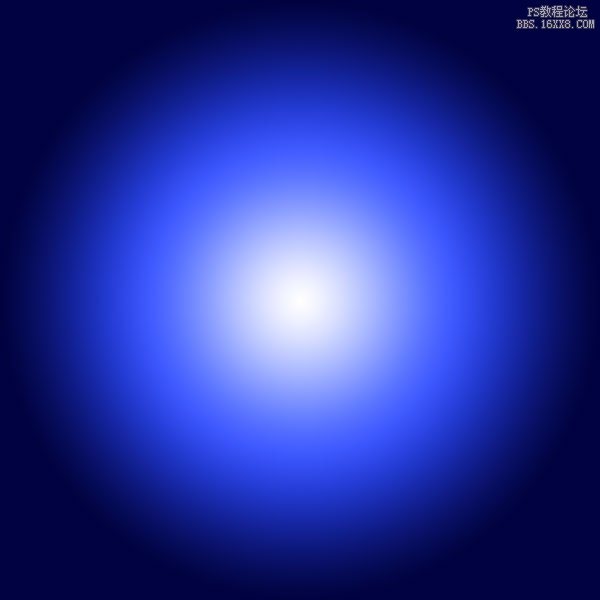 7、设置渐变图层的混合模式为“线性加深”,效果如图所示。

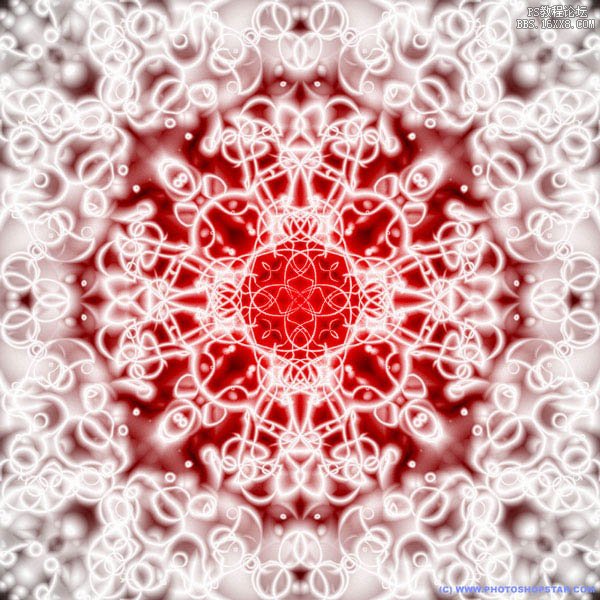
这款抽象的发光图案就制作完毕了。不同的渐变效果可以制作出不同的图案,大家可以多尝试几次

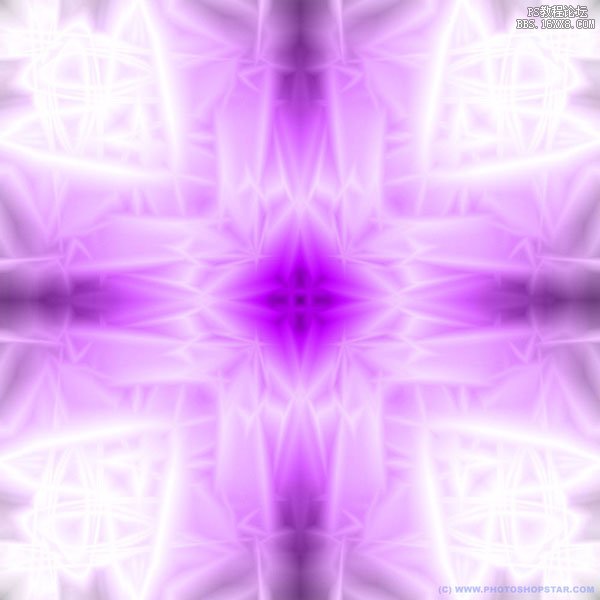
最终效果
1、在photoshop中创建一个大小为1000*1000的新图片,图片的尺寸十分重要,因为本教程的特效需要使用高度和宽度相同的图片。
2、选择渐变工具在属性栏中设置模式为“差值”,按下D恢复前景色和背景色的默认设置(黑白),然后在图片中填充多次线性渐变效果,如图所示。
3、接下来我们开始制作抽象的图案效果。按下Ctrl+J复制一层执行“编辑—变换—水平翻转”,然后设置混合模式为“变亮”,如图所示。
4、执行“图层—合并图层”把两个图层合并起来。再按下Ctrl+J复制一层,执行“编辑—变换—垂直翻转”,设置图层混合模式为“变亮”,如图所示。
5、按下Ctrl+E合并图层,然后再按下Ctrl+J复制一层,执行“编辑—变换—顺时针旋转90度”,设置图层混合模式为变亮,如图所示。
6、下面添加一些色彩,选择“图层—新建填充图层—渐变”,设置样式为“径向”,如图所示。
7、设置渐变图层的混合模式为“线性加深”,效果如图所示。
这款抽象的发光图案就制作完毕了。不同的渐变效果可以制作出不同的图案,大家可以多尝试几次
学习 · 提示
相关教程
关注大神微博加入>>


网友求助,请回答!