ps设计一个时尚MP3播放器教程

最终效果:
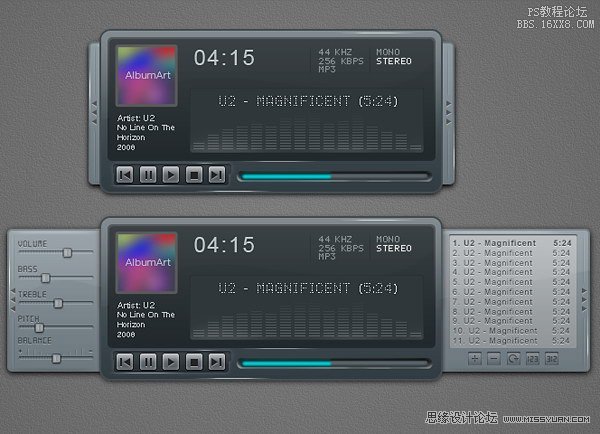
以下的教程翻译不一定100%正确,但意思没有错,相信会ps都应该都开的懂,都能做的更好!

第1步:背景

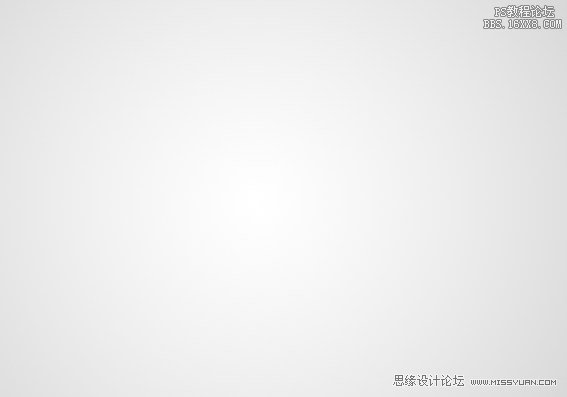
Let's start by creating a background for our mp3 player.让我们先创建一个为我们的MP3播放器的背景。

Draw a radial gradient from white to gray.借鉴白色的径向渐​​变为灰色。

Step 2第2步

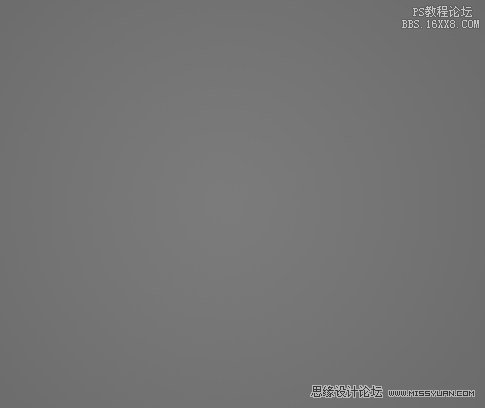
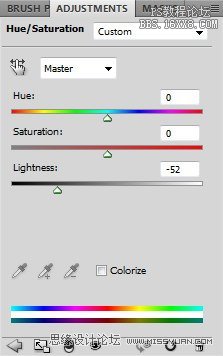
Darken the gradient by adding Adjustment Layer Hue/Saturation.通过添加变暗调整层色相/饱和度梯度。

Reduce the Lightness setting.降低亮度设置。
Step 3第3步

Create a new layer and fill it with white.创建一个新层,填充白色。

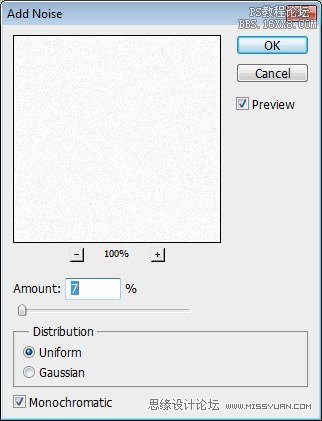
Make sure you have white and black as foreground and background by pressing D. Click Filter > Noise > Add Noise.请确保您有白色和黑色为前台和后台按D.单击“滤镜>噪音>”添加杂色。

Set Distribution to Uniform and select Monochromatic.集的分布均匀,并选择以单色。
Step 4第4步

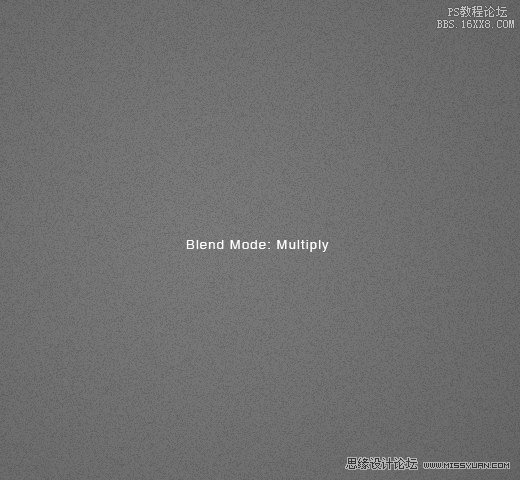
Change the blending mode of the layer to Multiply.更改图层混合模式为正片。
Step 5第5步

Duplicate layer by pressing Command/Ctrl + J. Invert layer by pressing Ctrl + I. Move layer 1 px left and 1 px down by activating tool move then press left arrow then down arrow.重复按按Ctrl +我将离开第1层和1个像素像素通过激活工具下命令/按Ctrl + j的反向移动,然后一层又一层,然后按左箭头向下箭头。

Change blend mode to Screen.改变混合模式为屏幕。

Step 6第6步

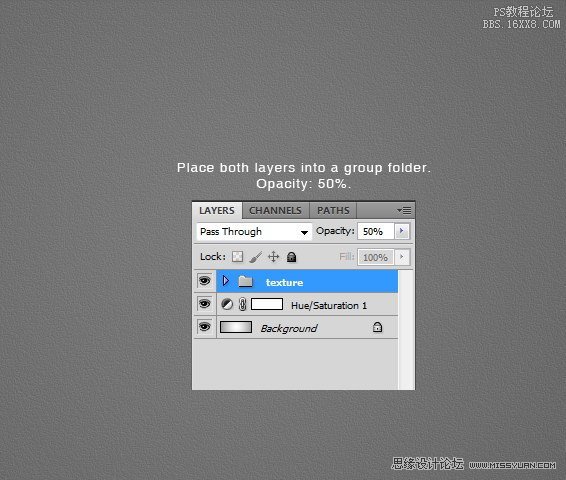
Put both noise layers into a group folder and reduce its Opacity to 50%.放入一组文件夹的噪声层,并减少其不透明度为50%。
Step 7: MP3 Basic Shape步骤7:MP3播放的基本形态

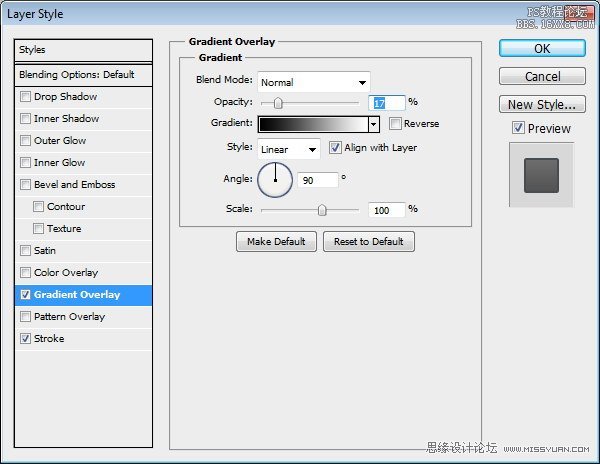
Create a rounded rectangle on the canvas.在画布上创建一个圆角矩形。

Use #3b484f as its color.使用#作为其颜色3b484f。

Add following layer styles.新增以下图层样式。

Step 8: Screen第八步:屏幕

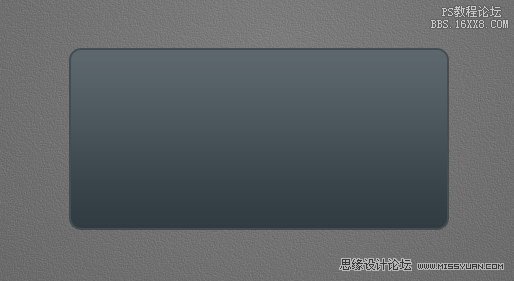
Draw a smaller rounded rectangle.绘制一个较小的圆角矩形。

Add following layer styles.新增以下图层样式。
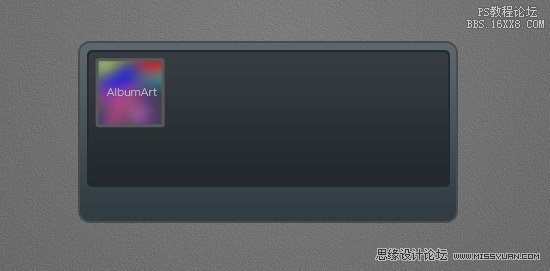
Step 9: Album Info第9步:相册信息

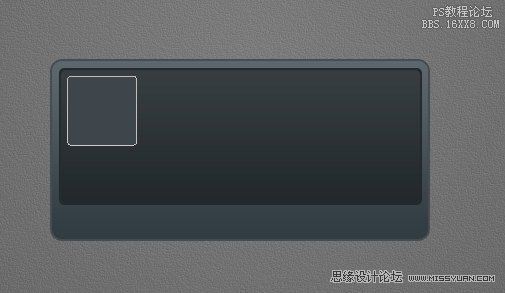
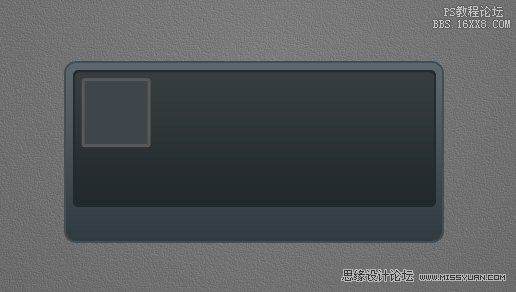
Add a small rounded rectangle.加一个小圆角矩形。

We'll use it as a container for album cover.我们将用作为专辑封面容器中。

Add following layer styles.新增以下图层样式。

Step 10第10步

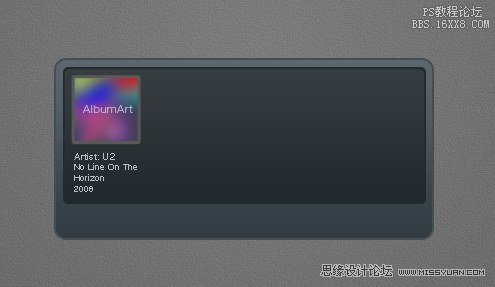
Paste a picture on top of the rounded rectangle.粘贴的图片上方的圆角矩形。

Hit Command/Ctrl + Alt + G to convert it to clipping mask and put it inside the rounded rectangle.点击命令/按Ctrl + Alt + G以将其转换为剪贴蒙版,把它里面的圆角矩形。

Step 11:第11步:

Add artist info, album's name, and its year underneath the album cover.新增艺术家信息,专辑的名字,其下一年的专辑封面。

Step 12第12步

From the option bar, you need to select the best Anti-aliasing methods to prevent blurry appearance.从选项吧,你需要选择最好的反走样方法,以防止出现模糊。

I can't say which one is better because it's different for each font type and size.我不能说哪一个更好,因为它的每一个不同的字体和大小。

You need to experiment with each setting.你需要与每个设置实验。

As you can see below, in this case None works best.正如你可以看到下面这个案例中没有,效果最好。

Step 13: Equalizer第13步:均衡器

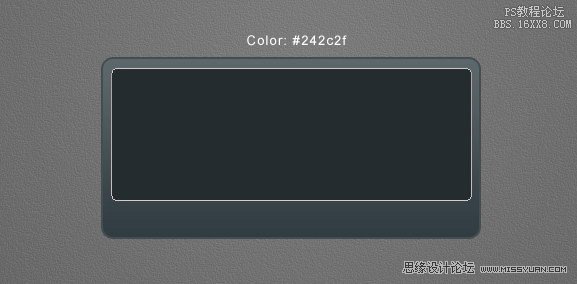
Draw a rounded rectangle.画一个圆角矩形。

Add following layer styles.新增以下图层样式。
Step 14第14步

Create new layer.创建新的图层。

Paint white using using a soft brush (Hardness: 0%) with low Opacity (10-15%).用白色油漆用软刷(硬度:0%),低透明度(10-15%)。

This will add a subtle light source under the equalizer.这将添加一个微妙的均衡下的光源。

Step 15第15步

Select line tool and set its weight to 1 px.选择行工具,并设置它的重量为1像素。

Step 16第16步

Draw a white line inside the equalizer.画一条白线内的均衡。

Activate zoom tool and click few times to zoom in to maximum view.缩放工具,点击激活几次放大到最大的看法。

We need to make sure that the line is not blurry.我们必须确保该行是不能模糊。

As you can see below, there is blurry spot on both ends of the line.正如你可以看到下面,有一种是在线路的两端模糊的斑点。

Step 17步骤17

There are two ways to fix this blurriness.有两种方法来解决这个问题模糊不清。

First we need to round up the size.首先,我们需要总结的大小。

Second is fixing its placement.二是确定其位置。

Hit Command/Ctrl + T to transform the line.点击命令/按Ctrl + T来转换线。

Right click Width (W) box and select pixels.右击宽度(W)框,并选择像素。

Do the same to Height (H) box.难道要高度(H)框相同。

Step 18第18步

We need to round up the size.我们需要总结的大小。

In this case we will need to change 11,97 px to 12 px.在这种情况下,我们需要改变11,97像素到12像素。

Step 19步骤19

Next, let's fix its position.接下来,让我们来解决它的立场。

Select line shape with tool Path.选择与刀具路径线的形状。

Hit arrow key to fix its position.点击箭头键确定自己的立场。

Do this until we have no blurry spot.这样做,直到我们没有模糊的斑点。

Step 20步骤20

Duplicate and transform the line by pressing Command/Ctrl + Alt + T. Move it upward 3 px..复制和转换按Command /按Ctrl + Alt + 3吨它向上移动像素行..

Step 21步骤21

Repeat the duplication and transformation process by pressing Command/Ctrl + Shift + Alt + T.重复按命令/按Ctrl + Shift + Alt键+吨重复和转化过程

Step 22步骤22

Select all lines, duplicate it and place it to the right.选择所有行,它并把它复制到正确的。

Remember to keep it sharp.记住要保持锋利。

Make sure the position is perfect to avoid blurry spot.确保完美的位置,以避免模糊的斑点。

Step 23步骤23

Repeat this process until we have some columns of 1 px height lines.重复此过程,直到我们有1像素高线一些列。

Step 24步骤24

Delete some of the lines until we get a natural shape of equalizer.删除某些行,直到我们得到一个均衡的自然形状。

Add following layer styles.新增以下图层样式。

Set Fill to 0%.设置填充为0%。

Step 25: Song Info步骤25:歌曲信息

Add artist name, song title, and total track time on top of the equalizer.新增艺术家姓名,歌曲标题,并在均衡器上的总的赛道时间。

I'm using font type LCD Phone here.我使用的字体类型液晶电话在这里。

The Anti-aliased Method used here is None.反走样方法用在这里是无。

Step 2626步

Below, you can see the result with each Anti-aliased method.下面,你可以看到每个反走样方法的结果。

Step 27步骤27

Add more text for more info on top of the LCD.添加更多的LCD顶端更多信息文本。

Use Pencil tool to draw a small black 1 px line separating each text.使用铅笔工具绘制一个小的黑色1像素分隔每一行文字。

Erase both ends of these lines.擦除两端这些行。

Step 28步骤28

Hit Command/Ctrl + 1.点击命令/按Ctrl + 1。

Let's step back and see the result we have so far in 100% view.让我们回过头来看看,结果我们至今在100%视野。

This is important to make there's no blurry spots in our design.这是重要的有在我们的设计没有模糊的斑点。

Step 29: Main Buttons步骤29:主要按键

Draw a small rounded rectangle for the button.绘制一个按钮的小圆角矩形。

Step 30步骤30

Again, we need to check its size and position to avoid blurry spots.同样,我们需要检查它的大小和位置,避免模糊的斑点。

Hit Command/Ctrl + T and make sure to round up its size.点击命令/按Ctrl + T和确保围捕它的大小。

Step 31步骤31

Make sure to check its position, we don't want to see blurry edges.请一定要检查自己的立场,我们不希望看到模糊的边缘。

Step 3232步

Add following layer styles.新增以下图层样式。

Step 3333步

Draw a black triangle on top of the button.上绘制一个按钮的顶部的黑色三角形。

Add Drop Shadow with following settings.加入阴影与以下设置。

Step 3434步

Repeat the process to create more buttons.重复该过程,创造更多的按钮。

Step 3535步

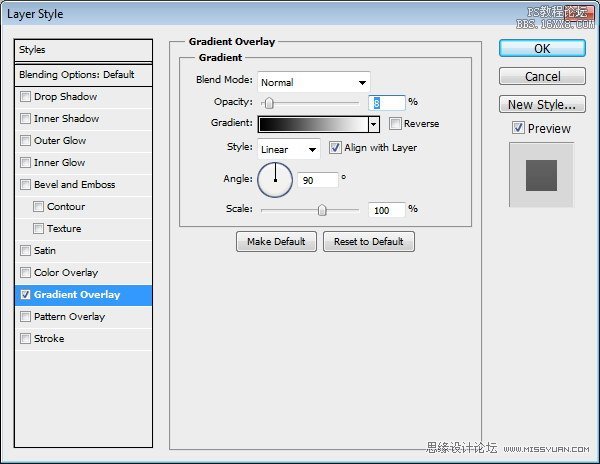
Create button background made from two overlapping rounded rectangle.从创建按钮背景双人重叠圆角矩形。

Add following layer styles.新增以下图层样式。
Step 3636步

Let's step back again and take a look at the design in 100% view.让我们回过头再看看在100%视图设计看看。

We need to make sure that there is no blurry spots.我们必须确保没有任何模糊的斑点。

Step 37: Total Time Track步骤37:总时间的轨迹

Create a long rounded rectangle.创建一个圆角矩形长。

Add this following layer styles.下面的图层样式添加此。

Step 38步骤38

Duplicate layer shape we have just created and add these layer styles.复制图层的形状,我们刚刚创建并添加这些图层样式。

Step 3939步

Add layer mask.添加图层蒙版。

Select half of the shape and fill it with black.选择形状的一半,填充黑色。

Step 3939步

Currently, layer styles are applied to the layer mask and they are adding a rounded shape on right end of the shape.目前,图层样式应用到图层蒙版,他们增加了对右端的形状圆的形状。

To remove this, activate Layer Mask Hides Effects from layer style dialog box.要删除此,激活图层蒙版隐藏的图层样式对话框中的影响。

Step 4040步

You can see the difference below.你可以看到下面的差别。

The effect from layer style is now hidden by the layer mask.从图层样式效果现在隐藏图层蒙版。

Step 41第41步

Create bigger rounded rectangle behind the time indicator for its background.创建更大的圆角矩形背景后面的时间指标。

Add this layer style.添加此图层样式。

Step 42步骤42

Create new layer on top of the time indicator background.创建对当时背景上的新指标层。

Paint some highlight and shadow.画一些突出和阴影。

You can see the progress I made below.你可以看到我做了以下的进展。

Step 43: Right Window – Playlist步骤43:右边的窗口 - 播放列表

Create a rounded rectangle and place it on right side behind the main shape.创建一个圆角矩形,将其放在右侧背后的主要形状。

Add following layer styles.新增以下图层样式。
Step 4444步

Create new layer on top of the rounded rectangle shape.对创建圆角矩形形状的顶部新层。

Paint some highlight and shadows.画一些突出和阴影。

Step 4545步

Create some triangles and place them on right side of the shape.创建一些三角形和放置在右侧它们的形状。

Add following layer style.新增以下图层样式。

Step 4646步

Use pencil tool to draw two 1 px line, black and white.使用铅笔工具绘制两个1像素线,黑色和白色。

Set its opacity to 10%.设置其不透明度为10%。

Step 4747步

Add layer mask and paint some parts of the line with black.添加图层蒙版和油漆的部分用黑线。

Below you can see the mask used here.下面你可以看到这里使用的面具。

Step 4848步

Draw a rounded rectangle and add following layer styles.画一个圆角矩形,并添加图层样式如下。

Set Fill layer to 0%.填充层设置为0%。

Step 4949步

Add song titles.新增歌曲冠军。

Set one of the songs to bold to indicate it as an active song.设置的歌曲之一,大胆地表明它作为一个积极的歌曲。

Step 5050步

Add Drop Shadow to give it inset effect.添加阴影,给它插图效果。

Step 5151步

Draw a rounded rectangle.画一个圆角矩形。

Add following layer styles and set its Fill layer to 0%.新增下列图层样式,并设置其填充层为0%。

Step 5252步

Create a plus sign made from two overlapping line shape.创建一个加号线由两个重叠的形状制成。

Set Fill to 0% and add these layer styles.设置填充为0%,并添加这些图层样式。

Step 5353步

Repeat the process to create other buttons.重复该过程,创建其他按钮。

Step 54: Left Window – Player Settings步骤54:左边的窗口 - 玩家设定

Duplicate playlist basic shape.重复播放的基本形状。

Hit Command/Ctrl + T, right click and choose Flip Horizontal.点击命令/按Ctrl + T,右击并选择水平翻转。

Move it to left side.将其移动到左侧。

Step 5555步

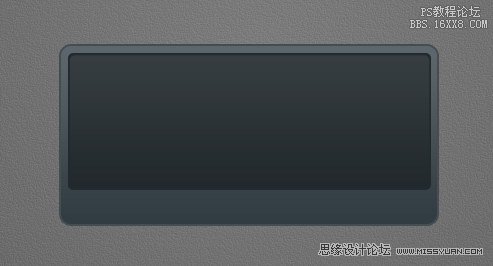
Draw a thin rounded rectangle and add these layer styles.薄画一个圆角矩形,并添加这些图层样式。

Step 5656步

Create a small rounded rectangle for the slider.创建一个滑块的小圆角矩形。

Add following layer styles.新增以下图层样式。
Step 5757步

These layer styles is still not enough to get a convincing 3D appearance.这些图层样式是不够的,还得到一个令人信服的三维外观。

Using pencil tool, we need to add some 1 px line detail on the slider.使用铅笔工具,我们需要添加一些1像素的滑块上线的细节。

See picture below for reference.见下面的图片,以供参考。

Step 5858步

Let's step back and see the result in 100% view.让我们回过头来看看在100%视野的结果。

Step 5959步

Paint some black stripes behind the slider.油漆背后的滑块一些黑色的条纹。

Step 6060步

Let's add label "VOLUME" for the slider.让我们添加了滑块标签“量”。

The font used is Digital-7 .使用的字体是数字7 。

Add Drop Shadow.添加阴影。

Step 61第61步

Create another slider by duplicating previous slider and change its label.创建另一个通过复制以前的滑块滑块并更改其标签。

Step 6262步

Now let's focus on creating balance slider since this is a bit different.现在,让我们的重点放在建立平衡滑块,因为这是一个有点不同。

Add more space between the slider and its label.添加更多的滑块之间的空间和它的标签。

Delete stripes behind the slider.后面的滑块删除条纹。

Use pencil to draw alternating 1 px black and white line.交替使用铅笔画1像素的黑色和白色线。

Set the layer's Opacity to 10%.设置图层的不透明度为10%。

Step 6363步

Add plus (+) and minus (-) character on both ends and add Drop Shadow.添加加号(+)和减号 - 两端的字符,并添加阴影()。

Step 6464步

Hit Command/Ctrl + 1 to see the result at 100% view.点击命令/按Ctrl + 1到看到在100%视野的结果。

Step 65: Highlight步骤65:突出

Our design is simply too clean and unnatural.我们的设计简直是太干净,不自然。

To fix this let's add some highlights.为了解决这个问题让我们添加一些亮点。

Draw a white 1 px line using pencil tool.画一个1像素的白色线使用铅笔工具。

Delete both ends.删除两端。

Step 6666步

Repeat this process to create another highlights.重复此过程来创建另一个亮点。

Step 67: Shadow步骤67:阴影

Hold Command/Ctrl and click basic shape, playlist shape, and player settings shape to create a new selection based on the mp3 player's shape.按住Command / Ctrl键并单击基本形状,音乐形态,形状和球员设置创建一个新的选择的MP3播放器的形状为基础。

Press down arrow a few times to nudge the selection down.按下箭头几次劝选择了。

Step 6868步

Create new layer underneath all other layers.创建新的图层下的所有其他层。

Fill selection with black.选择填充黑色。

Presst Command/Ctrl +Shift + I to deselect.Presst命令/按Ctrl + Shift +我要取消选择。

Soften the shadow by adding Gaussian Blur filter.柔化阴影,加入高斯模糊滤镜。

Step 69: Reflection步骤69:反思

Let's add reflection onto the surface of the mp3 player.让我们添加上的MP3播放器表面反射。

Copy screen path (1).屏幕拷贝路径(1)。

Click Adjustment Layer icon and select Solid Color.调整图层点击图标,选择纯色。

You can use any color here.您在这里可以使用任何颜色。

Create another path covering top part of the screen and set it to Intersect (2).创建另一个路径覆盖屏幕的顶端部分,将其设置为相交(2)。

Change Opacity to 2% and Fill to 0%.改变不透明度为2%,填充为0%。

Step 7070步

Now we'll create another reflection on outter side of the main window.现在我们将创建另一个主窗口outter一边思考。

Create new path covering top part of the main window (1).创建新的路径覆盖在主窗口的顶部部分(1)。

Click Adjustment Layer icon and select Solid Color.调整图层点击图标,选择纯色。

Subtract it with screen shape path (2).减去屏幕形状与路径(2)。

Intersect it with main window shape path (3).窗口的形状与主相交路径(3)条。

Step 7171步

Set Opacity to 23% and Fill to 0%.设置不透明度为23%,填充为0%。

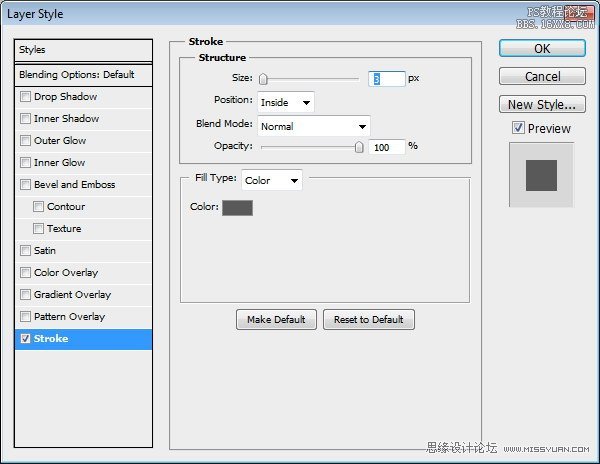
Add following layer styles.新增以下图层样式。
Step 7272步

Below, you can see the difference with and without reflection.下面,你可以看到和无反射的差异。

Step 7373步

Next we will add reflection on left and right window.下一步,我们将增加左,右窗口反映。

Copy left and right window path, set their mode to Add (1).左,右侧窗口中复制的路径,设置其模式,以添加(1)。

Click Adjustment layer icon and select Solid Color.点击图标,并调整图层选择纯色。

Subtract path with the main window path (2).减去路径与主窗口路径(2)。

Create new path covering top part of the interface and set it to Intersect (3).创建新的路径覆盖了界面顶部的一部分,将其设置为相交(3)。

Step 7474步

Set Opacity to 10% and Fill 0%.设置不透明度为10%和填充0%。

Step 7575步

Below, you can the difference with and without reflection.下面,你可以与不反射的差异。

Very subtle but it gives more depth onto the shape.非常微妙,但它提供了更多的形状上的深度。

Step 76: Interface with Closed Playlist and Settings步骤76:接口与播放列表和设置封闭

Put all shapes and layer that create the mp3 player into a group folder.把所有的形状和层,创建成一个组文件夹的MP3播放器。

Duplicate the group and move the left and right window until they are closed.复制本集团及左,右移动窗口,直到它们被关闭。

Step 77: Sharpening步骤77:锐化

We have tried to sharpen every pixel on the interface, we still need to sharpen it again.我们试图增强界面上的每个像素,我们仍然需要再提升。

Create new layer on top of all layer.创建新层上的所有层。

Hit Command/Ctrl + Shift + Alt + E to merge all visible layers.点击命令/按Ctrl + Shift + Alt键+ E来合并所有可见图层。

Now, we have exact duplicate of the image in one single layer.现在,我们已经精确的图像重复一单层。

Step 7878步

Click Filter > Sharpen > Unsharp Mask.点击“滤镜>锐化”> USM锐化。

This filter will sharpen all the pixels on the layer.该过滤器将所有的层锐化的像素。

Final Image最终图像

全教程完,学完记得交作业。如果本教程对您有所帮助,请推荐给你的朋友。

【原创教程 投稿邮箱: ps@16xx8.com】

长按二维码关注我们

关注我们微博:@photoshop教程论坛

推荐教程