PS打造美丽星空
来源:不详
作者:佚名
学习:1598人次
PS打造美丽星空同样,本帖也我是在创意论坛看见的,觉得很棒,就发过来给大家分享.
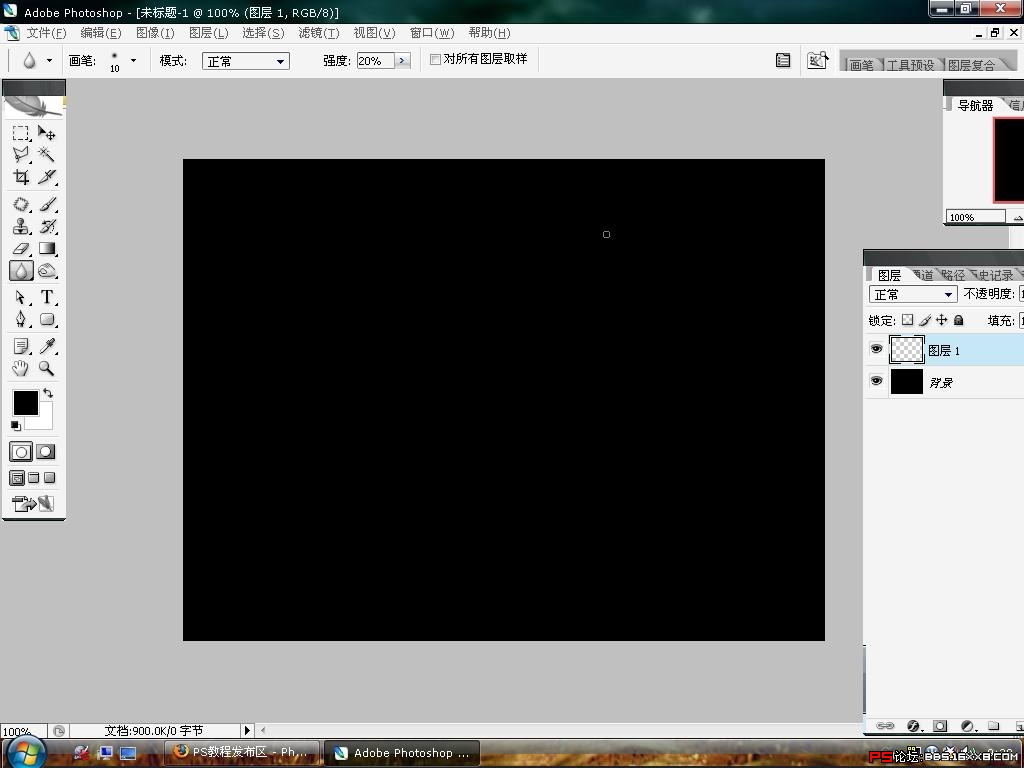
1新建一层画布,想做壁纸的话就1024*768
填充为黑色.

 未命名.JPG (145.36 KB)
2007-9-19 10:26
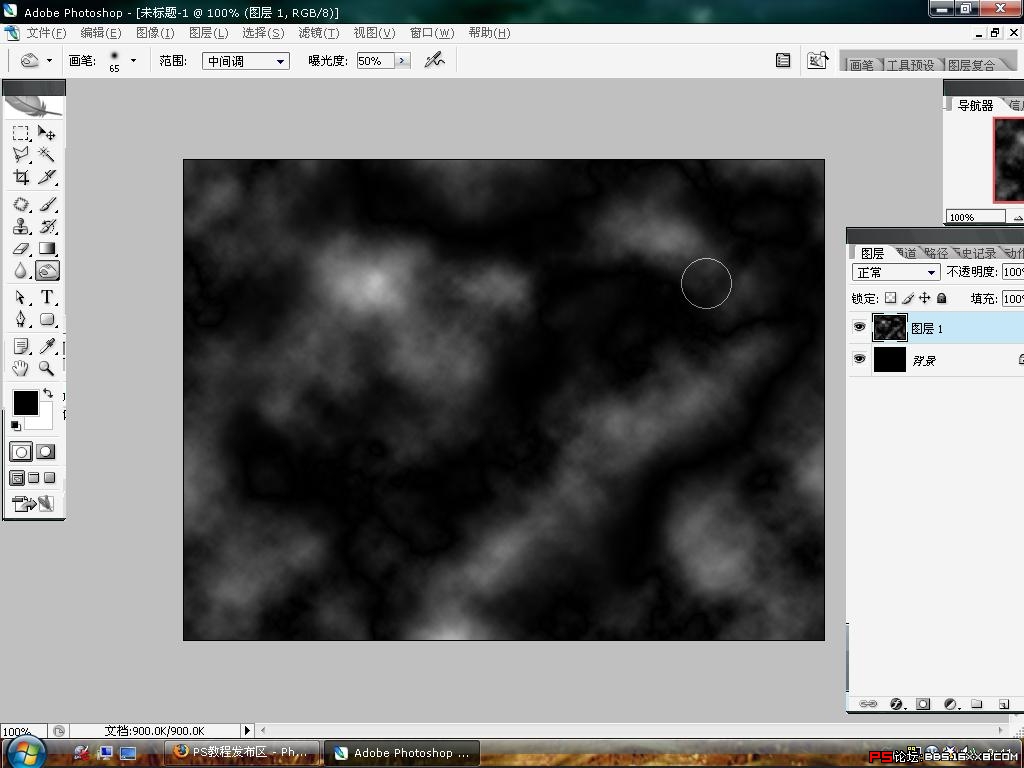
2在建一层.执行-滤镜-渲染-云彩
然后在执行分层云彩.适当用加深工具或者画笔涂抹.
 未命名1.JPG (206.67 KB)
2007-9-19 10:26
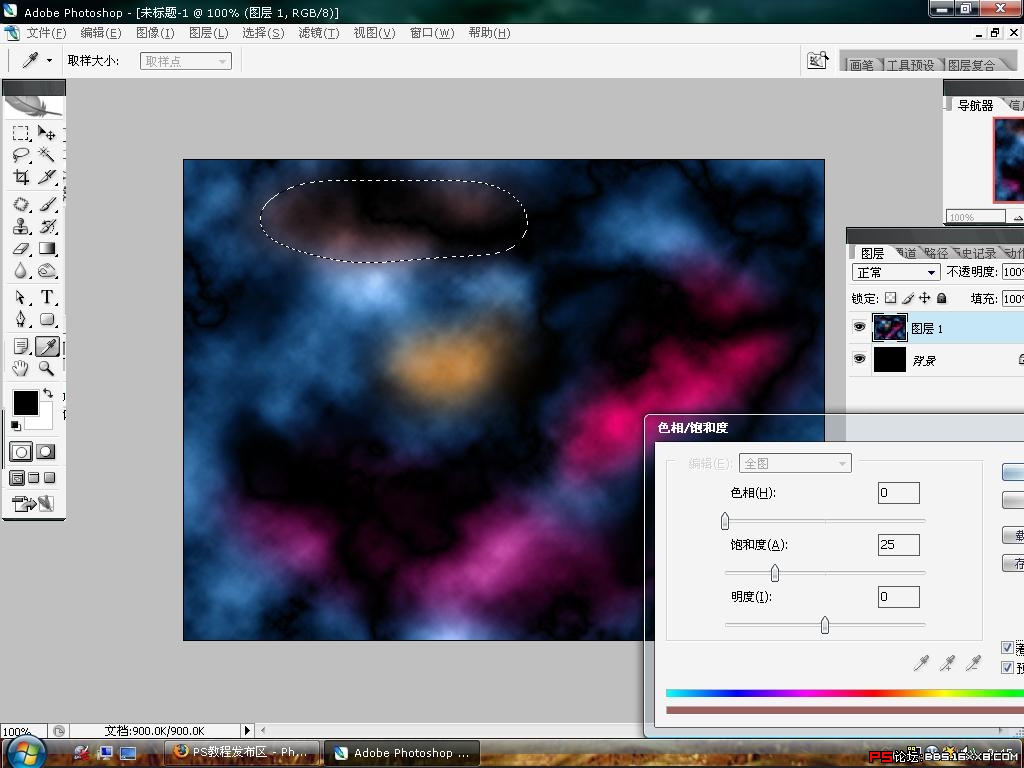
3CTRL+U上色.想云彩漂亮的话,那就多上点别的颜色.
 未命名3.JPG (256.75 KB)
2007-9-19 10:26
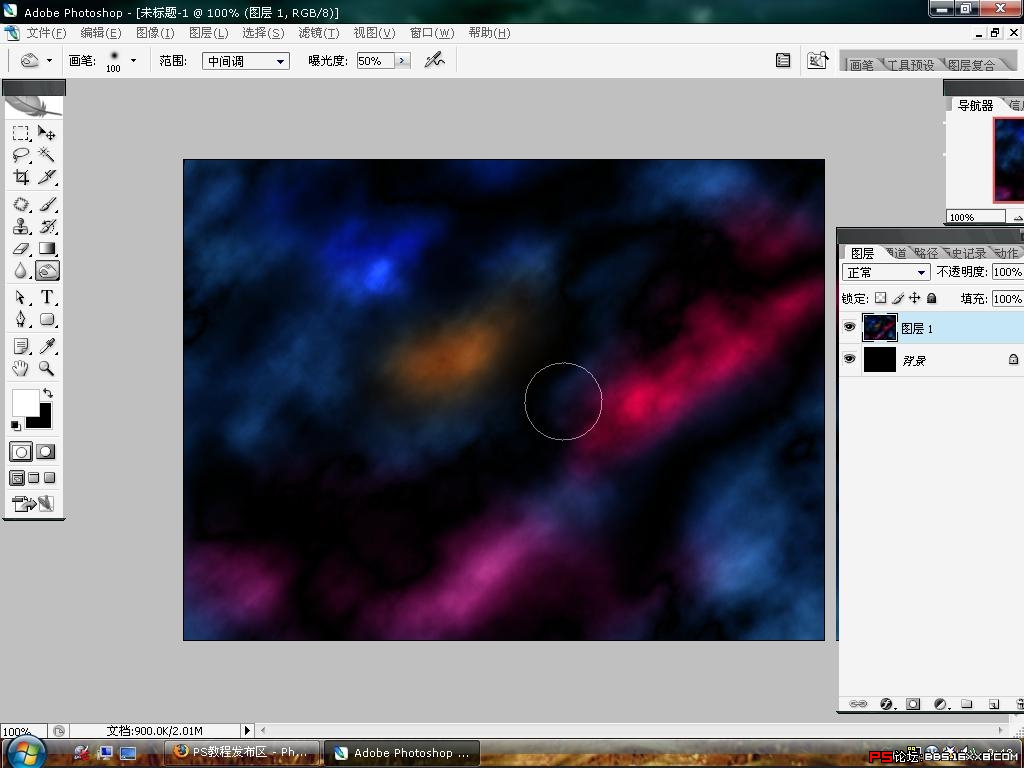
4如果觉得云彩太厚的话,用加深工具或者画笔涂抹.自由变换,拉出纵横感.
 未命名4.JPG (222.59 KB)
2007-9-19 10:26
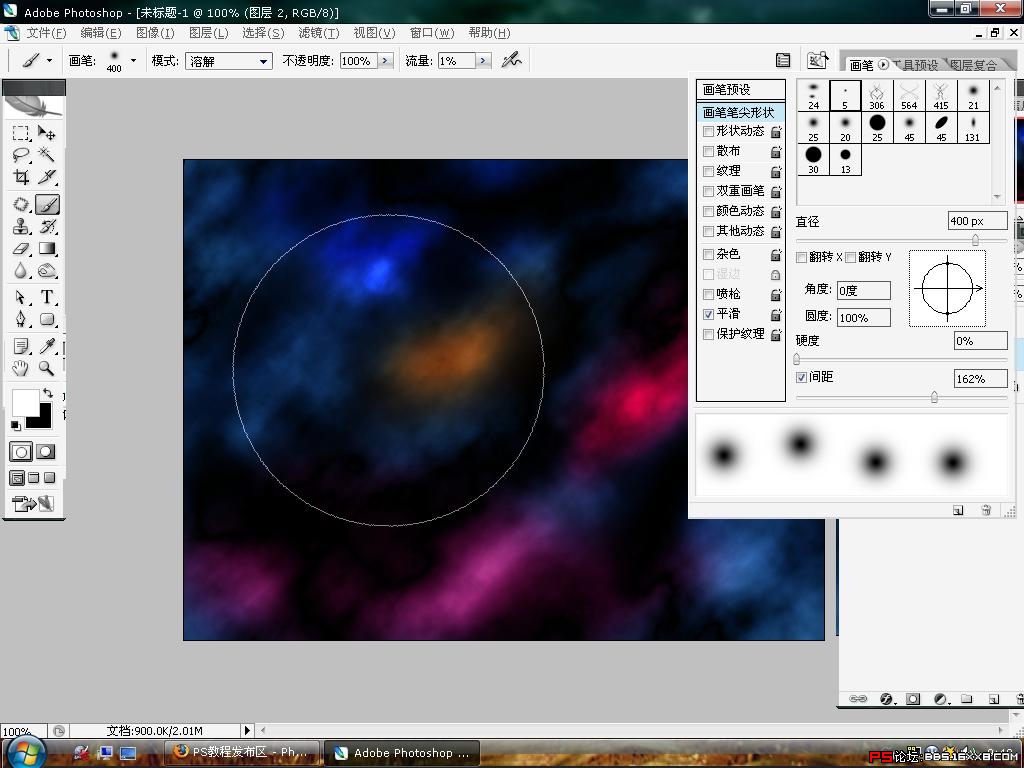
6下面就是做星星了,新建一层,如果你好的星光画笔就直接在上面刷吧,如果没有
就把画笔设置成我下面图的样子
 未命名5.JPG (265.38 KB)
2007-9-19 10:26
 未命名6.JPG (357.14 KB)
2007-9-19 10:26
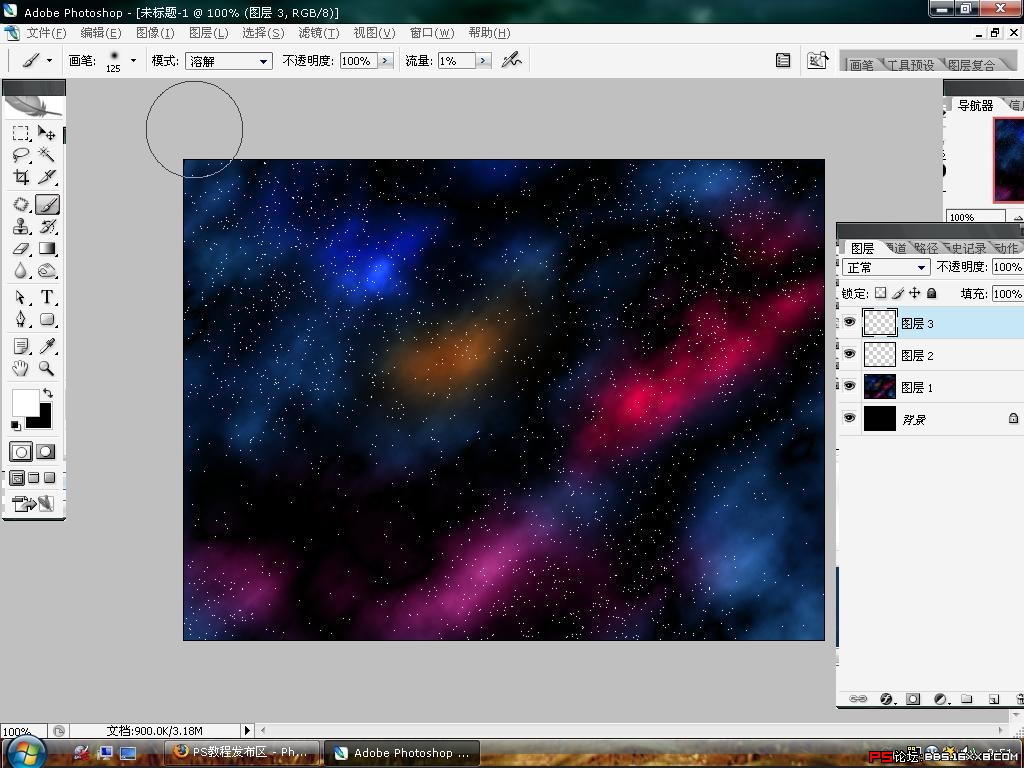
7然后就在上面涂抹,适当的高斯模糊,让星星有种闪烁感.同样用前次我教你们做星球的方法,给星空加上光晕.
就做好了
 未命名7.JPG (351.16 KB)
2007-9-19 10:26
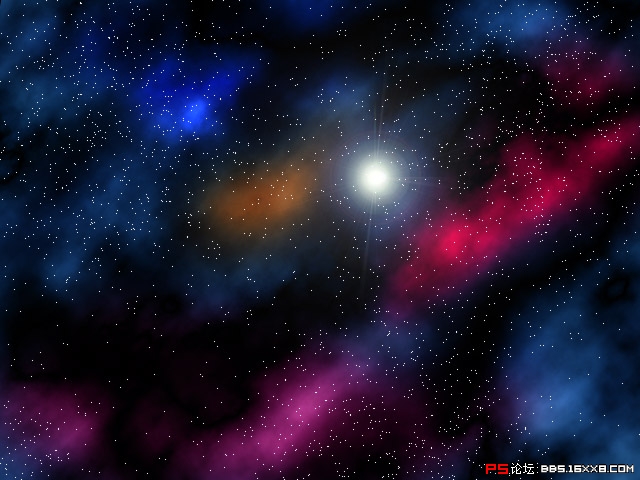
下面就是最终效果.
 未标题8.jpg (222.15 KB)
2007-9-19 10:26
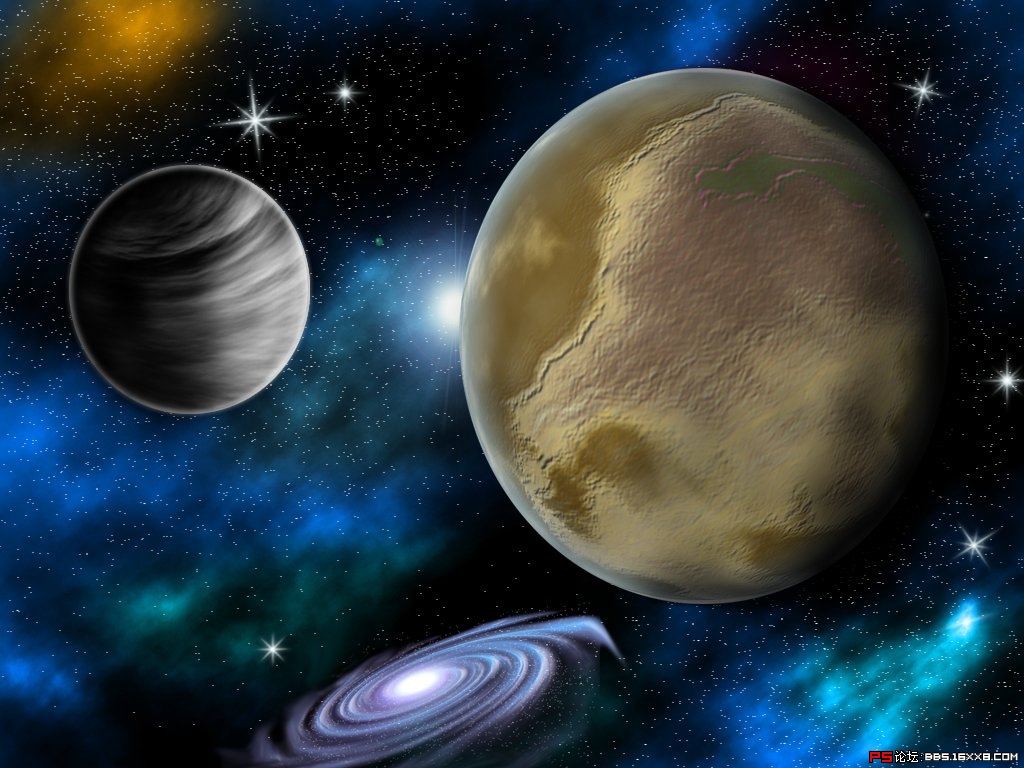
(番外,把上次我教你们做的2种星球,和星系放进上面的星空中.就能做成一副漂亮的星空壁纸.
怎么样,第一次拿自己做的壁纸做桌面,是不是很有成就感?LOOK↓)
 星空2.jpg (414.69 KB)
2007-9-19 10:26
[ 本帖最后由 深海里的孤独 于 2007-9-19 10:35 编辑 ]
1新建一层画布,想做壁纸的话就1024*768
填充为黑色.
未命名.JPG (145.36 KB)2007-9-19 10:26
2在建一层.执行-滤镜-渲染-云彩
然后在执行分层云彩.适当用加深工具或者画笔涂抹.
未命名1.JPG (206.67 KB)2007-9-19 10:26
3CTRL+U上色.想云彩漂亮的话,那就多上点别的颜色.
未命名3.JPG (256.75 KB)2007-9-19 10:26
4如果觉得云彩太厚的话,用加深工具或者画笔涂抹.自由变换,拉出纵横感.
未命名4.JPG (222.59 KB)2007-9-19 10:26
6下面就是做星星了,新建一层,如果你好的星光画笔就直接在上面刷吧,如果没有
就把画笔设置成我下面图的样子
未命名5.JPG (265.38 KB)2007-9-19 10:26
未命名6.JPG (357.14 KB)2007-9-19 10:26
7然后就在上面涂抹,适当的高斯模糊,让星星有种闪烁感.同样用前次我教你们做星球的方法,给星空加上光晕.
就做好了
未命名7.JPG (351.16 KB)2007-9-19 10:26
下面就是最终效果.
未标题8.jpg (222.15 KB)2007-9-19 10:26
(番外,把上次我教你们做的2种星球,和星系放进上面的星空中.就能做成一副漂亮的星空壁纸.
怎么样,第一次拿自己做的壁纸做桌面,是不是很有成就感?LOOK↓)
星空2.jpg (414.69 KB)2007-9-19 10:26
[ 本帖最后由 深海里的孤独 于 2007-9-19 10:35 编辑 ]
学习 · 提示
- 发评论 | 交作业 -
最新评论
深海里的孤独2015-03-25 03:51
CTRL+U没反映啊 你要在当前为英文输入法时,快捷键才有用,你也可以点图象-调整-色相/饱和度> 本帖最后由 深海里的孤独 于 2007-10-8 21:21 编辑 >
本帖最后由 深海里的孤独 于 2007-10-8 21:21 编辑 > 回复
相关教程
关注大神微博加入>>


网友求助,请回答!