Photoshop打造一张简洁漂亮的潮流花纹壁纸
![](../../../1linkpic/86.gif)
本教程介绍简单的花纹壁纸的制作方法。用到的素材不多,都是一些简单的潮流元素图形,可以直接用选区及渐变工具做出来。部分需要需要自己下载一些花纹笔刷或其它潮流元素笔刷来完成。
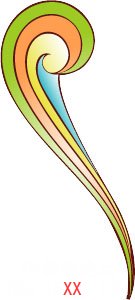
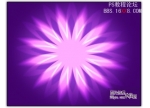
最终效果
![](http://pic.16xx8.com/allimg/110309/0132314H5-0.jpg)
<点小图查看大图>
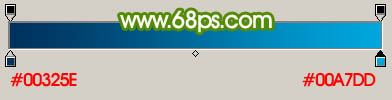
1、新建一个壁纸大小的文档如:1024 * 768像素。选择渐变工具,颜色设置如图1,拉出图2所示的径向渐变。
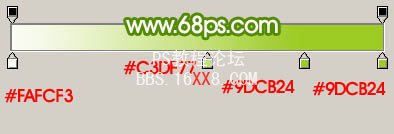
![](http://pic.16xx8.com/allimg/110309/0132314325-1.jpg)
<图1>
![](http://pic.16xx8.com/allimg/110309/0132315314-2.jpg)
<图2>
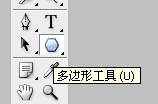
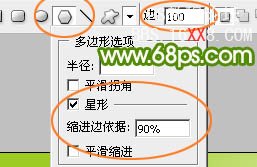
2、在工具箱选择多变性工具,再在属性栏设置相关参数如图4。
![](http://pic.16xx8.com/allimg/110309/01323114L-3.jpg)
<图3>
![](http://pic.16xx8.com/allimg/110309/0132312612-4.jpg)
<图4>
3、把前景颜色设置白色,适当把画布缩小比例,然后用多边形工具拉出图5所示的图形,栅格化图层后效果如图6。
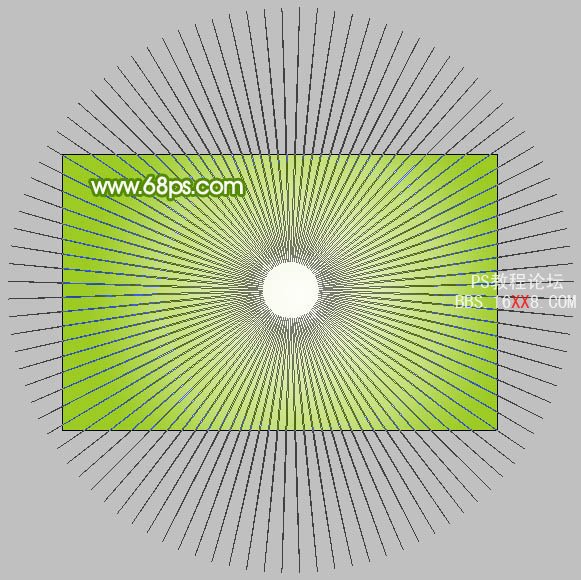
![](http://pic.16xx8.com/allimg/110309/0132312Q0-5.jpg)
<图5>
![](http://pic.16xx8.com/allimg/110309/0132316229-6.jpg)
<图6>
4、打开图7所示的花纹素材,用魔术棒抠出选区填充颜色:#FF5700,拖进来适当放好位置效果如图8。
![](http://pic.16xx8.com/allimg/110309/013231K14-7.jpg)
<点小图查看大图 图7>
![](http://pic.16xx8.com/allimg/110309/013231D28-8.jpg)
<图8>
4、新建一个图层,用钢笔勾出图9所示的选区,拉上图10所示的线性渐变色。再用同样的方法制作其它几片小花瓣,如图11。
![](http://pic.16xx8.com/allimg/110309/0132312934-9.jpg)
<图9>
![](http://pic.16xx8.com/allimg/110309/013231O28-10.jpg)
<图10>
![](http://pic.16xx8.com/allimg/110309/0132314T2-11.jpg)
<图11>
5、新建一个图层,用钢笔勾出花瓣边缘高光部分填充白色,如图12,再制作底部花纹及中心的高光部分如图13,14。
![](http://pic.16xx8.com/allimg/110309/0132314532-12.jpg)
<图12>
![](http://pic.16xx8.com/allimg/110309/0132311006-13.jpg)
<图13>
![](http://pic.16xx8.com/allimg/110309/013231J50-14.jpg)
<图14>
6、把做好的花瓣图层合并为一个图层,多复制几个用色相/饱和度调整颜色如图15,16。
![](http://pic.16xx8.com/allimg/110309/013231IJ-15.jpg)
<图15>
![](http://pic.16xx8.com/allimg/110309/01323134T-16.jpg)
<图16>
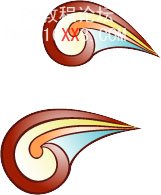
7、同上的方法制作一些潮流元素如图17,18,19,效果如图20。
![](http://pic.16xx8.com/allimg/110309/01323151V-17.jpg)
<图17>
![](http://pic.16xx8.com/allimg/110309/0132312627-18.jpg)
<图18>
![](http://pic.16xx8.com/allimg/110309/0132314U3-19.jpg)
<图19>
![](http://pic.16xx8.com/allimg/110309/0132314a1-20.jpg)
<图20>
8、新建一个图层制作一些小圆圈图形如图21,然后多复制一些适当改变大小和颜色,效果如图22。
![](http://pic.16xx8.com/allimg/110309/01323131L-21.jpg)
<图21>
![](http://pic.16xx8.com/allimg/110309/013231D40-22.jpg)
<图22>
9、在背景图层上面新建一个图层,用喷溅笔刷在右下角部分刷上一些绿色喷溅笔刷,效果如下图。
![](http://pic.16xx8.com/allimg/110309/0132313H0-23.jpg)
<图23>
10、最后再加上一些其它装饰完成最终效果。
![](http://pic.16xx8.com/allimg/110309/0132314H5-0.jpg)
<点小图查看大图>
学习 · 提示
![](http://www.16xx8.com/1diy/imges/noavatar.gif)
相关教程