Photoshop滤镜及路径制作漂亮的火焰效果(3)
本教程大致分为两部分来做。前期是火焰背景部分的制作,这一部分主要是用滤镜来制作,方法跟其它制作火焰的过程类似。后期是一些装饰效果的制作,主要是用描边路径来制作光束效果。
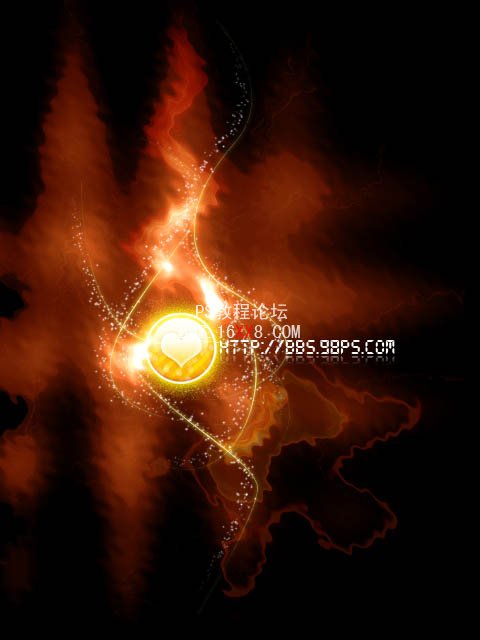
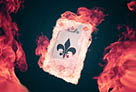
最终效果
![](http://pic.16xx8.com/allimg/110314/14413a3b-0.jpg)
1、新建一个文档,我这里制作成纵向的了,你可以新建一个横向的,遮阳就可以避免以后的来回旋转画布了。
![](http://pic.16xx8.com/allimg/110314/1441395213-1.jpg)
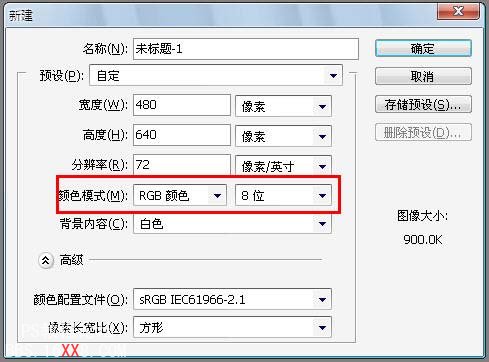
2、ctrl+I把背景色翻转诚黑色,这是为了便于观察效果。按ctrl+J拷贝出一个副本,这是一种良好的习惯!要保持!
![](http://pic.16xx8.com/allimg/110314/144139E18-2.jpg)
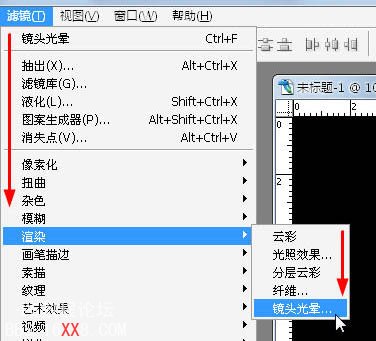
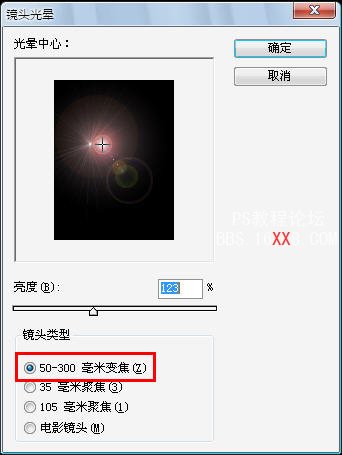
3、执行:滤镜 > 镜头光晕,参数设置如下图。
![](http://pic.16xx8.com/allimg/110314/1441392646-3.jpg)
![](http://pic.16xx8.com/allimg/110314/14413aE4-4.jpg)
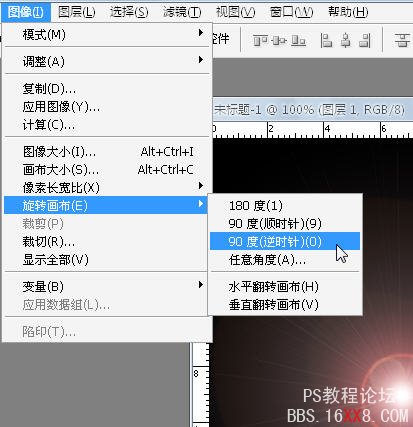
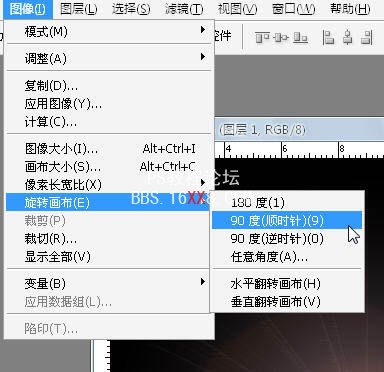
4、选择:图像 > 旋转画布 > 90度(逆时针)旋转画布。
![](http://pic.16xx8.com/allimg/110314/1441392O8-5.jpg)
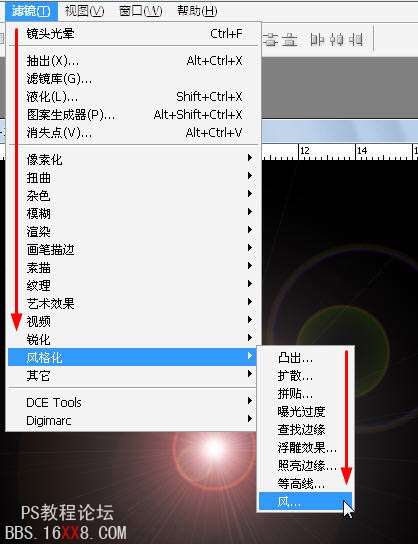
5、对旋转出的画布添加效果,选择:滤镜 > 风格化 > 风,参数默认!
![](http://pic.16xx8.com/allimg/110314/1441395622-6.jpg)
![](http://pic.16xx8.com/allimg/110314/1441392N6-7.jpg)
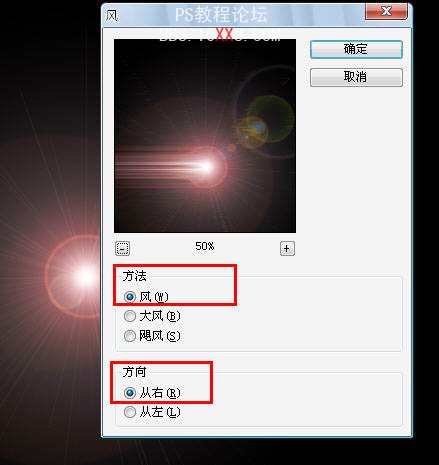
6、按Ctrl+F两次,就可以重复执行2次上次的风滤镜了!这里再把画布旋转回来。
![](http://pic.16xx8.com/allimg/110314/14413a300-8.jpg)
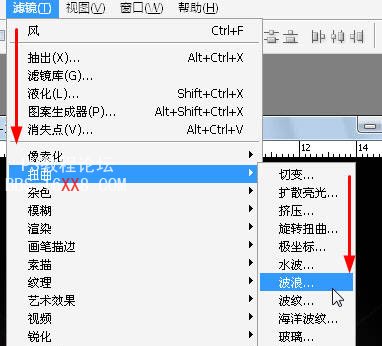
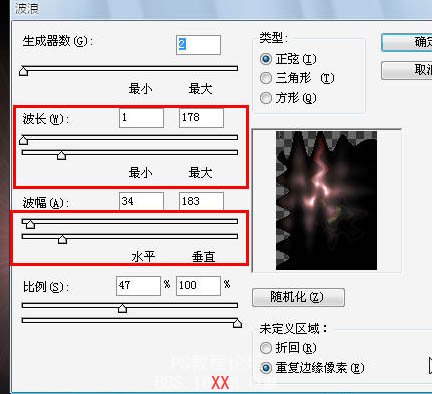
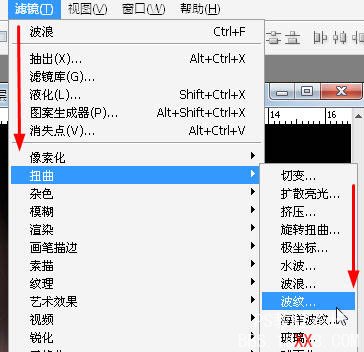
7、选择:滤镜 > 扭曲 > 波浪,参数及效果如下图。
![](http://pic.16xx8.com/allimg/110314/144139A58-9.jpg)
![](http://pic.16xx8.com/allimg/110314/1441392124-10.jpg)
![](http://pic.16xx8.com/allimg/110314/14413955H-11.jpg)
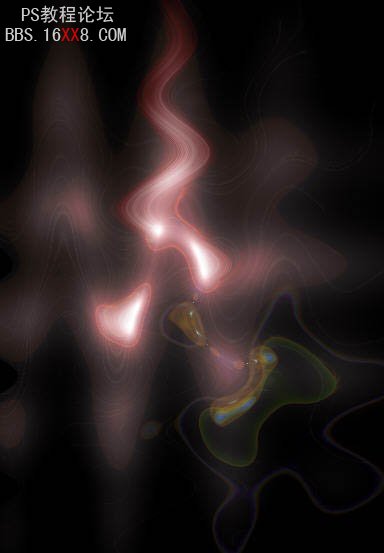
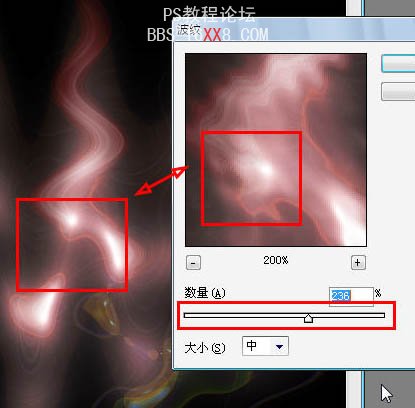
8、仔细观察上图,我们发现火焰前期的细节度不够,边缘太光滑了,说明火焰的火不够大。选择:滤镜 > 扭曲 > 波纹,参数设置如下图。
![](http://pic.16xx8.com/allimg/110314/1441395512-12.jpg)
![](http://pic.16xx8.com/allimg/110314/14413923C-13.jpg)
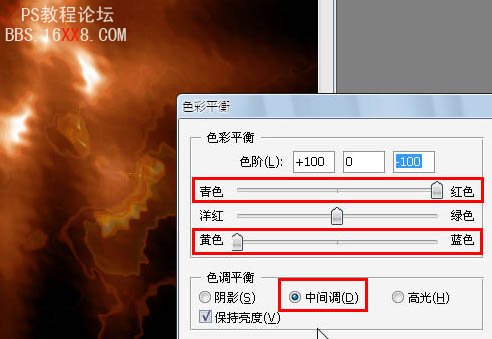
9、按ctrl+B打开色彩平衡,调整中间调的色阶值,参数设置如下图。
![](http://pic.16xx8.com/allimg/110314/1441394I9-14.jpg)
10、上就是制作简单的火焰的效果了,载入图像,开始制作效果应用。把下面的素材图抠出来,复制进来,适当放好位置。
![](http://pic.16xx8.com/allimg/110314/144139A05-15.jpg)
![](http://pic.16xx8.com/allimg/110314/1441395257-16.jpg)
11、调整图层顺序,这个火焰使用的话必须更改混合模式为“滤色”不然会有黑色遮住下面的图层。
![](http://pic.16xx8.com/allimg/110314/1441395506-17.jpg)
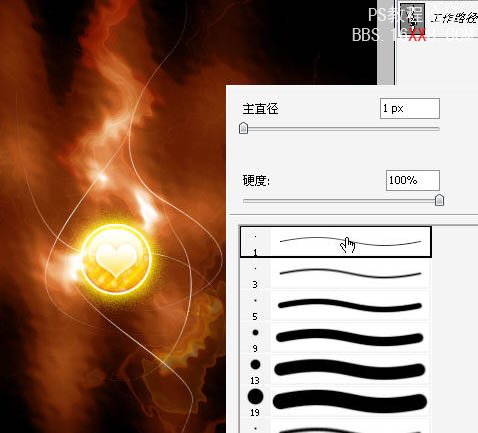
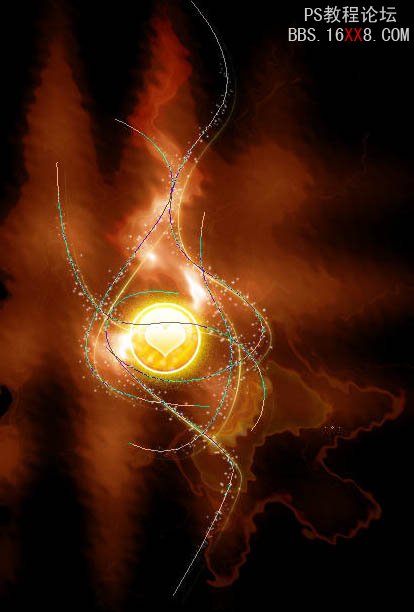
12、添加几根路径,用1像素的画笔描边路径。
![](http://pic.16xx8.com/allimg/110314/1441394931-18.jpg)
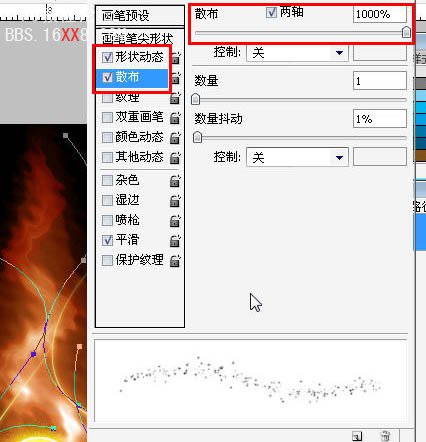
15、选择3像素的笔刷,并打开笔刷设置面板,调整形状动态的大小抖动到最大值,散布里的散布到最大值。这样笔刷就可以随机大小随机散步。
![](http://pic.16xx8.com/allimg/110314/1441394237-19.jpg)
16、继续描边。
![](http://pic.16xx8.com/allimg/110314/14413954R-20.jpg)
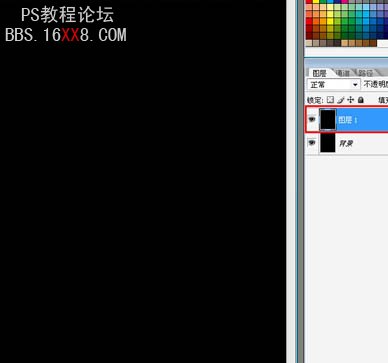
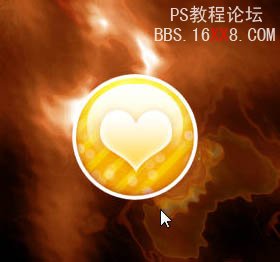
17、添加文字,后并适当调整火焰的色阶就完成效果了。
![](http://pic.16xx8.com/allimg/110314/14413a3b-0.jpg)
学习 · 提示
相关教程