Photoshop制作逼真的卷轴动画方法汇总
本例介绍运用PS制作逼真卷轴动画的几种方法,教程讲解的比较详细,从处理图片素材,绘制卷轴,用画布大小工具裁剪图片到如何制作动画都讲解的比较全面,希望能给对PS制作动画的朋友带来帮助~~
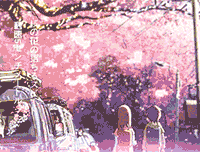
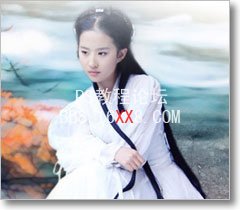
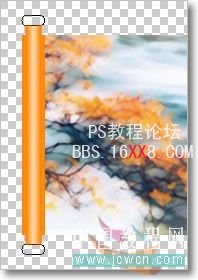
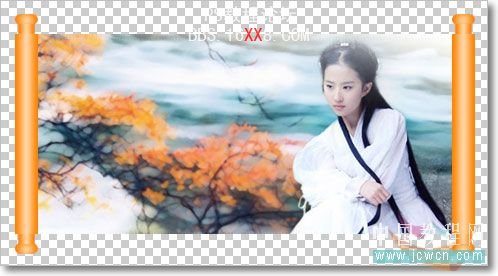
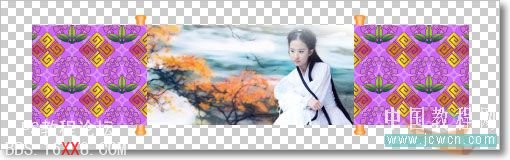
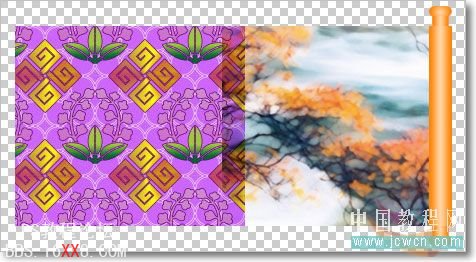
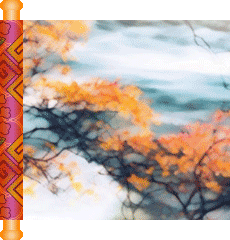
先来看有轴、底纹背景动画的效果:

制作方法:
一. 复制主景
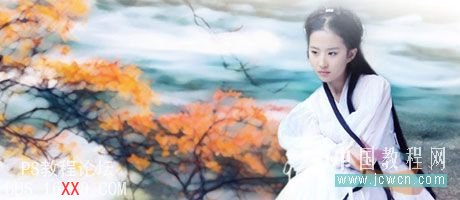
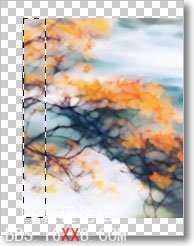
1.1 打开要制作的图片,编辑好画布大小(注意宽度和高度不要过大,因为制作出的动画帧数很多,
文件会非常大的)。按“Ctrl+A”全选,“Ctrl+C”复制。
1.2 新建文件,宽度要比刚编辑好的图片大两倍以上,比如,460px要设置到1000px左右;高度也要大的点,比如,
200px要设置到300px左右。按 “Ctrl+V”粘贴刚刚复制的图片进去(注意,要粘贴居中,这样才方便制作后的裁剪)。
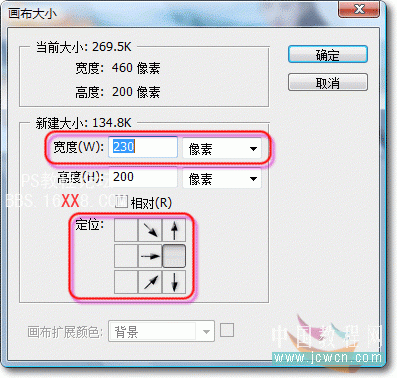
1.3 回到刚编辑的图片,点击菜单“图像——画布大小”,选择像素,设置宽度到原来的1/2,比如,460设置到230,
定位如图。

全选、复制再粘贴到新建文件中,重命名为“主景-左”。再回到刚编辑的图片,
按“Ctrl+Shift+Z”两次取消历史记录,点击菜单“图像——画布大小”设置如图。
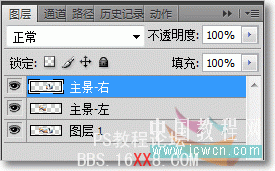
全选、复制再粘贴到新建文件中,重命名为“主景-右”。移动主景左右两张图与“图层1”图重合,如示意图。
先保存一个备份文件“备份1.psd”,后面的例子会用到。
二. 绘制轴
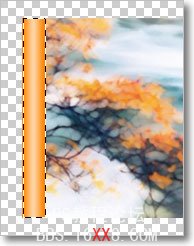
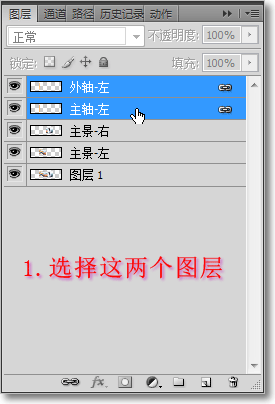
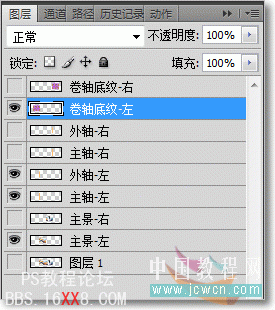
2.1 新建图层重命名为“外轴-左”,按住“Ctrl”键点击“主景-左”图层“载入选区”,
选择“矩形选框工具”——“从选区减去”,减去右边的选区,如图。

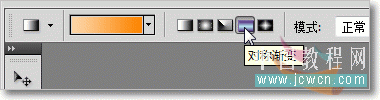
设置好前景色和背景色,选择“渐变工具”——“对称渐变”,对选区进行渐变。
2.2 按“Ctrl+J”复制一层,按“Ctrl+T”自由变换,设置宽度和高度百分比值,如图。

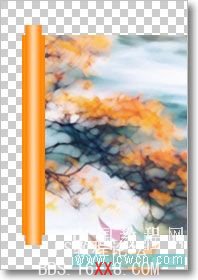
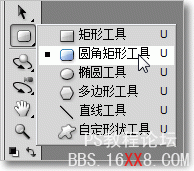
重命名图层为“主轴-左”。选择“圆角矩形工具”并设置选项参数。在主轴上下两端画出路径,
然后建立选区并进行渐变。

2.3 把“外轴-左”图层移到“主轴-左”图层上面,选择“外轴-左”和“主轴-左”图层,点击“链接图层”按钮。

2.4 把“外轴-左”和“主轴-左”拖到创建新图层按钮上复制,并重命名为“外轴-右”和“主轴-右”,如图。
2.5 移动“外轴-右”和“主轴-右”图层到右边如图。
再保存一个备份文件“备份2.psd”,后面的例子会用到。
三. 制作卷轴的底纹背景
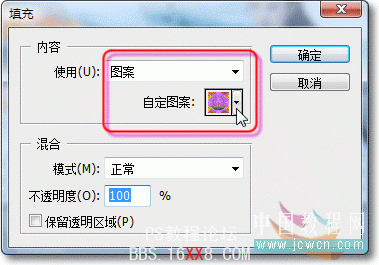
3.1 新建图层重命名为“卷轴底纹-左”,按住“Ctrl”键点击“主景-左”图层“载入选区”。
点击菜单“编辑——填充”填充图案,如图。
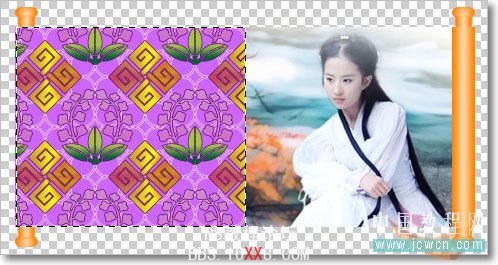
3.2 按“Ctrl+J”复制一层并重命名为“卷轴底纹-右”,点击菜单“编辑——变换——水平翻转”。
选择“移动工具”移动左右卷轴底纹如图。
四. 制作卷轴动画(左边的)
4.1 隐藏所有右边的图层和“图层1”(注,图层1已没有用到了,删除掉也可以)。
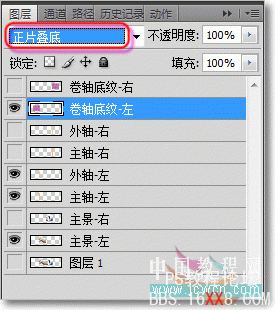
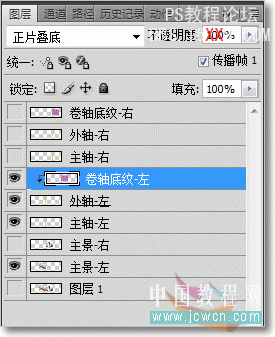
4.2 把“卷轴底纹-左”图层的模式设置为:正片叠底。
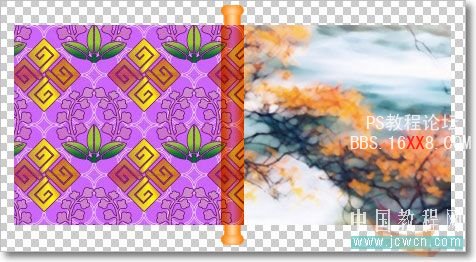
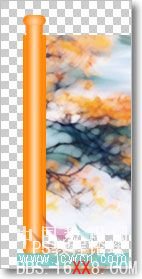
4.3 打开动画面板,复制一帧,移动左轴与“主景-左”右对齐,如图。
移动左卷轴底纹与“外轴-左”左对齐,如图。
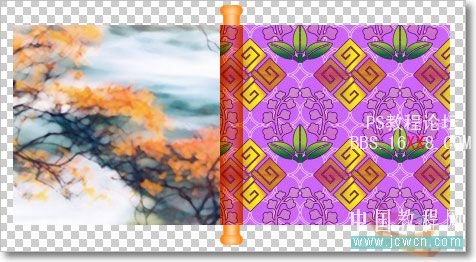
4.4 把“卷轴底纹-左”图层移动到“外轴-左”图层上面,并点击菜单“图层——创建剪贴蒙版”。
〖可以测试下卷轴动画效果,设置过滤动画帧为30帧,如图。〗
制作主景展缩动画(左边的)
4.5 选择第一帧、“主景-左”图层,按住“Ctrl”键点击“主景-左”图层“载入选区”。
(要保持选择“主景-左”图层状态)点击菜单“图层——图层蒙版 ——显示选区”。
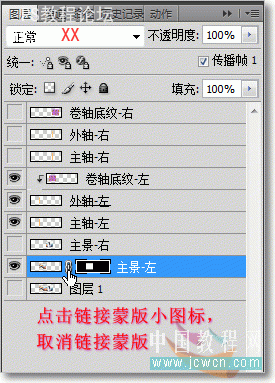
4.6 选择第二帧,取消链接蒙版,选择图层蒙版,选择“移动工具”按“Shift”+“→”或“→”键,
轻移图层蒙版,移到与“卷轴底纹-左”左对齐(就是移到看不见“主景-左”图层)。


到这里,左边的卷轴动画就制作好了。

4.7 制作右边的卷轴动画步骤与制作左边的相同,先显示所有右边的图层;隐藏所有左边的图层再制作。
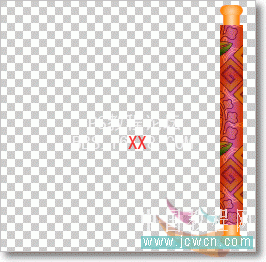
五. 裁剪画布大小方法
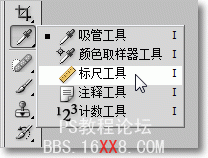
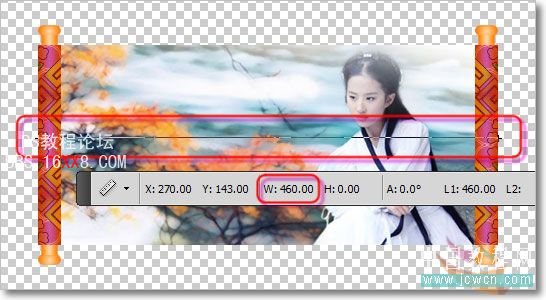
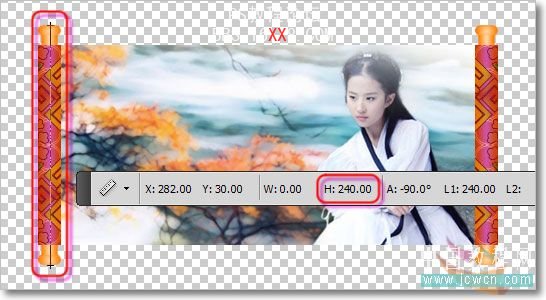
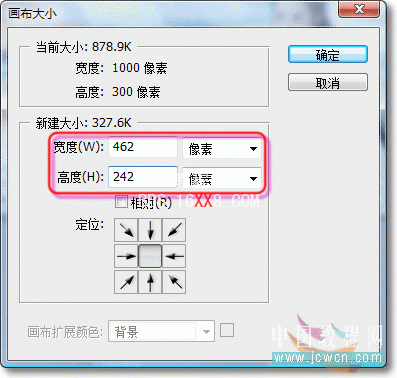
5.1 注意:不能用“裁剪工具”来裁剪!选择第一帧,用“标尺工具”测量出宽度和高度,
再点击菜单“图像——画布大小”输入宽度和高度像素值(要输入比测量出的值大出2像素及以上的整数值)。
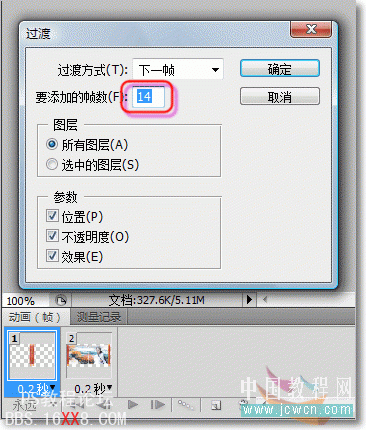
制作动画
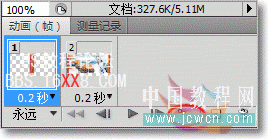
5.2 把第一帧移动到第二帧后面,选择第一帧,点击“过滤动画帧”按钮,输入要添加的帧数值,比如制作30帧的动画
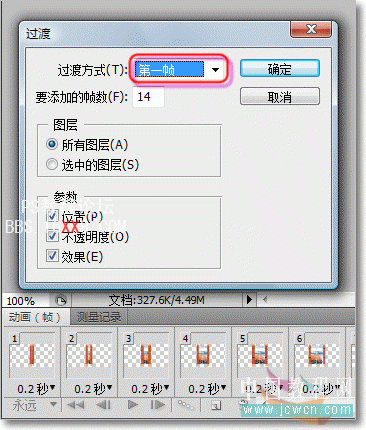
选择最后一帧,再点击“过滤动画帧”按钮,设置过滤方式为第一帧。
选择最后一帧,再点击“过滤动画帧”按钮,设置过滤方式为第一帧。
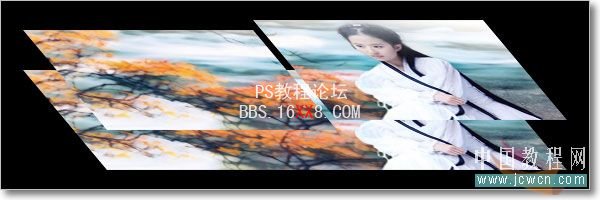
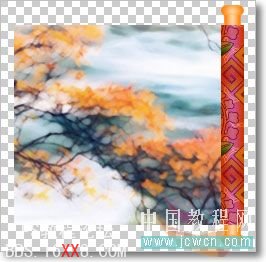
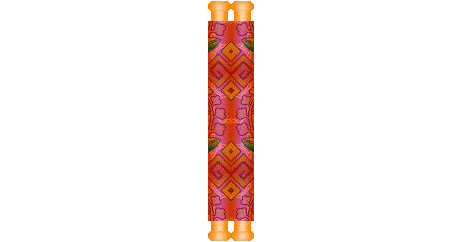
至此有轴、底纹背景动画最终效果如图
学习 · 提示
相关教程