Photoshop实例:美女的梦幻环绕光圈
来源:不详
作者:佚名
学习:225人次
Photoshop实例:美女的梦幻环绕光圈这个其实很简单,只是有些初学者可能还不能融会贯通,做这个只是给大家一个思路,,希望能对大家有所帮助。
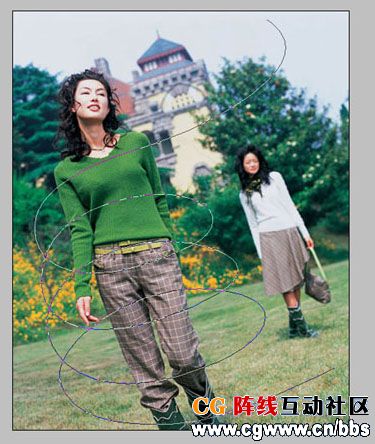
 ![](http://pic.16xx8.com/article/UploadPic/2007/10/26/2007102685112160.jpg)
![](http://pic.16xx8.com/article/UploadPic/2007/10/26/2007102685113908.jpg)
![](http://pic.16xx8.com/article/UploadPic/2007/10/26/2007102685113811.jpg)
![](http://pic.16xx8.com/article/UploadPic/2007/10/26/2007102685114293.jpg)
![](http://pic.16xx8.com/article/UploadPic/2007/10/26/2007102685114796.jpg)
![](http://pic.16xx8.com/article/UploadPic/2007/10/26/2007102685115778.jpg)
![](http://pic.16xx8.com/article/UploadPic/2007/10/26/2007102685115214.jpg)
![](http://pic.16xx8.com/article/UploadPic/2007/10/26/2007102685115850.jpg)
![](http://pic.16xx8.com/article/UploadPic/2007/10/26/2007102685116185.jpg)
![](http://pic.16xx8.com/article/UploadPic/2007/10/26/2007102685116848.jpg)
![](http://pic.16xx8.com/article/UploadPic/2007/10/26/2007102685116728.jpg)
教程如下:
![](http://pic.16xx8.com/article/UploadPic/2007/10/26/2007102685112160.jpg)
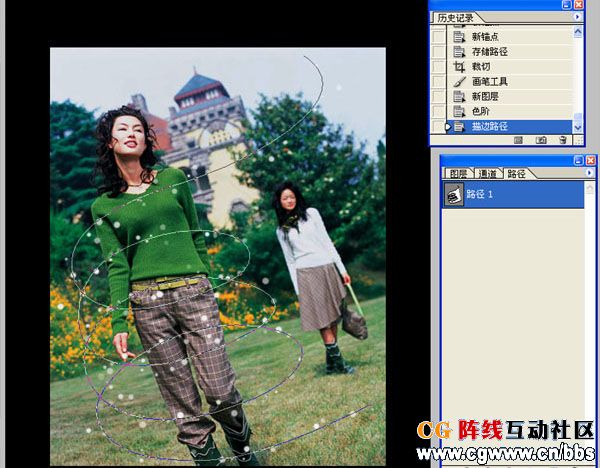
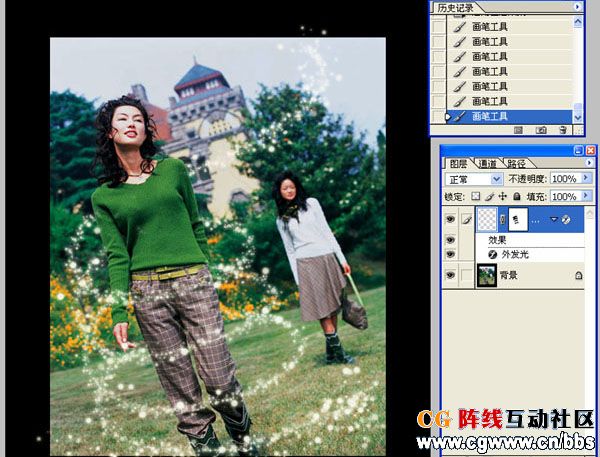
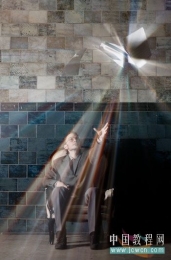
1、打开一副合适的图片,并照着勾划路径。
![](http://pic.16xx8.com/article/UploadPic/2007/10/26/2007102685113908.jpg)
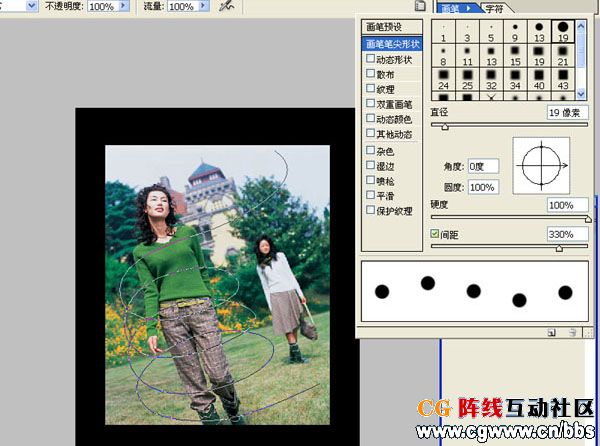
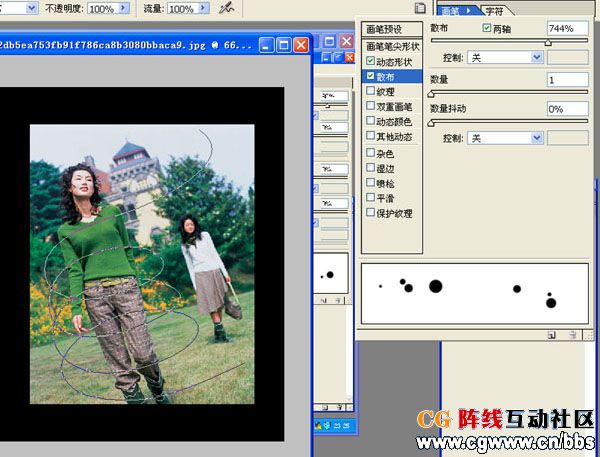
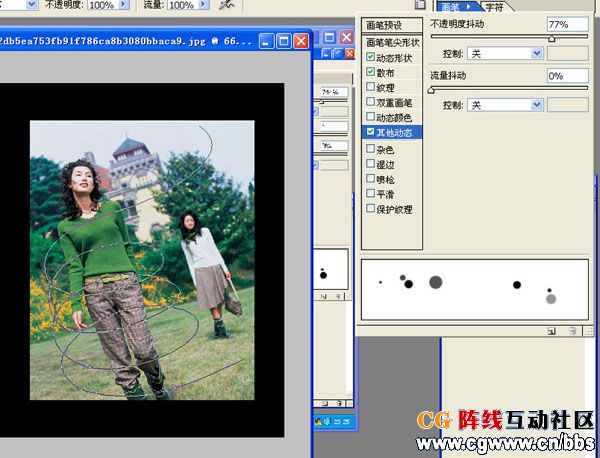
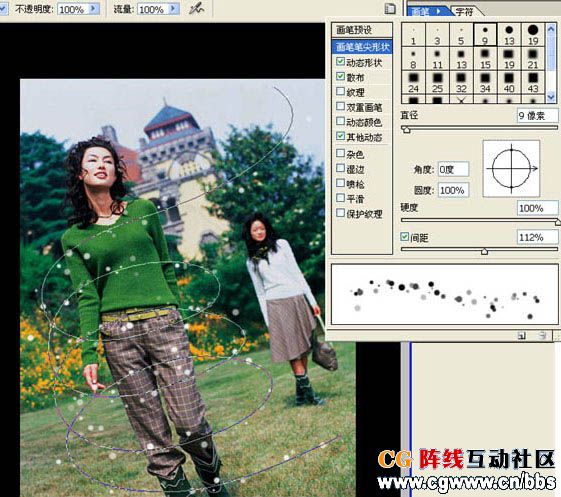
2、开始设置画笔,请大家仔细看看我右上角的画笔设置。
![](http://pic.16xx8.com/article/UploadPic/2007/10/26/2007102685113811.jpg)
3、请大家仔细看看我右上角的画笔设置。
![](http://pic.16xx8.com/article/UploadPic/2007/10/26/2007102685114293.jpg)
4、请大家仔细看看我右上角的画笔设置。
![](http://pic.16xx8.com/article/UploadPic/2007/10/26/2007102685114796.jpg)
5、请大家仔细看看我右上角的画笔设置。
![](http://pic.16xx8.com/article/UploadPic/2007/10/26/2007102685115778.jpg)
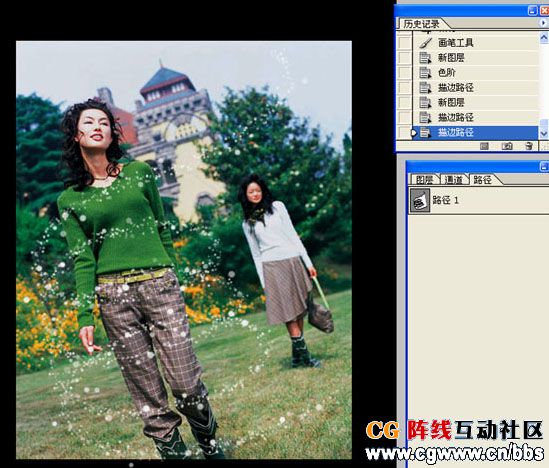
6、新建一层,用刚刚那个路径以及上面定义的画笔描边。
![](http://pic.16xx8.com/article/UploadPic/2007/10/26/2007102685115214.jpg)
7、把刚刚的画笔间距及直径调小点,再描一次。
![](http://pic.16xx8.com/article/UploadPic/2007/10/26/2007102685115850.jpg)
8、描边后得到如下效果:
![](http://pic.16xx8.com/article/UploadPic/2007/10/26/2007102685116185.jpg)
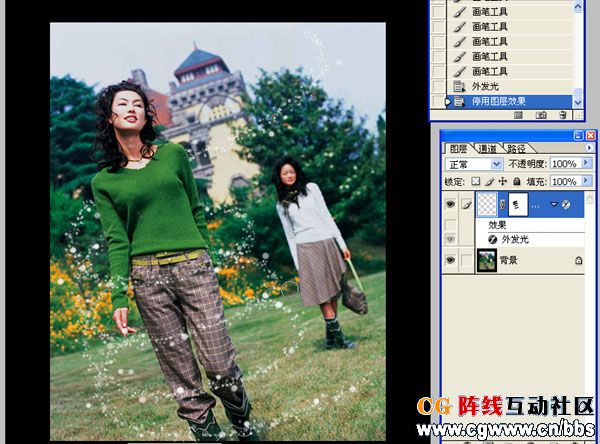
9、再在光点层上创建一个蒙板(当然你也可以用别的方法,呵呵)。
![](http://pic.16xx8.com/article/UploadPic/2007/10/26/2007102685116185.jpg)
10、把不需显示出来的光点擦掉;效果如下:
![](http://pic.16xx8.com/article/UploadPic/2007/10/26/2007102685116848.jpg)
11、添加外发光后得便完成啦。大家随便看看,做得不好请大家见谅。
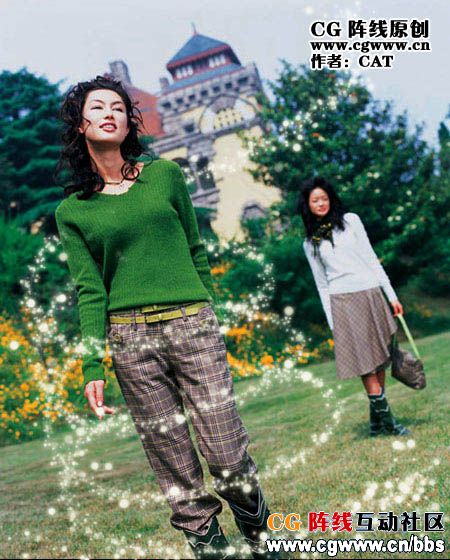
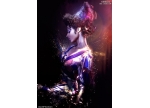
最终效果如下:
![](http://pic.16xx8.com/article/UploadPic/2007/10/26/2007102685116728.jpg)
![](http://bb.a.5d6d.com/userdirs/8/7/chacha163/attachments/day_070725/20070725_a7c1e26e4af909b3bf53b9VGezdsMndj.gif)
学习 · 提示
相关教程
关注大神微博加入>>
网友求助,请回答!