Photoshop合成实例:天使骑士出征史场景合成(10)
来源:未知
作者:admin
学习:16515人次
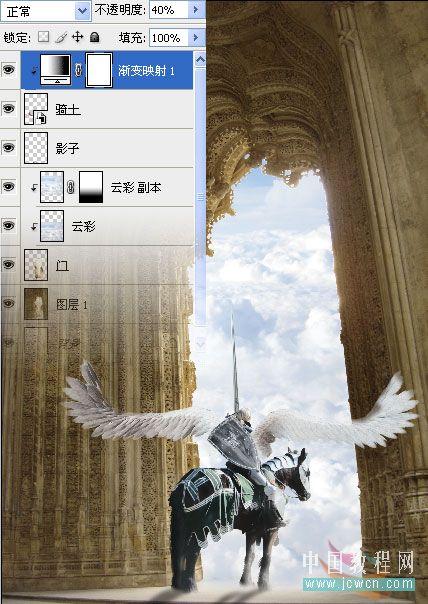
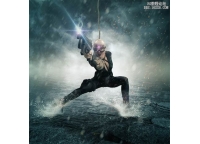
二十七、选择“骑士”图层,添加渐变映射调整层,设定颜色从左至右依次为:#252c2e/#26353c/#aabac2/#d1dde2
二十八、选择渐变映射调整层,Ctrl+Alt+G创建剪贴蒙板,并调整不透明度为40%
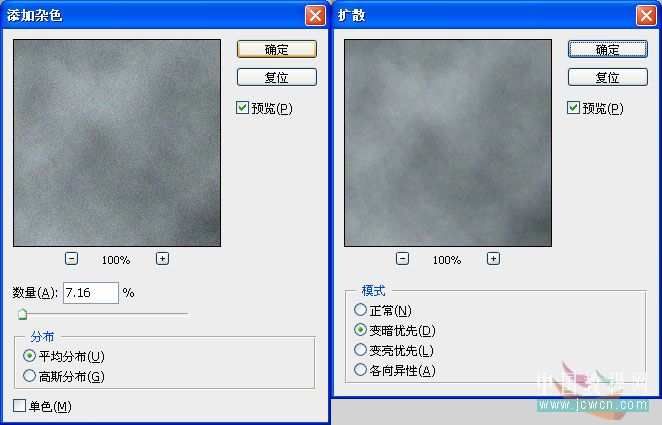
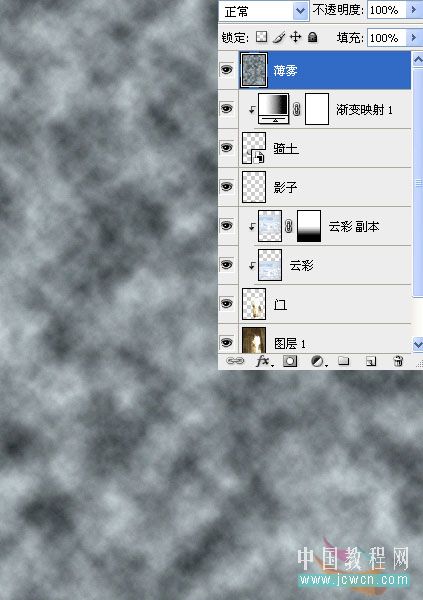
二十九、新建一层,命名:“薄雾”,设置前景色为:#252c2e,背景色为:#d1dde2,执行滤镜——渲染——云彩,按Ctrl+F两到三次,以增加云彩图层的对比度。
执行滤镜——杂色——添加杂色
执行滤镜——杂色——去斑
执行滤镜——风格化——扩散
效果如图:
![](http://pic.16xx8.com/article/UploadPic/2009-6/20096311227288.jpg)
学习 · 提示
- 发评论 | 交作业 -
最新评论
![](http://www.16xx8.com/1diy/imges/noavatar.gif)
Vxxxx2019-03-31 08:05
非常的牛B<阴险>9
回复
![](http://www.16xx8.com/1diy/imges/noavatar.gif)
xxs2018-04-18 06:32
楼主强啊~顶啦 文章来自photoshop论坛(bbs.16xx8.com) 详文参考:http://bbs.16xx8.com/thread-42965-1-2.html
![](http://www.16xx8.com/1diy/imges/noavatar.gif)
相关教程
关注大神微博加入>>
网友求助,请回答!