photoshop如何给黑白照片上色教程
来源:未知
作者:空来风
学习:11438人次
作者佚名 出处:52ps
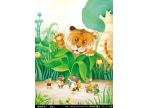
原图
[table=98%,#d3d3d3] [tr] [td]
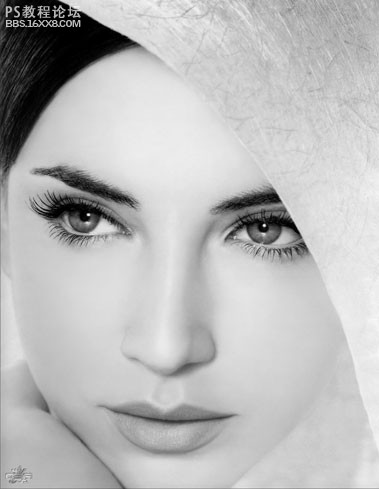
[/td] [/tr] [/table]
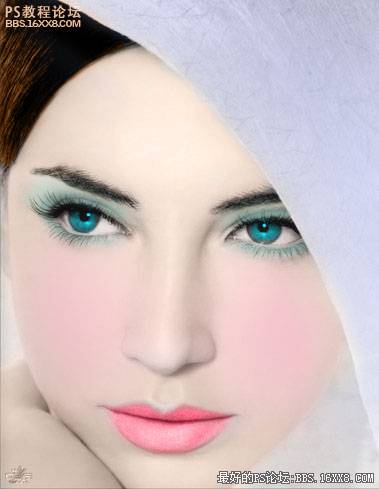
[table=98%,#d3d3d3] [tr] [td=1,1,680]最终效果[/td] [/tr] [/table]
[table=98%,#d3d3d3] [tr] [td]
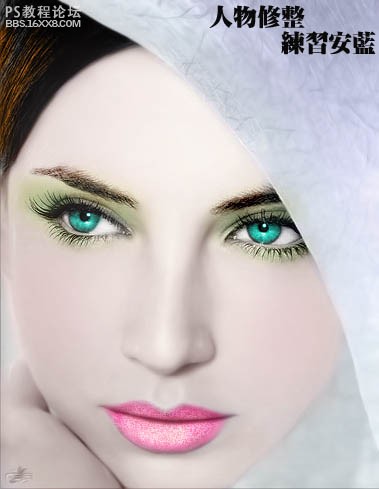
[/td] [/tr] [/table][table=98%] [tr] [td] [/td][/tr][/table]
以下是详细的photoshop教程步骤:
[table=98%,#d3d3d3]
[tr]
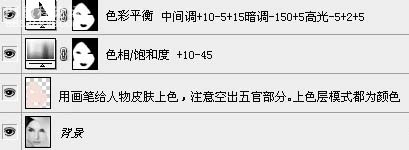
[td=1,1,680]1、打开原图素材,新建一个图层图层混合模式改为“颜色”,把前景颜色设置为:#FADDD9,然后用画笔涂抹人物脸部及皮肤部分,注意空出五官部分。
2、创建色相/饱和度调整图层,数值为:+10/-45/0。
3、创建色彩平衡调整图层:中间调:+10/-5/+15;暗调:-5/+2/+5。 [/td]
[/tr]
[/table]
[table=98%,#d3d3d3]
[tr]
[td]
[/td]
[/tr]
[/table]
[table=98%,#d3d3d3]
[tr]
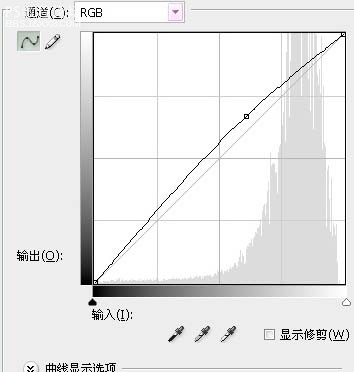
[td]4、分别创建曲线和可选颜色调整图层,参数设置如下图。 [/td]
[/tr]
[/table]
[table=98%,#d3d3d3]
[tr]
[td]

[/td]
[/tr]
[/table]
[table=98%,#d3d3d3]
[tr]
[td]
[/td]
[/tr]
[/table]
[table=98%,#d3d3d3]
[tr]
[td]

[/td]
[/tr]
原图
[table=98%,#d3d3d3] [tr] [td]
[/td] [/tr] [/table]
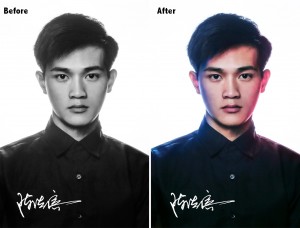
[table=98%,#d3d3d3] [tr] [td=1,1,680]最终效果[/td] [/tr] [/table]
[table=98%,#d3d3d3] [tr] [td]
[/td] [/tr] [/table][table=98%] [tr] [td] [/td][/tr][/table]
以下是详细的photoshop教程步骤:
[table=98%,#d3d3d3]
[tr]
[td=1,1,680]1、打开原图素材,新建一个图层图层混合模式改为“颜色”,把前景颜色设置为:#FADDD9,然后用画笔涂抹人物脸部及皮肤部分,注意空出五官部分。
2、创建色相/饱和度调整图层,数值为:+10/-45/0。
3、创建色彩平衡调整图层:中间调:+10/-5/+15;暗调:-5/+2/+5。 [/td]
[/tr]
[/table]
[table=98%,#d3d3d3]
[tr]
[td]
[/td]
[/tr]
[/table]
[table=98%,#d3d3d3]
[tr]
[td]4、分别创建曲线和可选颜色调整图层,参数设置如下图。 [/td]
[/tr]
[/table]
[table=98%,#d3d3d3]
[tr]
[td]
[/td]
[/tr]
[/table]
[table=98%,#d3d3d3]
[tr]
[td]
[/td]
[/tr]
[/table]
[table=98%,#d3d3d3]
[tr]
[td]
[/td]
[/tr]
学习 · 提示
- 发评论 | 交作业 -
最新评论
ZHONG2015-03-25 02:17
 交作业啦,请高手们指点下。主要是第七步口红亮光制作法和添加图层蒙板不怎么明白,还有更详细些的吗?小女子在此谢过。呵呵.....
 回复
相关教程
关注大神微博加入>>


网友求助,请回答!