photoshop制作人体外发光效果
来源:未知
作者:学photoshop
学习:3474人次
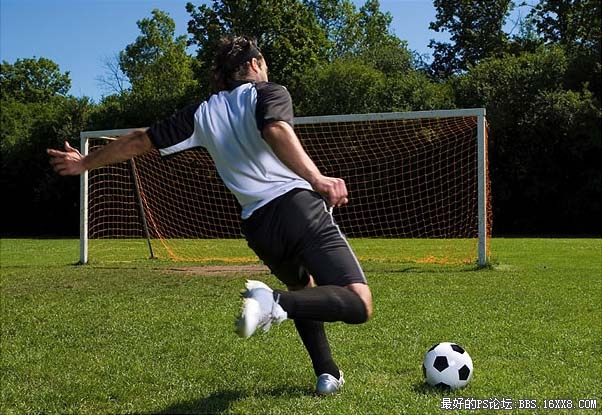
步骤 1、打开素材图片。
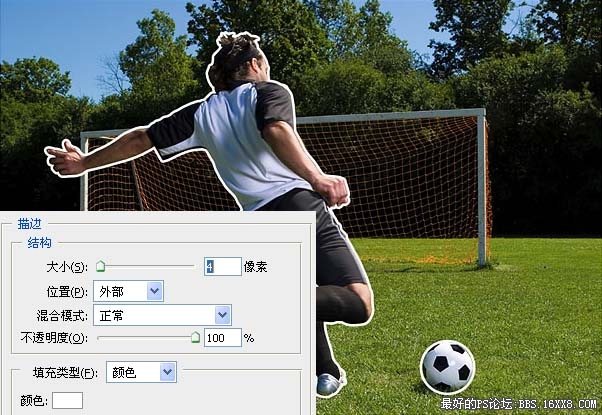
步骤 2、复制图层(Ctrl + J)。利用钢笔工具建立如下选区。

步骤 3、按下Ctrl + J,将选区内图像复制到新图层。图层 图层样式 描边,用白色描边。
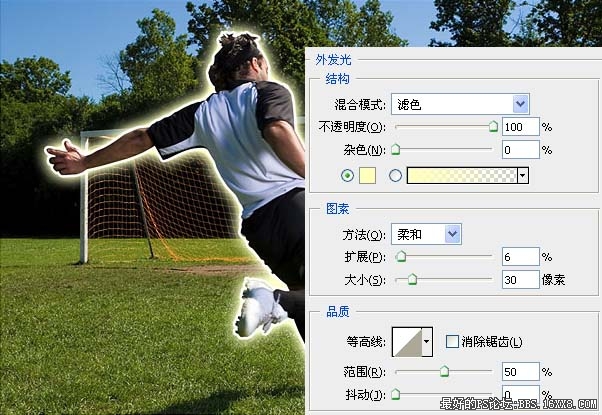
步骤 4、添加外发光效果,图层 图层样式 外发光。
,
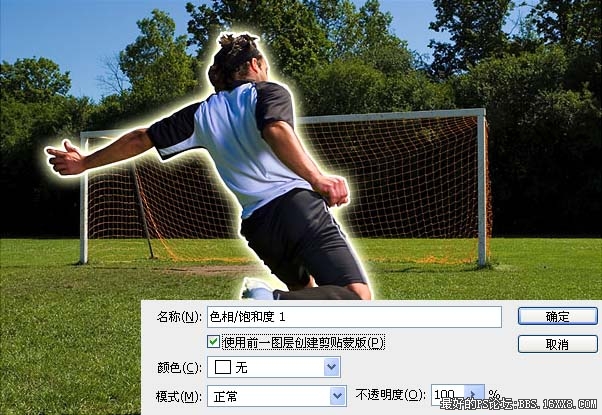
步骤 5、图层 新建调整图层 色相/饱和度,勾选“使用前一图层创建剪贴蒙版”,色相设为0,饱和度设为+35,明度0。
步骤 6、选择图层 1,滤镜 模糊 高斯模糊,模糊半径设为10。

步骤 7、确定图层 1为当前图层,点击图层面板下方“创建新的填充或调整图层”按钮并选择“色相/饱和度”,色相设为0,饱和度设为-25,明度0。
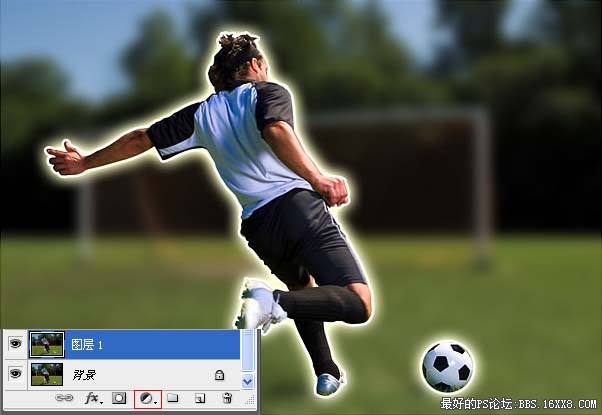
得到最终效果:

步骤 2、复制图层(Ctrl + J)。利用钢笔工具建立如下选区。
步骤 3、按下Ctrl + J,将选区内图像复制到新图层。图层 图层样式 描边,用白色描边。
步骤 4、添加外发光效果,图层 图层样式 外发光。
,
步骤 5、图层 新建调整图层 色相/饱和度,勾选“使用前一图层创建剪贴蒙版”,色相设为0,饱和度设为+35,明度0。
步骤 6、选择图层 1,滤镜 模糊 高斯模糊,模糊半径设为10。
步骤 7、确定图层 1为当前图层,点击图层面板下方“创建新的填充或调整图层”按钮并选择“色相/饱和度”,色相设为0,饱和度设为-25,明度0。
得到最终效果:
学习 · 提示
- 发评论 | 交作业 -
最新评论
tcnRlWzVDn2018-03-18 02:07
学习一下
回复
只为等你131442017-05-28 05:27
淘宝刷单有多厉害呢?我举个例子讲一下吧。有次看了一款充气娃娃,评论里有的说“是正品,质量很好”,这也算了,竟然还有的说“给爸妈买的,他们觉得都不错点赞”,好吧这也忍了,忍无可忍的是有刷单评论说“味道不错,很好吃”,好吧你赢了,最终让我彻底跪了的评论是“看上去很高大上,朋友们都说好,带出去特有面子!!!”
相关教程
关注大神微博加入>>


网友求助,请回答!