我来说说通道抠图
来源:未知
作者:福特少普ps
学习:9747人次
通道抠图是最常用的一种抠图方法,但有些新手还不太懂,今天我就来说说photoshop通道抠图法

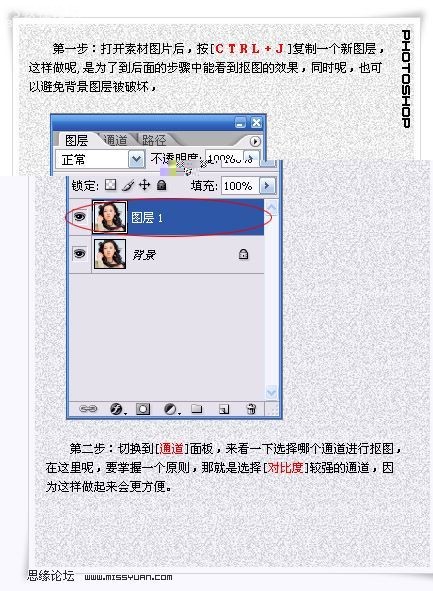
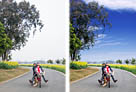
一、首先用PS打开需要进行通道抠图的素材图片,对背景图层执行CTRL+J复制。
二、点击来到通道面板下,观察一下那个通道的明暗反差大一些,在抠图的时候,要在反差较大的那个通道来进行操作。
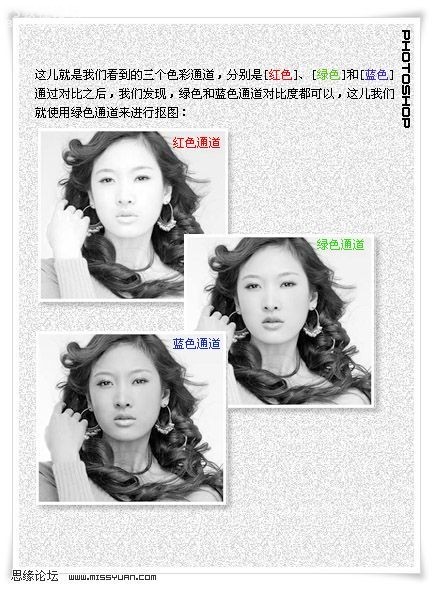
通道比较发现,绿色和蓝色通道都还可以,不过绿色要更好一些,这里我们就选择绿色来进行通道抠图了。
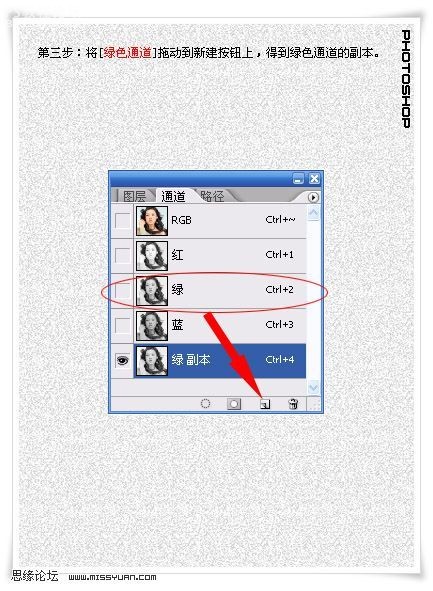
三、把绿色通道拖到新建通道按钮上,得到绿色副本通道。
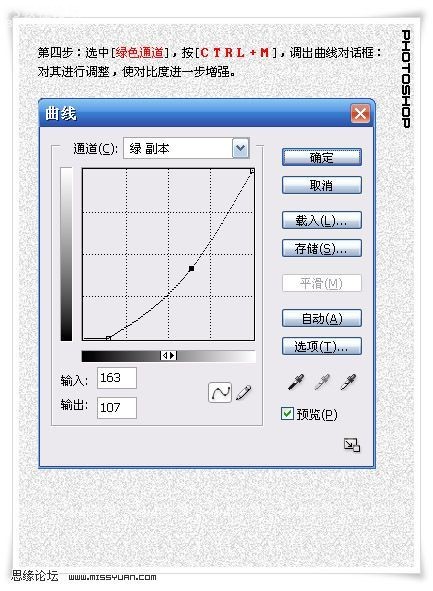
四、选择中绿色副本通道,执行CTRL+M调暗图像,这样使得比对度进一步加深了。
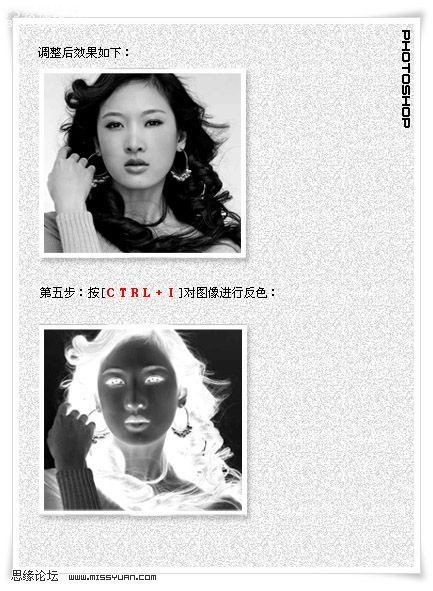
五、对绿色副本通道执行CTRL+I反相处理。
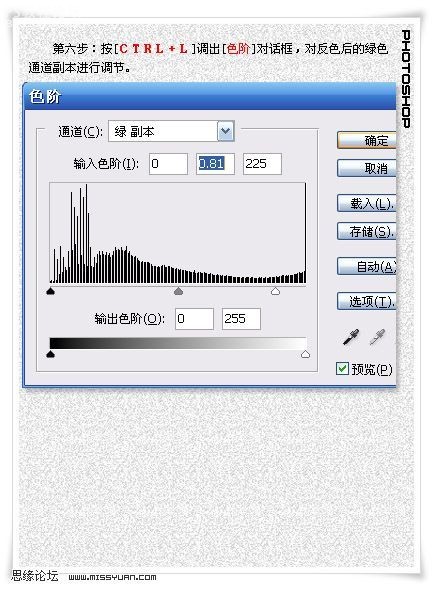
六、执行CTRL+L打开色阶调整面板,对反相后的绿色副本通道进行相应的调节。
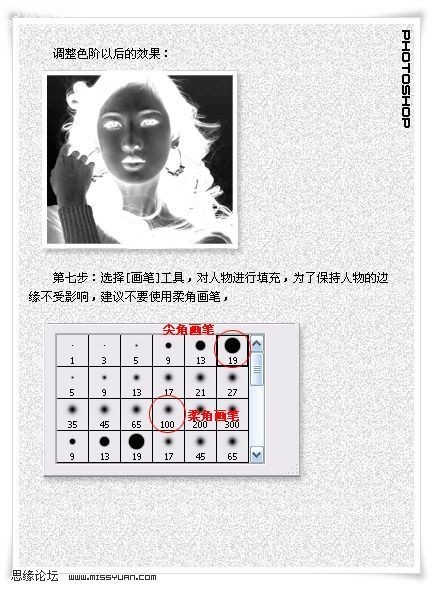
七、选择工具栏上的画笔工具,为了保持人物的边缘不受影响,这里我们就选择柔角画笔来对人物进行填充。
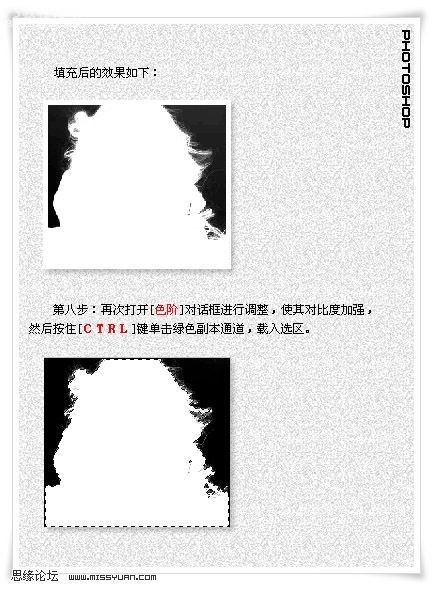
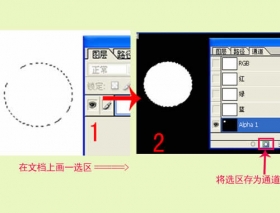
八、再次打开色阶来进行调整,使用图像的对比度进一步加强,按住CTRL键,用鼠标单击绿色副本通道,将其载入选区。
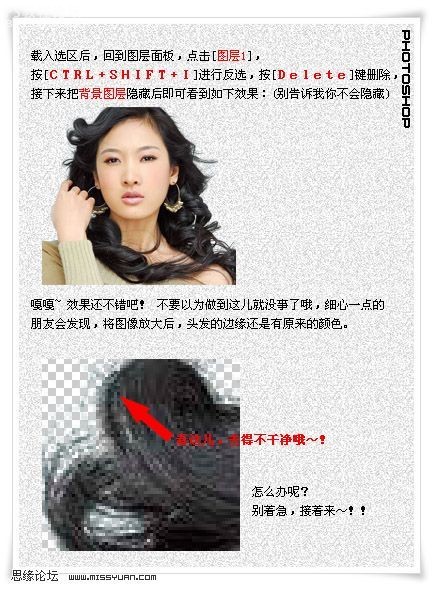
得到选区以后,返回到图层面板,选择图层1,执行CTRL+SHIFT+I反选,再按DELETE键删除选区内容,再把背景层隐藏起来。
这时把图像放大,会发现头发还有点没抠干净,下面继续。。。
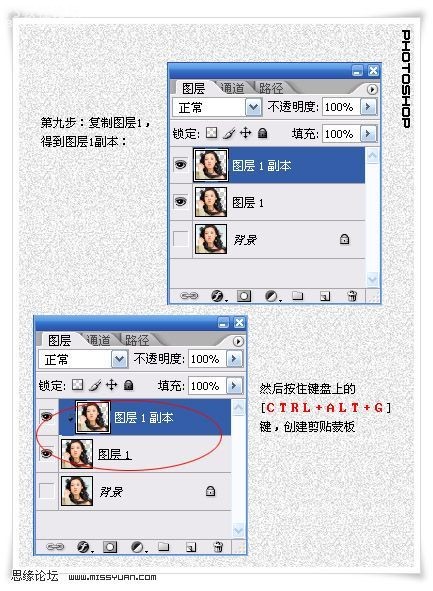
九、对图层1执行CTRL+J复制,得到图层1副本,然后执行CTRL+ALT+G创建剪贴蒙板。
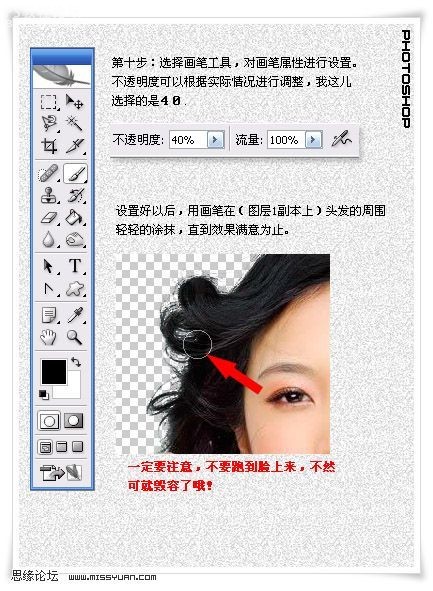
十、再次选择画笔工具,把画笔的不透明度设为40%左右,颜色为黑色,然后在图层1副本上面对头发丝进行涂抹处理。
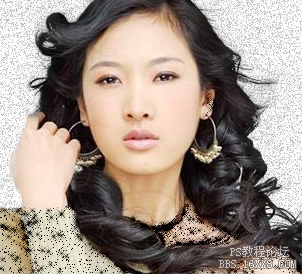
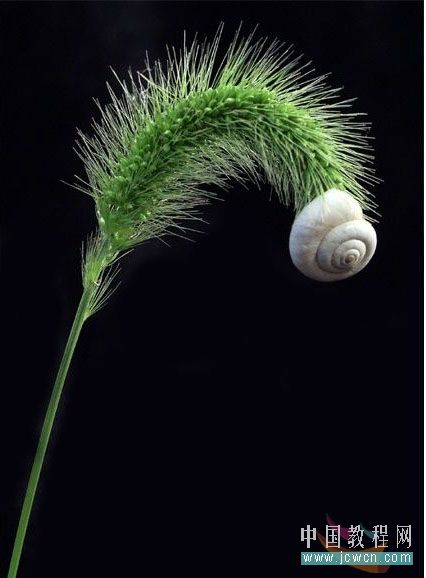
下面是处理完成以后的效果。。。

作者跳舞的灰尘 出处:思缘论坛
一、首先用PS打开需要进行通道抠图的素材图片,对背景图层执行CTRL+J复制。
二、点击来到通道面板下,观察一下那个通道的明暗反差大一些,在抠图的时候,要在反差较大的那个通道来进行操作。
通道比较发现,绿色和蓝色通道都还可以,不过绿色要更好一些,这里我们就选择绿色来进行通道抠图了。
三、把绿色通道拖到新建通道按钮上,得到绿色副本通道。
四、选择中绿色副本通道,执行CTRL+M调暗图像,这样使得比对度进一步加深了。
五、对绿色副本通道执行CTRL+I反相处理。
六、执行CTRL+L打开色阶调整面板,对反相后的绿色副本通道进行相应的调节。
七、选择工具栏上的画笔工具,为了保持人物的边缘不受影响,这里我们就选择柔角画笔来对人物进行填充。
八、再次打开色阶来进行调整,使用图像的对比度进一步加强,按住CTRL键,用鼠标单击绿色副本通道,将其载入选区。
得到选区以后,返回到图层面板,选择图层1,执行CTRL+SHIFT+I反选,再按DELETE键删除选区内容,再把背景层隐藏起来。
这时把图像放大,会发现头发还有点没抠干净,下面继续。。。
九、对图层1执行CTRL+J复制,得到图层1副本,然后执行CTRL+ALT+G创建剪贴蒙板。
十、再次选择画笔工具,把画笔的不透明度设为40%左右,颜色为黑色,然后在图层1副本上面对头发丝进行涂抹处理。
下面是处理完成以后的效果。。。
作者跳舞的灰尘 出处:思缘论坛
学习 · 提示
相关教程
关注大神微博加入>>


网友求助,请回答!