photoshop花卉鼠绘实例(3)
来源:未知
作者:烟花台
学习:488人次
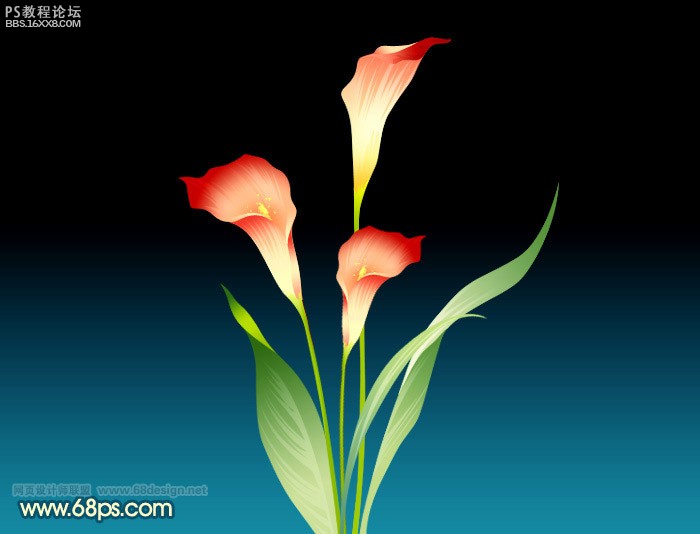
最终效果
1、新建一个800 * 600 像素的文件,选择渐变工具,颜色设置如图1,拉出图2所示的线性渐变。

图1

图2 ,
2、新建一个图层,选择钢笔工具勾出下图所示的选区,然后选择渐变工具,颜色设置如图4,拉出图5所示的线性渐变。
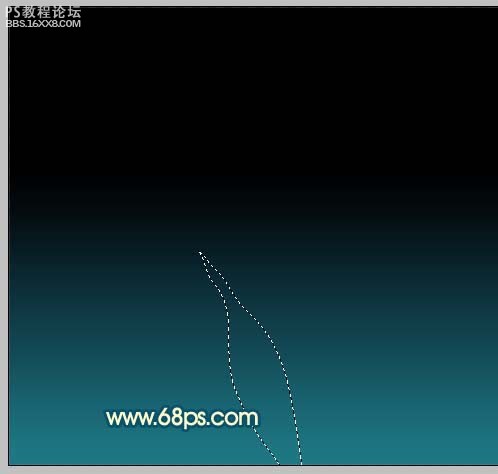
图3
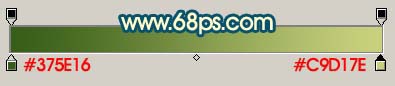
图4

图5
3、把刚才做好的叶子图层复制一层,用钢笔工具勾出下图所示的选区,按Ctrl + Shift + I 反选,按Delete 删除,取消选区后,锁定图层,选择渐变工具,颜色设置如图7,拉出图8所示的渐变。
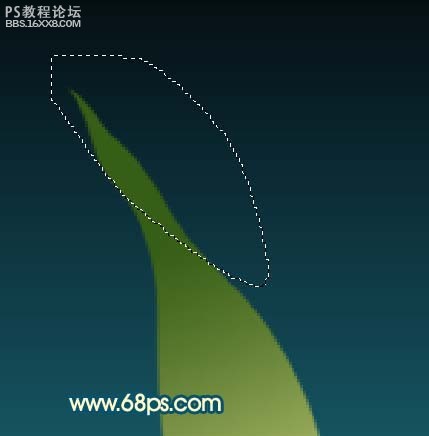
图6
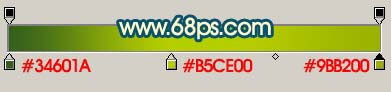
图7

图8 ,
4、新建一个图层,用钢笔勾出叶脉路径,转为选区如图9,填充颜色:#D2DB93,适当调整下不透明度,效果如图10。
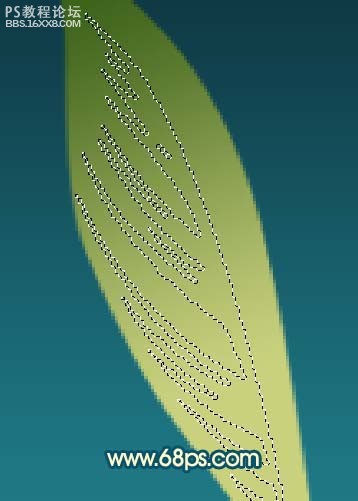
图9

图10
5、新建一个图层,用钢笔工具勾出下图所示的选区,然后选择渐变工具,颜色设置如图12,拉出图13所示的效果。
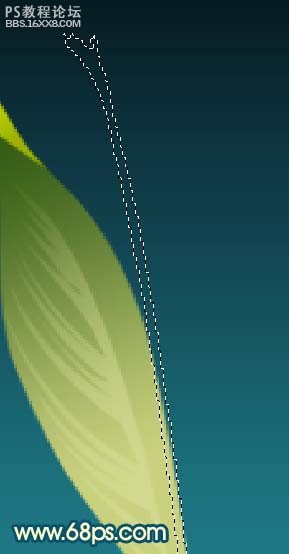
图11
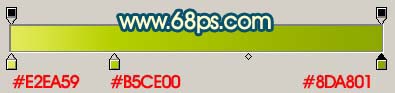
图12

图13 ,
6、在刚才的图层下面新建一个图层,用钢笔工具勾出图14所示的选区,选择渐变工具,颜色设置如图15,拉出图16所示的径向渐变。
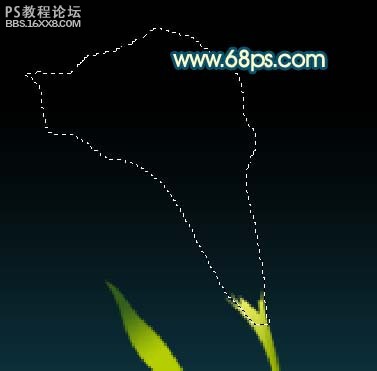
图14
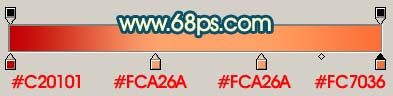
图15

图16
7、新建一个图层,用钢笔工具勾出图17所示的选区,选择渐变工具颜色设置如图18,拉出图19所示的线性渐变。

图17
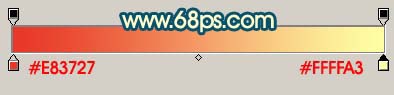
图18

图19 ,
8、同样的方法制作另一边的高光部分。
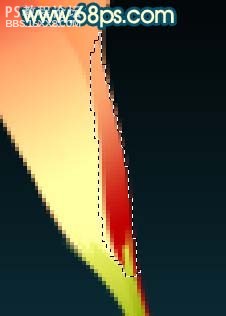
图20
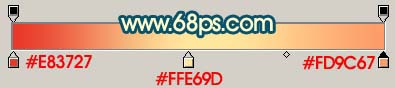
图21

图22
9、新建一个图层,把前景颜色设置为黄色,用大小为1像素的铅笔点上花蕊部分,效果如下图。

图23 ,
10、同样的方法制作其它叶子和花朵,如图24-26。

图24
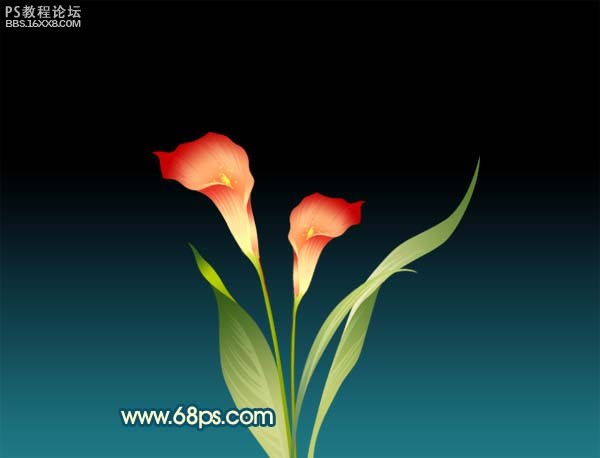
图25
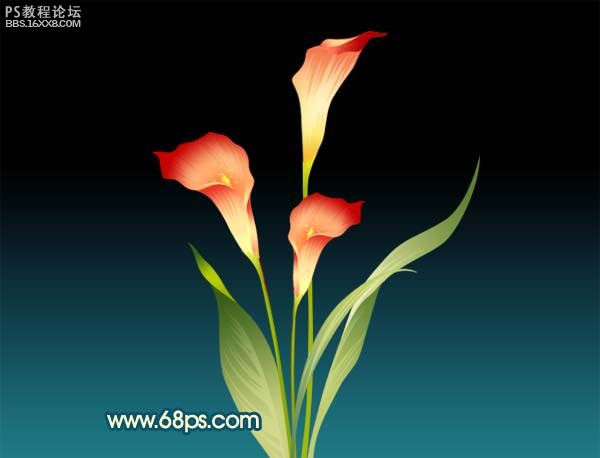
图26
11、最后整体调整一下颜色和细节,完成最终效果。
图27
责任编辑:bbs.16xx8.com
作者: 出处:網絡
1、新建一个800 * 600 像素的文件,选择渐变工具,颜色设置如图1,拉出图2所示的线性渐变。
图1
图2 ,
2、新建一个图层,选择钢笔工具勾出下图所示的选区,然后选择渐变工具,颜色设置如图4,拉出图5所示的线性渐变。
图3
图4
图5
3、把刚才做好的叶子图层复制一层,用钢笔工具勾出下图所示的选区,按Ctrl + Shift + I 反选,按Delete 删除,取消选区后,锁定图层,选择渐变工具,颜色设置如图7,拉出图8所示的渐变。
图6
图7
图8 ,
4、新建一个图层,用钢笔勾出叶脉路径,转为选区如图9,填充颜色:#D2DB93,适当调整下不透明度,效果如图10。
图9
图10
5、新建一个图层,用钢笔工具勾出下图所示的选区,然后选择渐变工具,颜色设置如图12,拉出图13所示的效果。
图11
图12
图13 ,
6、在刚才的图层下面新建一个图层,用钢笔工具勾出图14所示的选区,选择渐变工具,颜色设置如图15,拉出图16所示的径向渐变。
图14
图15
图16
7、新建一个图层,用钢笔工具勾出图17所示的选区,选择渐变工具颜色设置如图18,拉出图19所示的线性渐变。
图17
图18
图19 ,
8、同样的方法制作另一边的高光部分。
图20
图21
图22
9、新建一个图层,把前景颜色设置为黄色,用大小为1像素的铅笔点上花蕊部分,效果如下图。
图23 ,
10、同样的方法制作其它叶子和花朵,如图24-26。
图24
图25
图26
11、最后整体调整一下颜色和细节,完成最终效果。
图27
责任编辑:bbs.16xx8.com
作者: 出处:網絡
学习 · 提示
相关教程
关注大神微博加入>>


网友求助,请回答!