ps制作一颗好看的红色钻石(5)
来源:PS联盟
作者:Sener
学习:7102人次
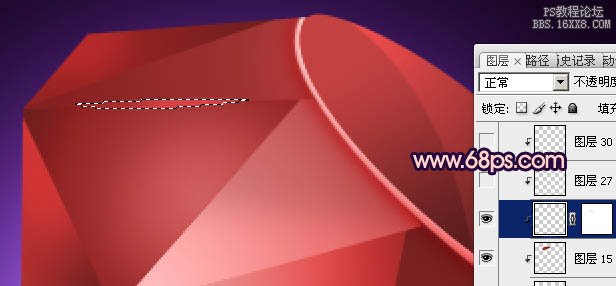
9、再制作各个面相交出的高光。新建一个图层,用钢笔勾出图17所示的选区,填充红色,两端用加深工具稍微涂暗一点。
10、新建一个图层,用钢笔勾出图18所示的选区,填充淡红色,如图18。不要取消选区,把选区向上移动2个像素后按Delete 删除,效果如图19,取消选区后用加深工具把两端加深一点,效果如图20。
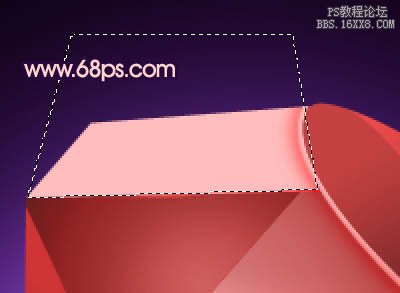
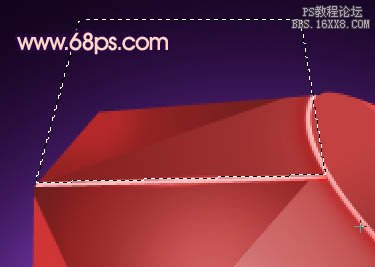

10、新建一个图层,用钢笔勾出图18所示的选区,填充淡红色,如图18。不要取消选区,把选区向上移动2个像素后按Delete 删除,效果如图19,取消选区后用加深工具把两端加深一点,效果如图20。
学习 · 提示
关注大神微博加入>>


网友求助,请回答!