photoshop如何做金色的金属字
来源:未知
作者:空来风
学习:46318人次
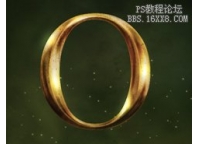
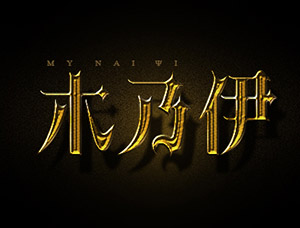
效果图:

首先在photoshop中新建一个大小适当的图像,用工具栏上的文字工具在图像上输入需要的文字,设置好字体和字号,文字颜色为黑色。

双击文字图层,打开文字层的图层样式,选择投影,把结构下的不透明度设为100%,距离为4像素,大小为3像素,其它默认。
再来到外发光样式面板,把结构中的颜色由黄色设为白色,其它都不变。
接着再勾选内发光,把混合模式设为叠加,不透明度为100%,颜色为白色,方法为较柔软,勾选居中,大小为18像素,其余默认。
,还要选择斜面和浮雕样式,把结构中的大小设为10像素,再参考下面设置阴影中的光泽等高线,勾选消除锯齿,暗调模式为颜色减淡,颜色为白色;在勾选下面的等高线,设置等高线,勾选消除锯齿,范围为28%,其它的为默认。
再来到光泽样式面板,把结构下的距离设为3像素,大小为11像素,勾选消除锯齿,取消反相。
下面来设置颜色叠加,把颜色的混合模式设为颜色,颜色为#AE571C深黄色,不透明度为81%。
勾选渐变叠加,渐变的颜色由#3F3F3F到#3F3F3F,其它的都不需要改变。
把图层样式确定以后,你就会发现刚才黑色的文字现在已经变成了金灿灿的文字效果了,在用PS制作这种效果是非常简单的,只需要输入文字以后,调节文字的图层样式就可以达到这种效果。
首先在photoshop中新建一个大小适当的图像,用工具栏上的文字工具在图像上输入需要的文字,设置好字体和字号,文字颜色为黑色。
双击文字图层,打开文字层的图层样式,选择投影,把结构下的不透明度设为100%,距离为4像素,大小为3像素,其它默认。
再来到外发光样式面板,把结构中的颜色由黄色设为白色,其它都不变。
接着再勾选内发光,把混合模式设为叠加,不透明度为100%,颜色为白色,方法为较柔软,勾选居中,大小为18像素,其余默认。
,还要选择斜面和浮雕样式,把结构中的大小设为10像素,再参考下面设置阴影中的光泽等高线,勾选消除锯齿,暗调模式为颜色减淡,颜色为白色;在勾选下面的等高线,设置等高线,勾选消除锯齿,范围为28%,其它的为默认。
再来到光泽样式面板,把结构下的距离设为3像素,大小为11像素,勾选消除锯齿,取消反相。
下面来设置颜色叠加,把颜色的混合模式设为颜色,颜色为#AE571C深黄色,不透明度为81%。
勾选渐变叠加,渐变的颜色由#3F3F3F到#3F3F3F,其它的都不需要改变。
把图层样式确定以后,你就会发现刚才黑色的文字现在已经变成了金灿灿的文字效果了,在用PS制作这种效果是非常简单的,只需要输入文字以后,调节文字的图层样式就可以达到这种效果。
学习 · 提示
相关教程
关注大神微博加入>>


网友求助,请回答!