photoshop教程:制作立方体魔方效果
来源:未知
作者:学有所成
学习:870人次
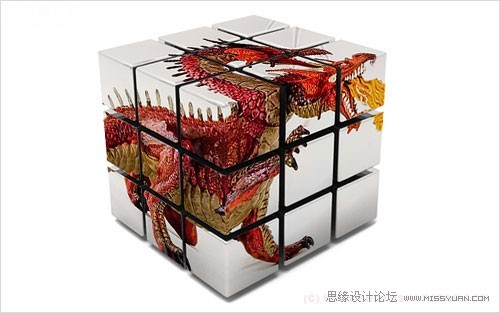
本photoshop教程旨在说明如何通过使用图像来获得正确的空间感的立方体皮肤。
下面是效果图。
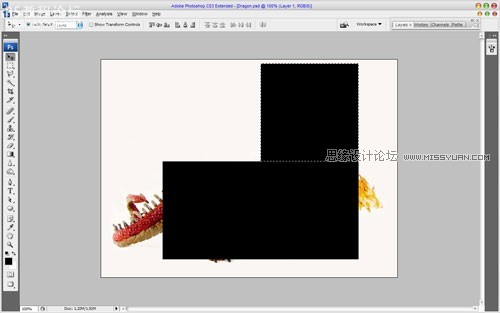
1.打开图片,新建图层,用矩形选框工具拉一个250*250px的选区,填上不同的颜色,这里填上黑色即可。
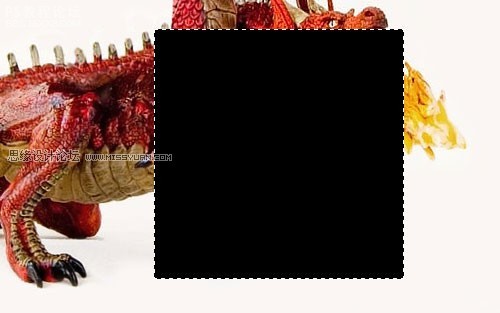
进入论坛讨论: http://bbs.16xx8.com/viewthread.php?tid=4219022.另外各自新建图层再添加两个方块区域,尽可能大的覆盖图像。选中其中一个载入选区,选择背景层,ctrl+c复制图像。

3.打开魔方图片,ctrl+v粘贴图像,命名为皮肤1。
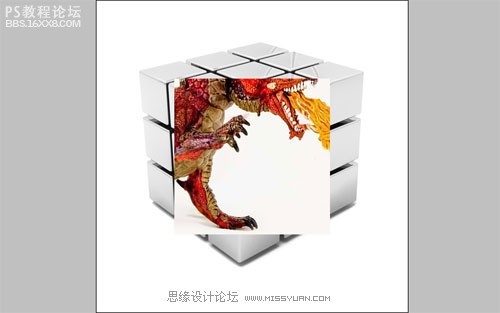
4.选择皮肤1,执行编辑 变形 扭曲,将图像形状契合魔方的一个面。
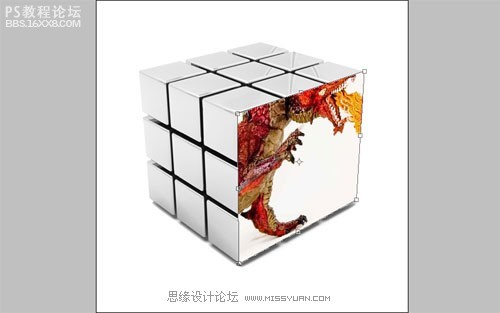
5.回到主画布,执行以上相同的操作,使魔方的各个面均覆盖上皮肤。


6.将各张皮肤图层的图层混合模式改为正片叠底。
7.最后,用硬度稍大的橡皮擦工具将魔方缝隙处不明确的皮肤给擦除,就大功告成了。
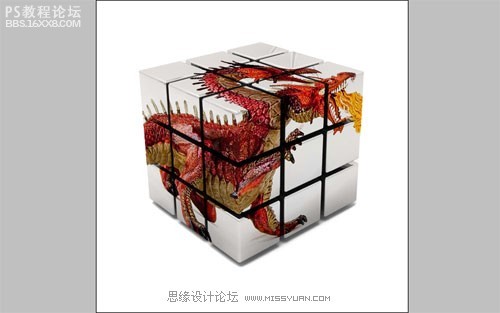
最终效果:
作者:photoshopstar
下面是效果图。
1.打开图片,新建图层,用矩形选框工具拉一个250*250px的选区,填上不同的颜色,这里填上黑色即可。
进入论坛讨论: http://bbs.16xx8.com/viewthread.php?tid=4219022.另外各自新建图层再添加两个方块区域,尽可能大的覆盖图像。选中其中一个载入选区,选择背景层,ctrl+c复制图像。
3.打开魔方图片,ctrl+v粘贴图像,命名为皮肤1。
4.选择皮肤1,执行编辑 变形 扭曲,将图像形状契合魔方的一个面。
5.回到主画布,执行以上相同的操作,使魔方的各个面均覆盖上皮肤。
6.将各张皮肤图层的图层混合模式改为正片叠底。
7.最后,用硬度稍大的橡皮擦工具将魔方缝隙处不明确的皮肤给擦除,就大功告成了。
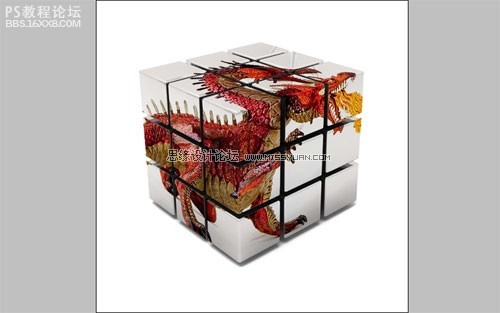
最终效果:
作者:photoshopstar
学习 · 提示
相关教程
关注大神微博加入>>


网友求助,请回答!