利用PhotoShop制作倒影效果
来源:不详
作者:佚名
学习:2590人次
利用PhotoShop制作倒影效果

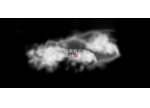
在本则教程中我们将学习如何利用PS制作倒影效果。


创建300*300画布并用黑色填充。
选择文字工具并输入文字。


复制文字层,自由变换(CTRL T),右键打开快捷菜单选择垂直翻转。

降低复制层的不透明度到15-25%左右。


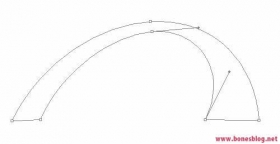
自由变换(CTRL T),右键打开快捷菜单并选择斜切。

按左图所示调节节点。


这里简单介绍了制作倒影效果的简单法则,发挥想象力制作出更加绚丽的效果吧^-^。
![]()
在本则教程中我们将学习如何利用PS制作倒影效果。
创建300*300画布并用黑色填充。
选择文字工具并输入文字。
复制文字层,自由变换(CTRL T),右键打开快捷菜单选择垂直翻转。
降低复制层的不透明度到15-25%左右。
自由变换(CTRL T),右键打开快捷菜单并选择斜切。
按左图所示调节节点。
这里简单介绍了制作倒影效果的简单法则,发挥想象力制作出更加绚丽的效果吧^-^。
学习 · 提示
- 发评论 | 交作业 -
最新评论
好心情2018-06-06 09:34
太棒了
回复
halfbeer2017-05-28 12:20
中秋到了男女同事相约去郊游,车到一僻静处两人抱住狂吻,突然一公路巡警咚咚敲开窗门,问男:这车是你的吗?男答:单位的。再问:她是你老婆吗?男答:也是单位的。巡警听后自言自语道:狗日的啥单位福利这么好!我们单位他娘只知道发月饼,操!
相关教程
关注大神微博加入>>


网友求助,请回答!