柔焦效果
来源:不详
作者:佚名
学习:6464人次
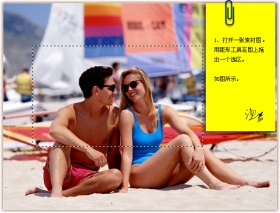
柔焦效果柔焦效果非常广泛地应用在人像艺术照片上,特别是拍MM的照片。用Photoshop实现柔焦效果的方法有很多,下面介绍其中一种。
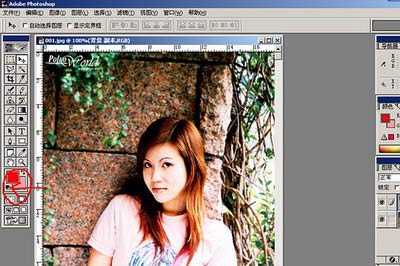
1、在Photoshop中处理好其它效果后,将底层拷贝一个新图层。![]() screen.width*0.7) {this.resized=true; this.width=screen.width*0.7; this.style.cursor='hand'; this.alt='Click here to open new window\nCTRL Mouse wheel to zoom in/out';}" alt="" src="http://pic.16xx8.com/article/UploadPic/2007/10/26/200710269531933.jpg" tag.php?name=screen" class="t_tag">screen.width*0.7) {this.resized=true; this.width=screen.width*0.7; this.alt='Click here to open new window\nCTRL Mouse wheel to zoom in/out';}" border=0>
screen.width*0.7) {this.resized=true; this.width=screen.width*0.7; this.style.cursor='hand'; this.alt='Click here to open new window\nCTRL Mouse wheel to zoom in/out';}" alt="" src="http://pic.16xx8.com/article/UploadPic/2007/10/26/200710269531933.jpg" tag.php?name=screen" class="t_tag">screen.width*0.7) {this.resized=true; this.width=screen.width*0.7; this.alt='Click here to open new window\nCTRL Mouse wheel to zoom in/out';}" border=0>
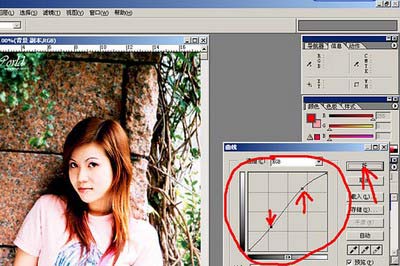
2、选择新图层,然后按Ctrl M调出曲线调整窗口,并且将新图层的对比拉大,然后确定。
3、选择前景/背景色控制板左下角的小图标“默认前景和背景色”,将背景色设为白色。
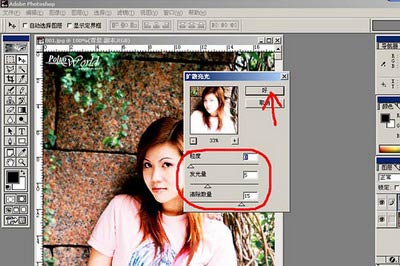
4、选择滤镜菜单下的“扭曲/扩散亮光…”,弹出控制窗口。

5、将“粒度”一项选择为0,“发光量”和“清除数量”根据需要进行调整(范例选择分别为5和10),然后确定。
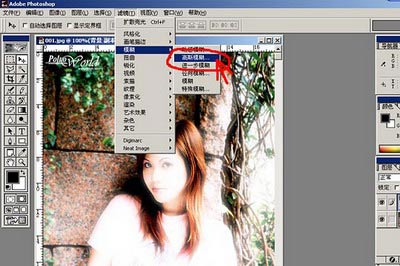
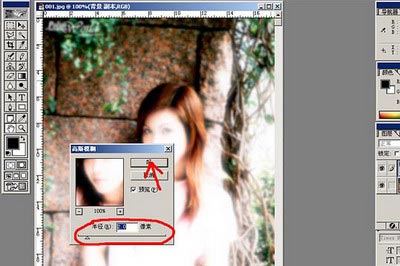
6、选择滤镜菜单下的“模糊/高斯模糊”,弹出控制窗口。
7、根据需要选择合适的模糊半径(范例选择为2.0),然后确定。
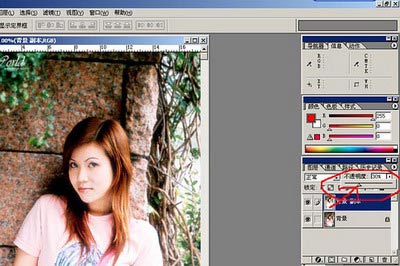
8、选择图层窗口中的“不透明度”,并根据需要选择合适的不透明度(范例选择为30)。
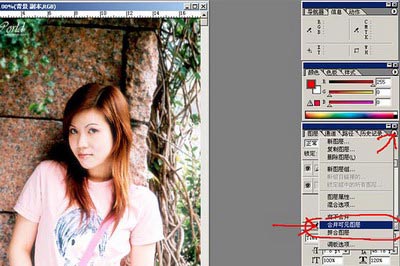
9、选择图层窗口右上角的三角型,在弹出菜单中选择“合并可见图层”或者“拼合图层”,然后储存,大功告成!

1、在Photoshop中处理好其它效果后,将底层拷贝一个新图层。
2、选择新图层,然后按Ctrl M调出曲线调整窗口,并且将新图层的对比拉大,然后确定。
3、选择前景/背景色控制板左下角的小图标“默认前景和背景色”,将背景色设为白色。
4、选择滤镜菜单下的“扭曲/扩散亮光…”,弹出控制窗口。
5、将“粒度”一项选择为0,“发光量”和“清除数量”根据需要进行调整(范例选择分别为5和10),然后确定。
6、选择滤镜菜单下的“模糊/高斯模糊”,弹出控制窗口。
7、根据需要选择合适的模糊半径(范例选择为2.0),然后确定。
8、选择图层窗口中的“不透明度”,并根据需要选择合适的不透明度(范例选择为30)。
9、选择图层窗口右上角的三角型,在弹出菜单中选择“合并可见图层”或者“拼合图层”,然后储存,大功告成!
学习 · 提示
相关教程
关注大神微博加入>>


网友求助,请回答!