photoshop做火焰字教程
来源:未知
作者:福特少普ps
学习:23135人次
作者佚名 出处:昵图网
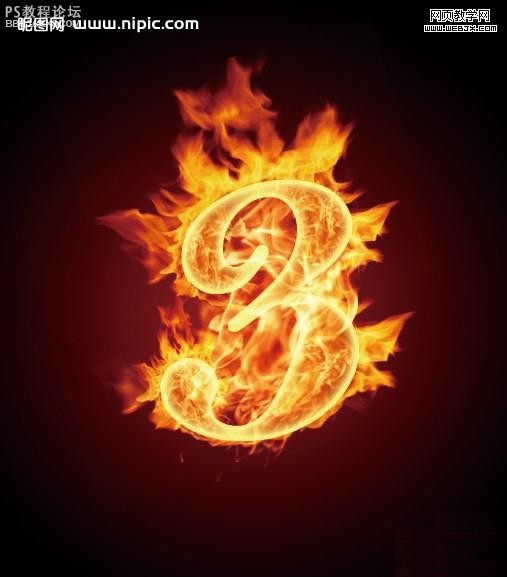
先看效果:
文字素材(可自己选择):

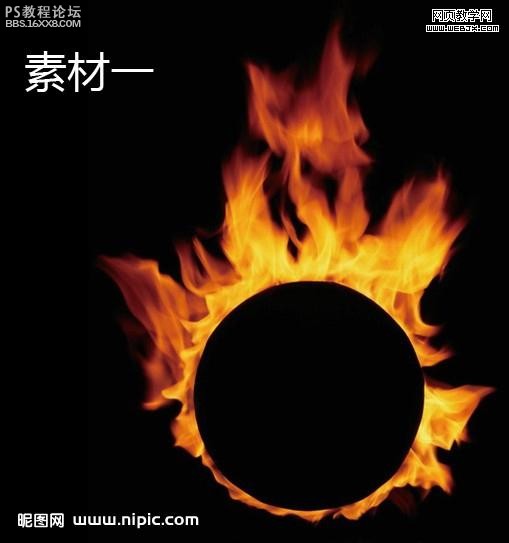
火焰素材:
以下是详细的photoshop教程步骤:
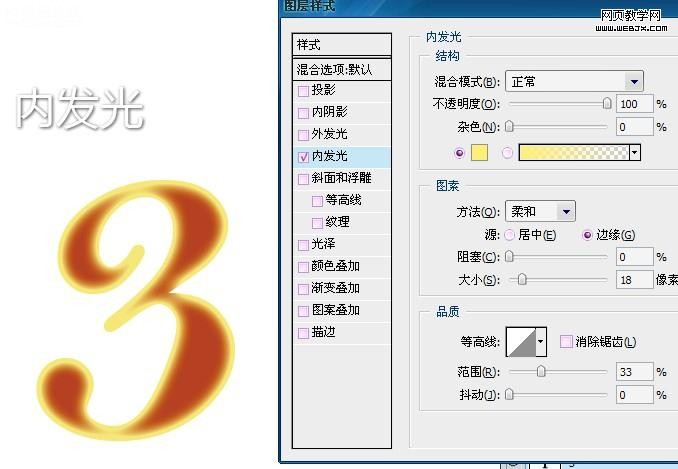
一、为文字设置图层样式,如图:
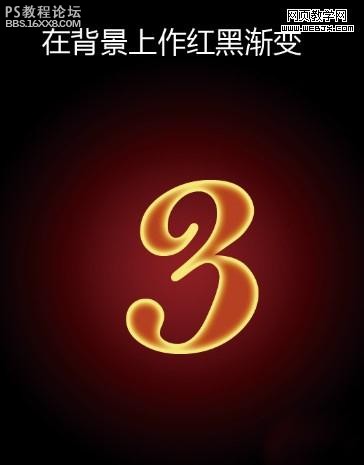
, 二、选择径向渐变为背景做红黑渐变
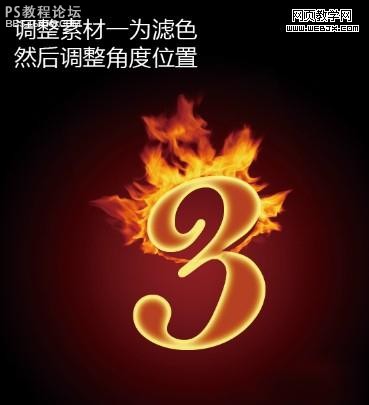
三、打开火焰素材1,改变混合模式为滤色,调整角度放置在合适位置
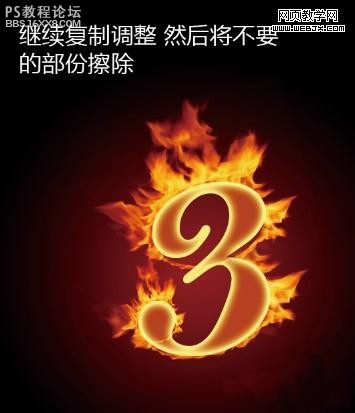
四、复制火焰素材,继续上一步操作

五、继续复制调整,然后将不需要的部分擦除
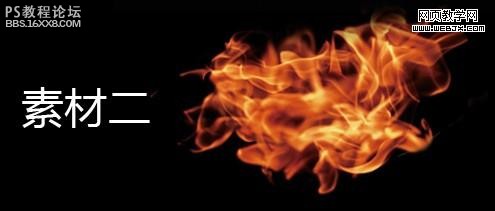
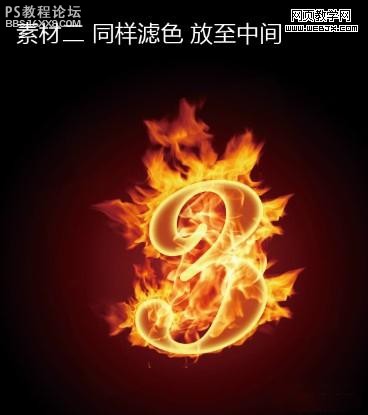
六、打开素材二,同样滤镜,放在中间
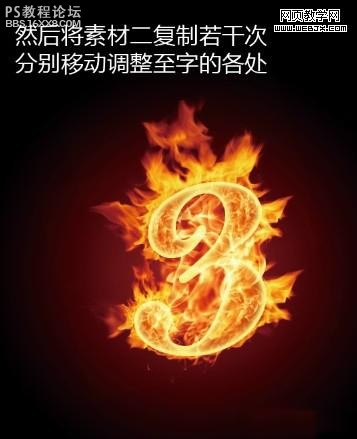
, 七、将火焰素材二复制若干份,分别移动调整至字的各处
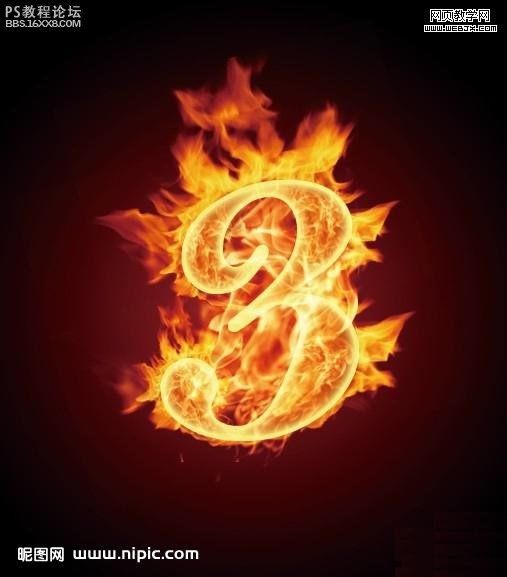
完成了:
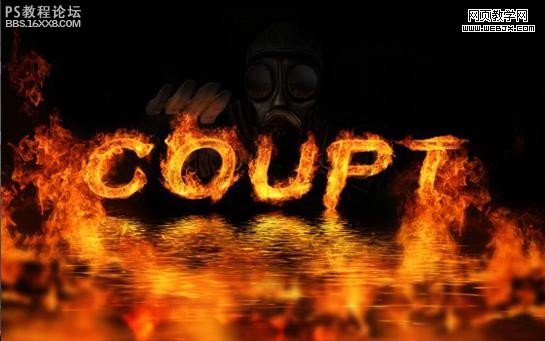
融入更多的创意可制作出更炫的效果:
先看效果:
文字素材(可自己选择):
火焰素材:
以下是详细的photoshop教程步骤:
一、为文字设置图层样式,如图:
, 二、选择径向渐变为背景做红黑渐变
三、打开火焰素材1,改变混合模式为滤色,调整角度放置在合适位置
四、复制火焰素材,继续上一步操作
五、继续复制调整,然后将不需要的部分擦除
六、打开素材二,同样滤镜,放在中间
, 七、将火焰素材二复制若干份,分别移动调整至字的各处
完成了:
融入更多的创意可制作出更炫的效果:
学习 · 提示
相关教程
关注大神微博加入>>


网友求助,请回答!