文字制作,打造质感卡通渐变文字效果
整个教程都是在PS中完成,不管是字体还是效果,用到图层样式的时候比较多,通过图层样式来给字体添加效果,做过很多的字体教程的同学,相信对这个已经驾轻就熟了,具体如何做一起来学习一下吧,灵活运用图层样式,现在让我们一起来看看究竟是如何通过PS打造质感卡通渐变文字效果的吧。
效果图:
 新手学PS请到:www.16xx8.com
操作步骤:
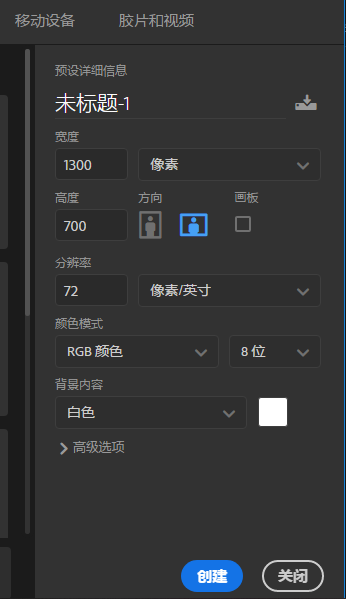
Step1
我们首先新建一个1300x700px的背景图层,并给背景图层填充灰色#726e6e
Step2
选择文字工具,并设置文字属性,设置数值如下。然后我们再输入“Faerie”,接着我们按Ctrl+A全选,然后选择移动工具,再点击垂直居中和水平居中对齐,使文字位于背景图层的中间。

Step3
双击文字图层,给图层添加图层样式。添加一个描边,设置如下:

Step4
选择faerie图层,按Ctrl+J复制图层,并将复制图层命名为“Middle”,然后再打开图层>图层样式>清除图层样式,并将文字颜色该为#c6c6c6,最后将其向上和左移动7px。得到效果如下图

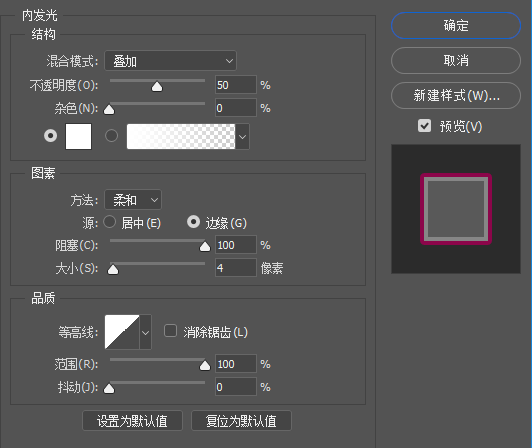
Step5
双击Middle图层,给图层添加图层样式。添加一个描边,设置如下:

添加一个内发光
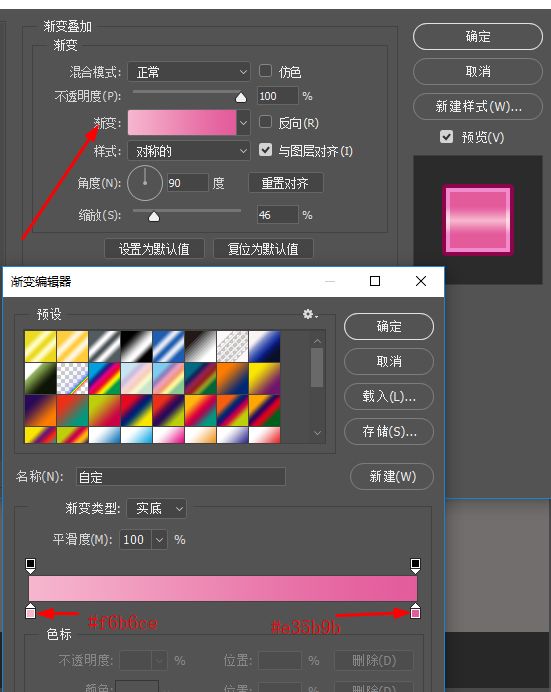
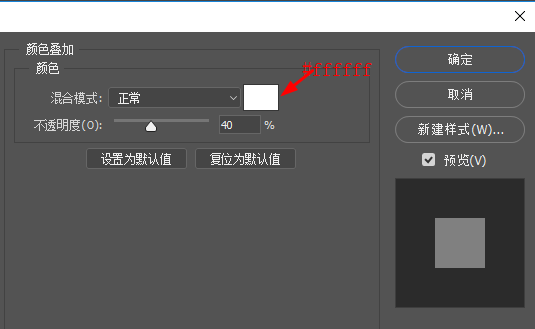
接着添加一个渐变叠加
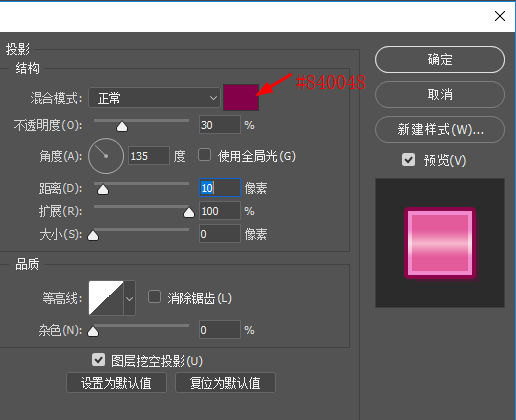
最后添加一个投影
添加了多个样式,我们得到的效果如下

Step6
选择Middle图层,按Ctrl+J复制图层,,然后再打开图层>图层样式>清除图层样式,并,最后将其向上移动5px和向左移动1px。

Step7
双击Middle拷贝图层,给图层添加图层样式。设置填充的不透明度为0%
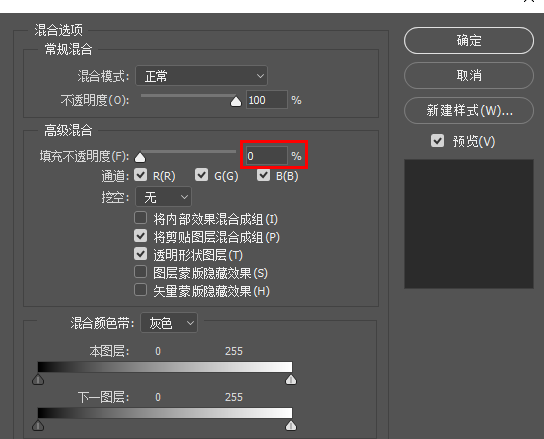
添加一个描边
添加一个颜色叠加
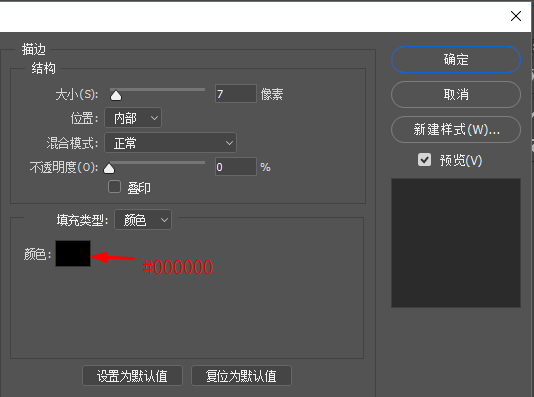
Step8
按住Ctrl 选中Faerie、Middle Middle拷贝这三个图层,再按Ctrl+E合并图层。然后双击合并图层添加图层样式。
添加一个描边
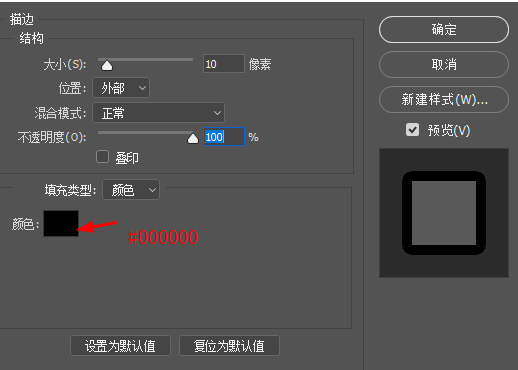
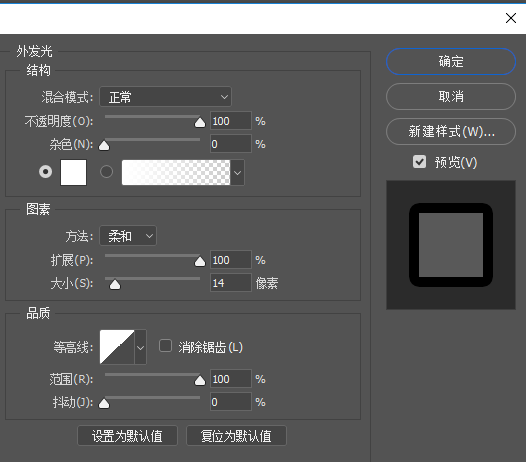
接着添加一个外发光

最后添加一个投影
完成:

同学们通过制作学会运用图层样式来制作字体了吗?还可以自己操作几遍,熟练熟练哟,相信同学们可以制作的更好,快来动手练习起来吧。
学习 · 提示
相关教程