photoshop制作多彩的3D文字特效
来源:未知
作者:学有所成
学习:668人次
在本教程中大家将学习到如何用photoshop创建多彩的3D文字效果,可以在加一个60周年可以送给祖国过生日了。

在本教程中大家将学习到如何用PS创建多彩的3D文字效果。(这个教程不是特别完美 大家凑活着读吧)
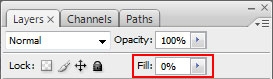
创建一个1280×1024 px, 72 dpi的新文件(文件 新建)。然后选择矩形工具(U)在整个工作区域中画一个矩形。
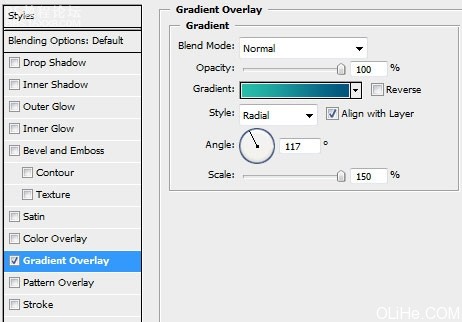
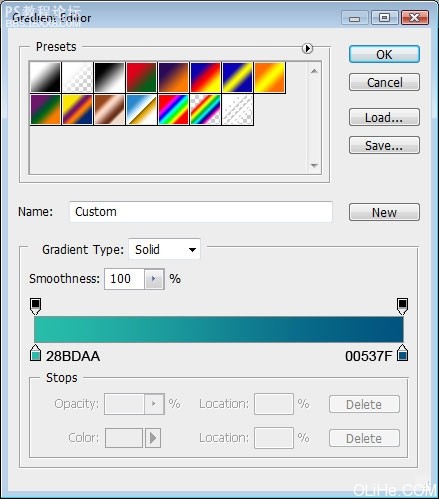
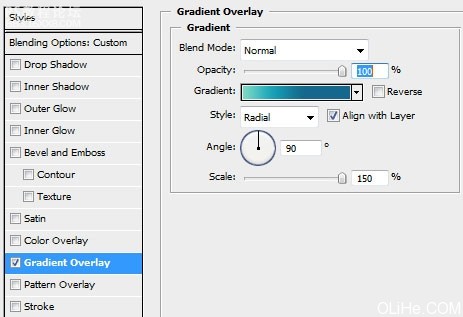
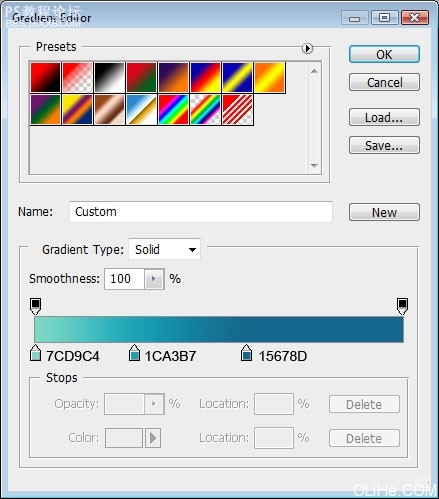
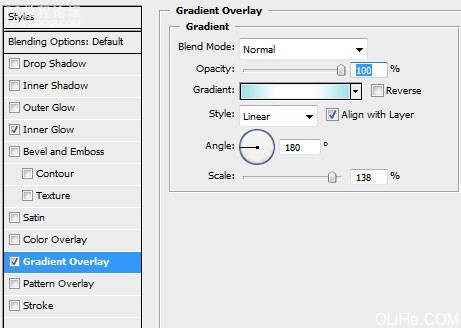
然后设置混合选项 渐变叠加。按下图设置:
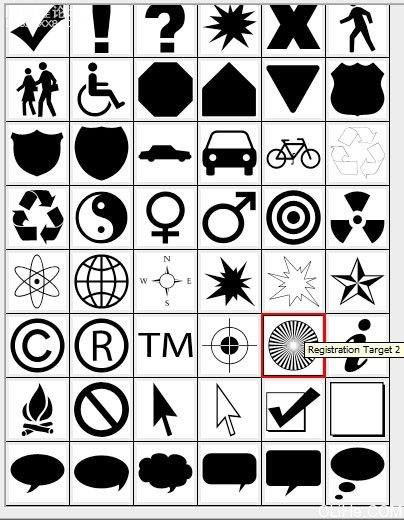
然后选择自定义图形工具(U),选择下图的形状:
把它放在下图所示的位置:
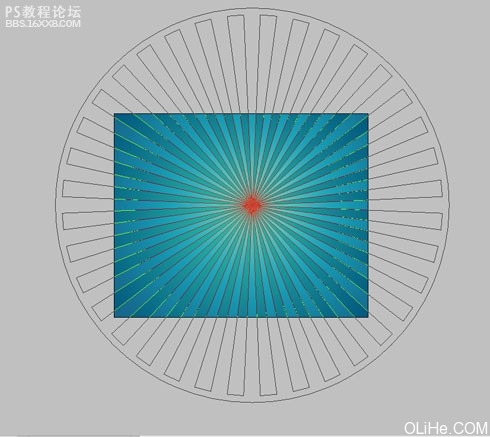
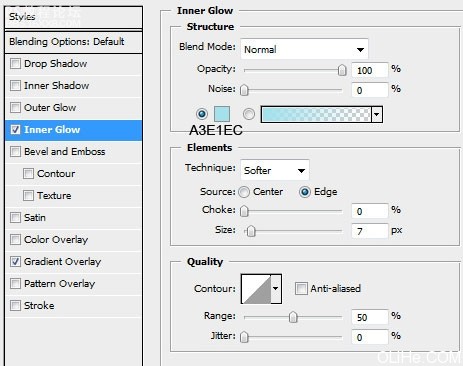
,按下图设置不透明度: 设置下图的混合选项: 你将得到如下效果: 使用椭圆工具(U),画一个半径为10px的圆柱形,然后再画一些圆。(如下图)
按下图设置不透明度:
设置下图的混合选项:
你将得到如下效果:

使用椭圆工具(U),画一个半径为10px的圆柱形,然后再画一些圆。(如下图)

,对每个元素应用下面的混合选项: 复制所有的层。选中复制的层(按Ctrl+左键单击),并把它们合并在一起(Ctrl+E)。把合并后的新图层放在原始图层下方,应用下图所示的混合选项: 你将得到如下效果:
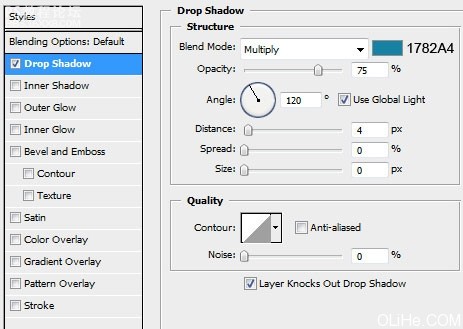
对每个元素应用下面的混合选项:

复制所有的层。选中复制的层(按Ctrl+左键单击),并把它们合并在一起(Ctrl+E)。把合并后的新图层放在原始图层下方,应用下图所示的混合选项:
你将得到如下效果:

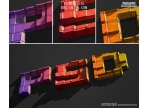
,打 开AdobeIllustrator,在3D环境中写2009年。使用下图所示的文本设置。选择颜色#FC0101。 首先是 cipher2,应用设置(效果3D挤压与斜角)(活力盒子注:Illustrator这个3d效果玩玩就会了 很简单 不一定非按照下面数
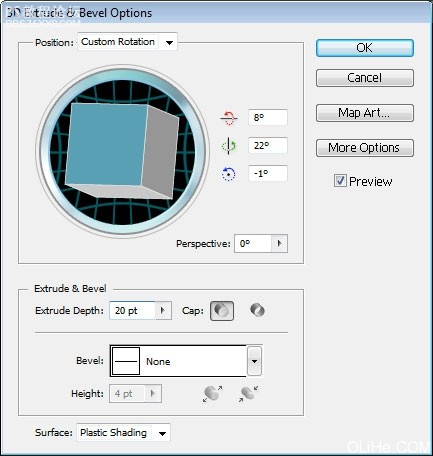
打开Adobe Illustrator,在3D环境中写2009年。使用下图所示的文本设置。选择颜色#FC0101。

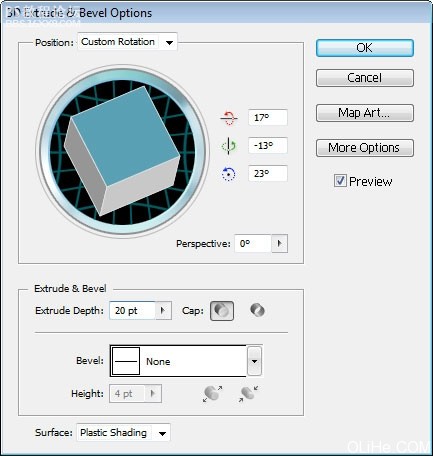
首先是 cipher 2,应用设置(效果 3D 挤压与斜角)……(活力盒子注:Illustrator这个3d效果玩玩就会了 很简单 不一定非按照下面数值设置)

在本教程中大家将学习到如何用PS创建多彩的3D文字效果。(这个教程不是特别完美 大家凑活着读吧)
创建一个1280×1024 px, 72 dpi的新文件(文件 新建)。然后选择矩形工具(U)在整个工作区域中画一个矩形。
然后设置混合选项 渐变叠加。按下图设置:
然后选择自定义图形工具(U),选择下图的形状:
把它放在下图所示的位置:
,按下图设置不透明度: 设置下图的混合选项: 你将得到如下效果: 使用椭圆工具(U),画一个半径为10px的圆柱形,然后再画一些圆。(如下图)
按下图设置不透明度:
设置下图的混合选项:
你将得到如下效果:
使用椭圆工具(U),画一个半径为10px的圆柱形,然后再画一些圆。(如下图)
,对每个元素应用下面的混合选项: 复制所有的层。选中复制的层(按Ctrl+左键单击),并把它们合并在一起(Ctrl+E)。把合并后的新图层放在原始图层下方,应用下图所示的混合选项: 你将得到如下效果:
对每个元素应用下面的混合选项:
复制所有的层。选中复制的层(按Ctrl+左键单击),并把它们合并在一起(Ctrl+E)。把合并后的新图层放在原始图层下方,应用下图所示的混合选项:
你将得到如下效果:
,打 开AdobeIllustrator,在3D环境中写2009年。使用下图所示的文本设置。选择颜色#FC0101。 首先是 cipher2,应用设置(效果3D挤压与斜角)(活力盒子注:Illustrator这个3d效果玩玩就会了 很简单 不一定非按照下面数
打开Adobe Illustrator,在3D环境中写2009年。使用下图所示的文本设置。选择颜色#FC0101。
首先是 cipher 2,应用设置(效果 3D 挤压与斜角)……(活力盒子注:Illustrator这个3d效果玩玩就会了 很简单 不一定非按照下面数值设置)
学习 · 提示
相关教程
关注大神微博加入>>


网友求助,请回答!