Maya教程:创建Fur教程
学习内容:
1· 创建Fur
2· 了解Fur的相关参数及概念
3· 使用不同的模型建立Fur
一· 创建Fur
调入Fur,Window->Settings/Preferences->Plug-in Manager。
了解Fur菜单,切换到渲染命令菜单。
点击放大
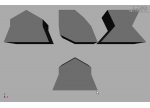
建立Fur,随意的一个NURBS模型选择,执行Fur->Attach Fur Description->New。
点击放大
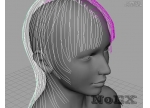
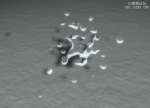
调节视图Fur的显示密度。
点击放大
进入FurDescription。
二、了解Fur的相关参数及概念
了解FurDescription属性;
看到FurDescription下面成堆的参数,你一定头大了;不用着急,我们一个一个来讲解,逐一攻克。
Fur的color。
调节渲染效果。
Fur的长度(Length),控制Fur的长短,数值0~10,最高-100000~100000。
Length实例。
Fur的秃度(Baldness),控制Fur的光秃度,数值0~1。
学习 · 提示

- 打开ps,跟着教程做一遍,做完的图要到这里交作业:提交作业
- 教程有看不懂的地方,可以到论坛发帖提问:ps新手求助
- 加官方微信,随时随地,想学就能学:ps_bbs,或扫右侧二维码!
- 关注我们微博:@photoshop教程论坛
- 想学更多的同学,可以关注我们小程序,每天都有新教程:点我用微信扫一下
3104人学习过

相关教程